Jessica Sews | Made Again Patterns Joey Tank

Joey Tank Front.jpg
Joey Tank Back.jpg
Joey Front Lead.jpg

First things first - you guys are the best. Thanks for the encouragement on the launch of Made Again Patterns. I’m soaking in loads of good vibes and putting them to use on the creation on the first clothing pattern. And this is it!

Introducing the Joey Tank! Inspired by summers from the late 90s - a time when days were spent at the neighborhood pool, with tan shoulders and daisies in our hair, cruising around with way too many people in the backseat of the one guy who had his license, 11 pm curfews, the sound of dial up internet and managing 26 different conversations… and finally… cue the Dawson’s Creek theme song.

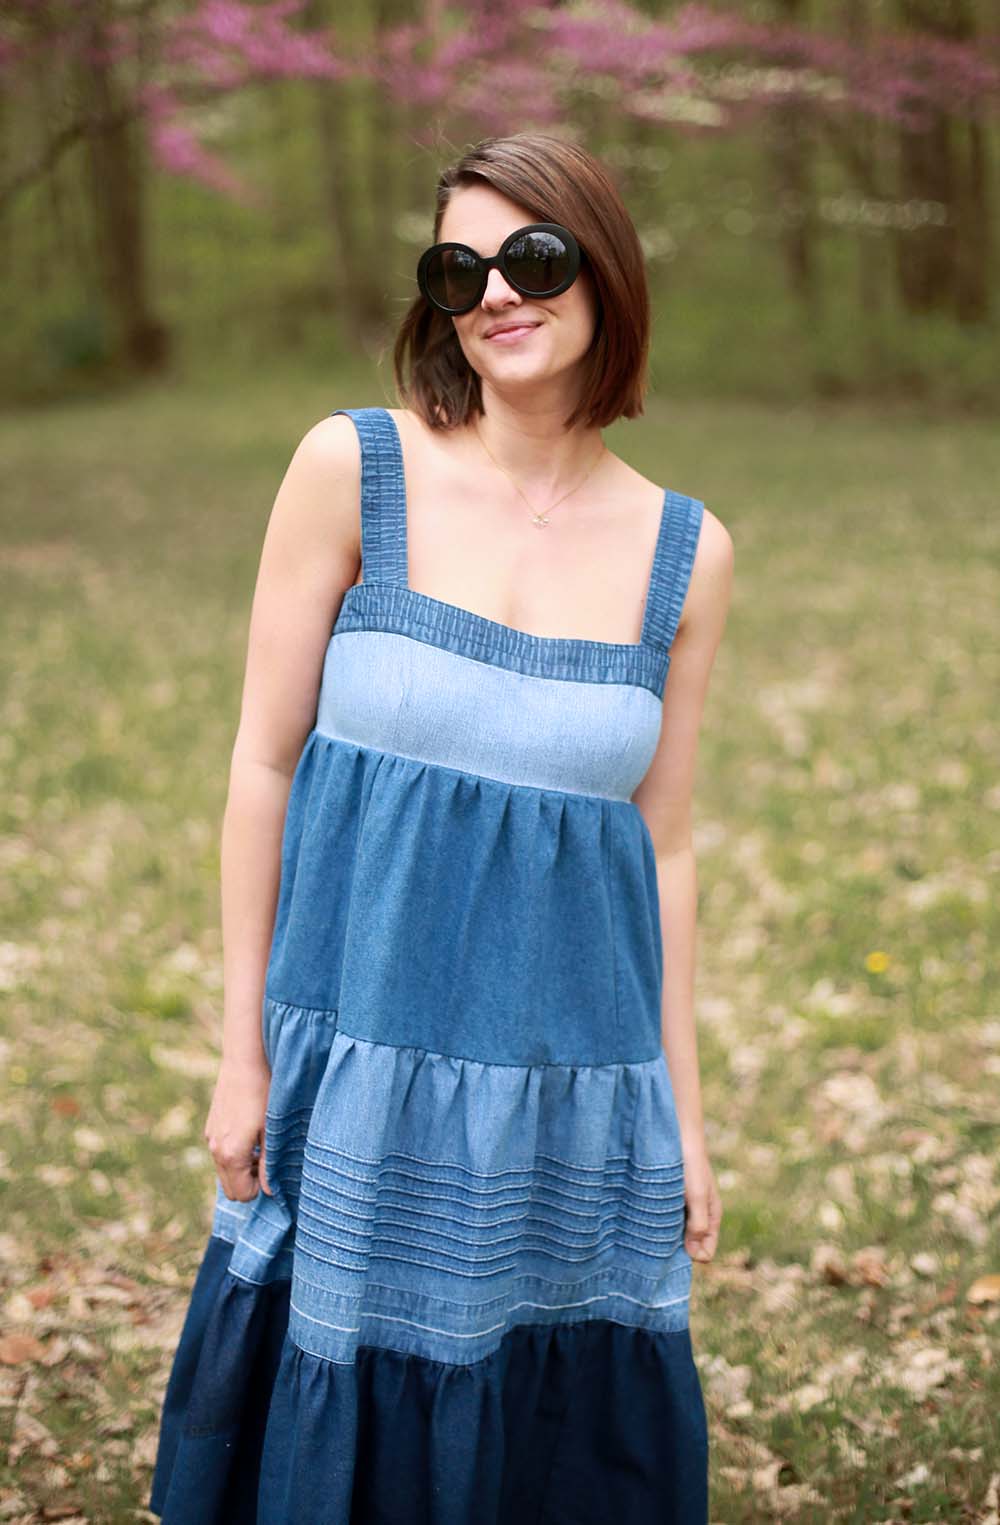
To me, this tank captures all of that! It’s upcycled from a men’s button down (check out that pocket in back) and so easy to throw on with a part of shorts (which do not pass the regulation finger tip length circa 1999).

So here’s where I’m at in the development phase - I have the digital base pattern created plus the written and illustrated instructions drafted. What you see here is version one. I’ve made a few updates like continuous straps and binding which will be in the final version. Plus there’s a straight hem cropped version as well! I’ll be grading it and sending out to my testers in the next week with a hope to debut in July! (if you’d like to volunteer to stitch a sample and make notes in exchange for a free pattern, you can do that here) You can also follow Made Again Patterns on Instagram and Facebook for release updates. I’m also doing some behind-the-scenes of the process there too. Until then… happy summering, sewing and spending your time doing what you love doing most!
Joey Tank Full Back.jpg

Jessica Sews | Peplum Eyelet Refashion + Wide Leg Dawn Jeans

Peplum Top and Wide Leg Dawn Jeans.jpg
Peplum Top and Wide Leg Dawn Jeans 5.jpg
Peplum Top and Wide Leg Dawn Jeans 4.jpg

There are a couple fabrics that instantly draw me in when I’m shopping for fabric at the thrift store - eyelet and chambray. You saw my chambray refashion earlier this week, so here’s one example of how I’ve harvested eyelet fabric and remade it into a different silhouette.

Before.jpg

I was instantly drawn to this navy eyelet dress, but it was a couple sizes too big for me. Sure, I could have tried to alter it down to fit, but I’ve been in more of a chop chop mood lately plus I had a pattern (Simplicity 1425) that I wanted to try out. After a wash, I went to town cutting along the seam lines to see what kind of yardage I would be left with. I’ve had some questions about how I disassemble garments and it varies from piece to piece. Something like eyelet can be a beast with all of the thread used to create the actual eyelet, so in this case I just cut along the seam edges.

From there I laid out my pattern and realized I’d need to make some changes to have enough fabric. I omitted the pleats in the peplum by folding them up on the paper pattern and cutting that smaller shape out. I also decided not to do a collar stand and have a flat Peter Pan style collar instead.

I lined both the lower portion of the bodice front and the whole back so I could wear a bra underneath. The fabric I used was left over from Bea’s 18th century dress.

On bottom I’m wearing my wide leg Dawn jeans again. I’ve only worn them a couple of times (I usually save true white for later spring and summer or vacation) and I absolutely love this style. I’m even thinking I need to go check my stash to see what fabrics I have to make a second pair! If you want to see the first way I wore them, check out this post.

Peplum Top and Wide Leg Dawn Jeans 2.jpg
Peplum Top and Wide Leg Dawn Jeans 3.jpg

Time Traveling | Making My Blue Brain Hat

18th Century Brain Hat 1780

I love hats! Especially the fancy, floral, floofy numbers from bygone ears. For a large part of history, women wouldn’t leave the house without a chapeau!

Hat 3.jpg

For my 1780s look, I decided to work with a straw hat I had in my stash. Once upon a time I thought I might have a go as a milliner and thus collected a lot of straw hat bodies and blocks to make new hats of my own. This base was actually a modern hat, but the size was perfect for this project. Here’s what it looked like when I started.

After removing the inter and exterior bands I started steaming the hat out. Moisture allows the straw to relax and take a new shape (which is why you may have noticed if you get a straw hat wet at the beach, it will lack the definition it had when you bought it). I wanted it to have a very shallow crown, like a bergère hat that was popular in the 18th century. I knew I’d be covering the hat with fabric, so an identical shape wasn’t necessary - just the rough form. I also found that I could flip the back brim up and it would hold nicely, which I knew would be a good place to slip in some decorations. I gave the whole thing a good steam and let it dry.

Covering straw with fabric on 18th century hat

Next I started on my fabric covering. Around the brim I created half inch pleats using a cotton sateen, a bajillion pins and a ton of patience. I first pinned the pleats to the edge of the interior brim, as you can see at the right. As I brought them to the edge of the brim, I let them spread just a bit and then brought them back in on top where the brim meets the crown. This was an easy place to become too perfectionist and fiddle! One thing I like to remind myself about historical sewing is that imperfection is historically accurate. We’ve become so accustomed to huge racks and full size runs of identical garments it’s no wonder something handmade feels a bit foreign to the eye with a little jumping stitch here or a slightly bigger pleat there. I’ve started to really love what a handmade piece looks like - one of a kind!

So anyway, when I got the brim pleats to a place I liked with pins, I hand sewed it down to the straw.

With the whole brim complete, I moved onto the brainy bit at the top. I used the same fabric but in a darker shade of blue and I love the combination of the two. For this part I turned to The American Duchess Guide to 18th Dressmaking (which I highly recommend!) and used their tutorial in the 1780s section to create the texture. Once it was all pinned in place, it also got tacked down with heavier buttonhole thread.

Hat 8.jpg
Under Side 18th Century Hat

Now that the top of my little hat looked perfect, I set out to make the inside of the crown just as lovely. I made a very large and shallow tube (only a few inches deep) which I gathered at one side and created a drawstring channel at the other. The gathers were drawn in to match the circumference of the crown and sewn down. The drawstring channel was also draw up using a piece of string, tied, trimmed and tucked into the new crown covering. I also made two ties that were tacked down before the gathered interior crown bit went on. These let me to pull the hat down tightly and further emphasize the flipped up back!

Feathers on 18th century hat

Lastly was the question of feathers - how many and in what placement. After trying a bunch of different combinations, I settled on just one white feature layed horizontally in the back and tacked down.

In all I used 1 yard of light blue fabric and just a half yard of the darker blue. I had enough leftover to make a matching waist sash/belt to coordinate everything together. Because there are so many pieces to an 18th century kit (shift, stays, petticoats, bum rolls, socks, shoes, buckles, gown, fichu, apron and hat to name a few) I think I’ll keep my costumes from this era in the same general color story with this pretty blue as the common link.

I can’t decide if I should make one more gown (I do have the fabric on hand) as a birthday present to myself (it would photograph so beautifully in the snow!), do some modern sewing or start planning for the next era. I realized when I was sick for a day earlier this week that I cannot not have a project sitting around to pick up and play with. And as all of our outdoor chores are coming to an end for the season and it’s time to sit by the fire for the next few months, I do think another lap project is in order. Are you interested in progress shots or is a big reveal more fun? I’m not sure which way to take this one on. Let me know what you think!

Time Traveling | Making 18th Century Stays

Stays Leader 3.jpg
Embroidery 1.jpg
Stays Full 3.jpg
Stays Embroidery.jpg
Stays Leader 4.jpg

Voila! I've put the finishing touches on my 18th century stays and I could not be more excited and proud of the final result. I've made these as the foundation to complete my 1780's style costume that I'll wear this fall with my family to a Revolutionary War re-enactment. But before I go into any of those plans, let me tell you more about this project!

Historical Background

Once upon a time, stays were the foundation to every woman's daily outfit. They provide an elegant conical shape, give back support, lift and enhance the bosom (hello!) and inform one's posture. Women of all social classes wore stays, which later evolved into corsets. Normally stays would be worn with a linen shift or chemise underneath, but I haven't completed mine yet so I'm just wearing a simple white dress I already had in my closet. 

Inspiration

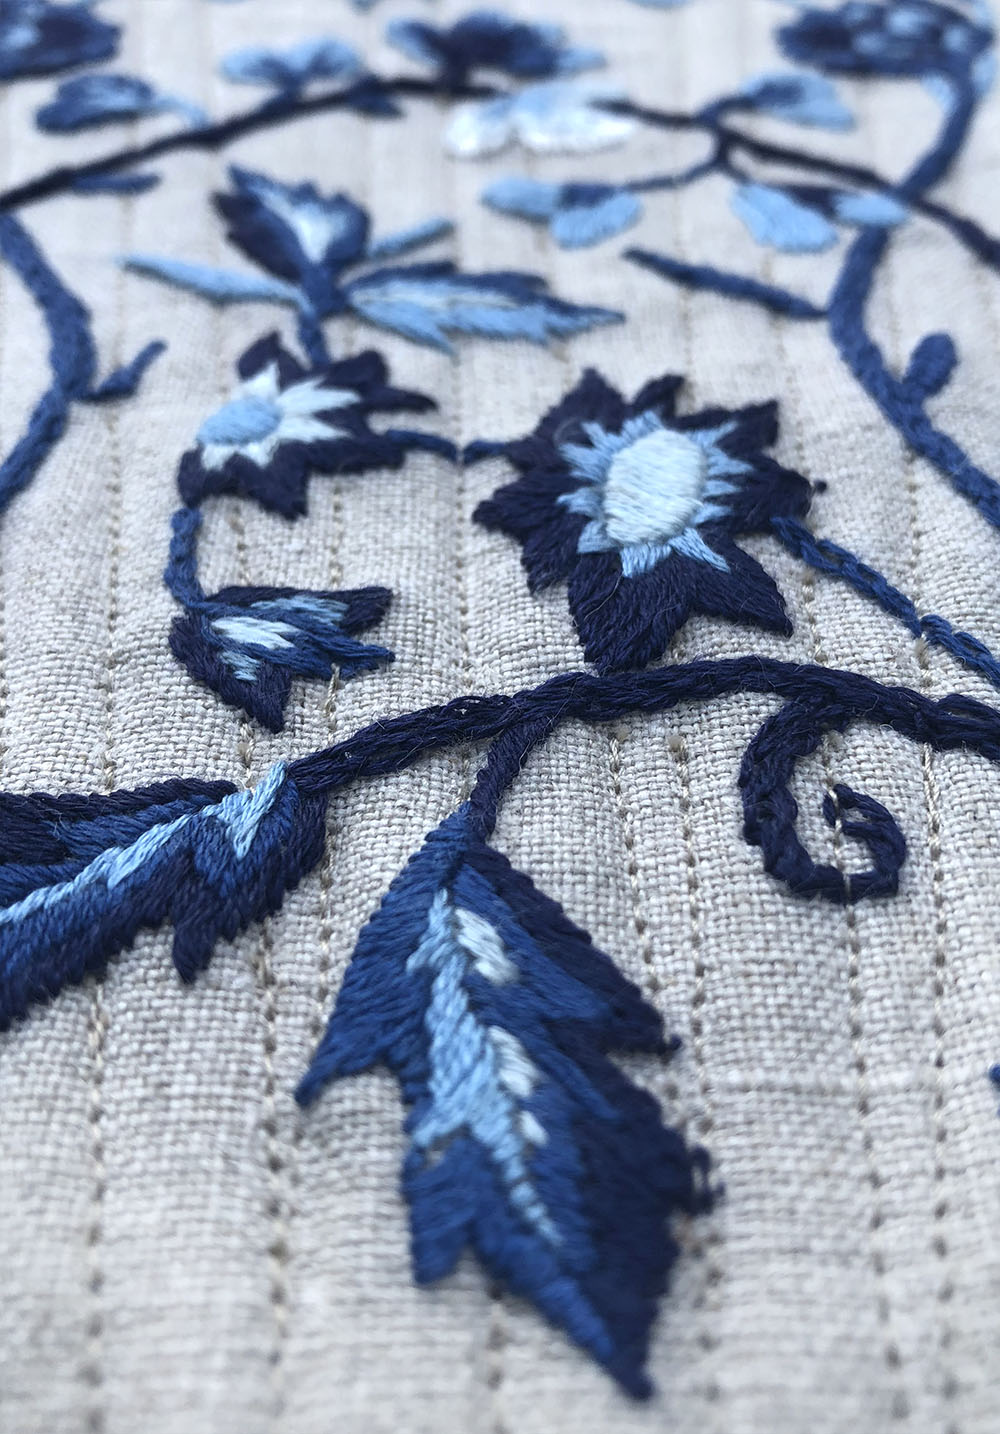
I wanted my stays to have an antique quality to them, which is why I chose natural linen as my fashion fabric. I also knew I wanted to make them a little extra special, and chose to embroidery an 18th century design. I'm not going for a super bourgeois look nor am I wanting to be a laborer/camp follower. So although this fabric does lend itself to a more modest (financially speaking) approach, I think the embroidery makes it special and a little more luxurious. All that said, no one but me and you will see this piece because it will be completely covered by my gown and petticoats!  

Embroidery 3.jpg

Embroidery

The floral design I've used was actually something I found at a garage sale! The pattern was part of a Colonial Williamsburg embroidery kit for a bell pull. I used this design as a basis by scanning it into Photoshop and adjusting it to fit the center front pattern piece (which was a PDF download). Next I printed that design out to scale on adhesive embroidery paper, which dissolves in water once you have completed your design. It was really cool! I also recolored it into shades of blue, which really pop against the natural linen! 

Pattern

I purchased the digital download from RedThreaded patterns online. I met the proprietress Cynthia at the Jane Austen Festival and she was great! I had a look at her stock corsets and this particular 18th century design spoke to me. I like the look of the horizontal boning and the shaping of the all in one tabs. I sewed a medium and did not make alterations to the pattern pieces. I did add some additional decorative boning channels because I love the ribbed effect it creates.

Stitching Notes

Stays Back.jpg

Because I embroidered the motif directly onto the linen, I did a lot of stopping and starting with my boning channels, as I did not want to sew over/through my design (minus some small branches). The end result is so beautiful and I don't think the starts and stops will negatively effect the functionality!

I used a faux silk charmeuse (It's poly and the best I could find locally! It has a really nice hand feel for not being the real thing) for my binding and hand sewed it around the entirety of the stays, using the bias to create as smooth of an effect as possible. This was fiddly, but I actually really loved doing the hand work on this step. I then wrapped the bias around the edges and basted it into place. Finally, I stitched in the ditch oh-so-carefully to hold the binding in place.

I also really loved doing all of the eyelets BY HAND (there are 24 of them!) Using a sewing awl and button thread, these lil guys are so sturdy. And they're beautiful! 

Finally - I did end up making two orders for my boning and had to adjust the lengths (I needed longer) than the pattern notions suggested. And that's my fault because the pattern says to measure before you order (but I wanted all of the supplies at once...)

Final Thoughts

I LOVED this project. All of the handwork was really enjoyable and something I am able to do as my children play nearby or while they are napping (getting time with my sewing machine is a different story). Sewing it was a pleasure and it's fun to create something with such attention to detail, even if I'm the only one who will be able to appreciate them.

Actually lacing up and wearing these stays was even better than making them!! I love the silhouette it creates and how it really directs how you move about. Weird as it may sound, I always feel more myself when I'm dressing in costume and this foundation garment is no exception. It's remarkably comfortable and doesn't constrict my breathing as you might expect. Now I cannot wait to get started on my 1780s Italian style gown! 

Project Sources

Stays Happy 1.jpg
IMG_3335 copy.jpg