Jessica Sews | McCall's M7359 Review

M7359 Head to Toe.jpg
sleeve detail.jpg

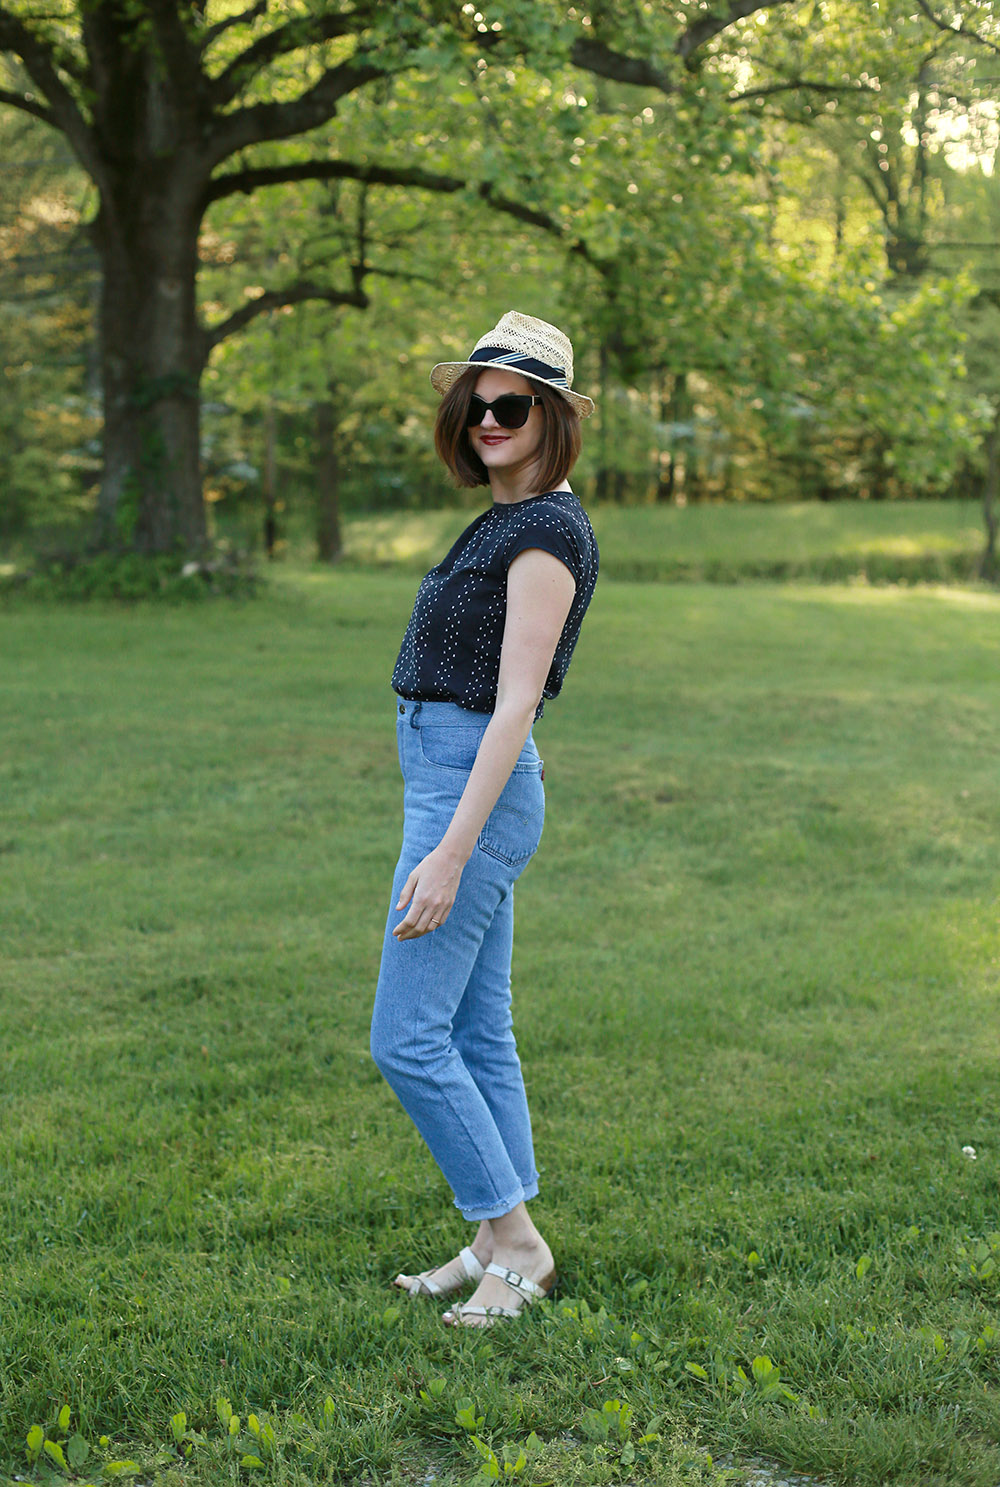
Although I’m not posting new outfits daily for the Me Made May challenge, I have been keeping busy at my sewing machine and have a couple of new pieces I’ve sewn this week. One of them is this top! I used McCall’s 7359, and made it from a linen cotton blend from JoAnn’s. It was a super simple project and I finished it in less than a day! Let me tell you a little more about it!

I’ve mentioned this before but it’s worth saying again just in case anyone is finding this post via Google and is new to my page - I’m in the process of swapping out all of my store bought new clothing for an entirely self made wardrobe. I’m not intentionally throwing things out, but for the most part I’m not buying retail anymore. (I’m giving myself just a smidgeon of space for stuff like concert tees or vacation souvenirs because I love those kinds of pieces too!) As a stay at home mom, I tend to gravitate to leggings and tee shirts and I want to put more effort into getting dressed… which means making simple tops has become one of my sewing priorities.

This particular top fits the bill perfectly. It’s comfortable. It was quick to sew. It pops on over the head and has no closures. And it’s a perfect option instead of a tee shirt to wear with jeans.

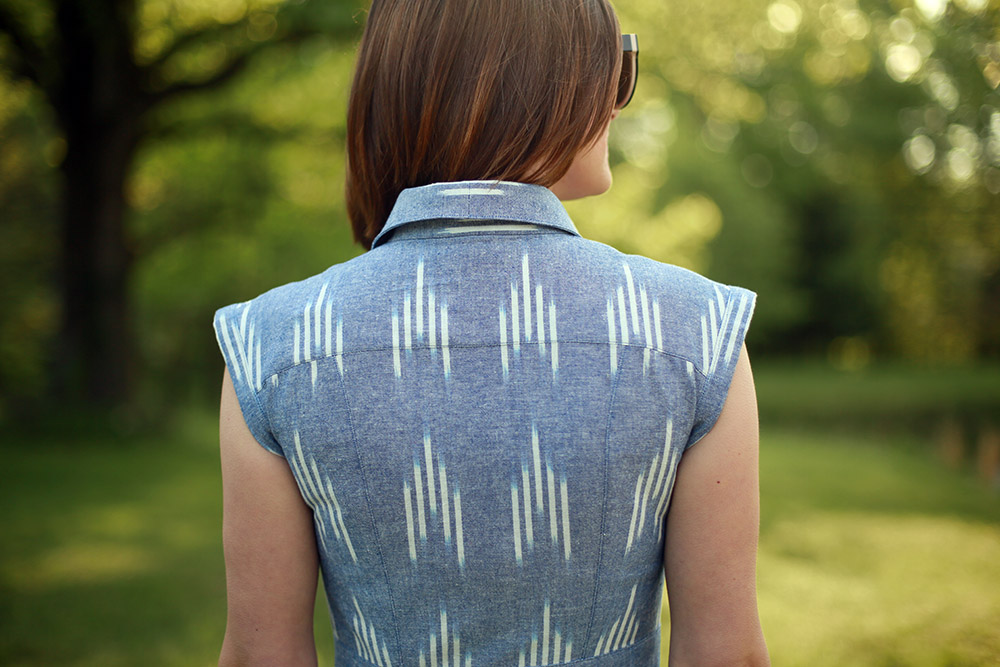
I got this pattern during a $2 sale (I always try to pick out a couple new patterns when those come along!) and saw this fabric in the quilting section at JoAnn’s. I can’t find online but in my store it was in the “vintage” section… and was one of MANY awesome cotton linens that would be perfect for apparel. Its a really cool weave - it’s a linen cotton blend and there are slubs to create more texture. It was great to sew too! I stitched up view B in a medium with no pattern piece alterations. Construction wise, I omitted the gathered detail on the shoulders and instead did my own pieating action once the whole top was complete. I really love this detail!!

I also want to say: patterns are here to SERVE YOU. Don’t be afraid to sew something a different way to make it more couture (and by that I mean by using fine finishing techniques like French seams, special hems, etc) or to make it quick and easy (hello zigzags!). Or to completely change things like I did with the shoulders. I often combine views/sleeves/hems/whatever to make the garment that I want. Which is the point! Plus it makes me feel a little more creative/designery which I suppose is the point of the sewing blitz I’ve been on this year.

Anyway.

I think this is a great pattern for someone who is newer to sewing and wants to make something fashion forward. It has a Madewell sort of vibe to me and also looks really cute tucked in (see my Highlighted stories for that). Out of cotton it’s nice and casual but could be sewn with a crepe or something more silky to be a really beautiful work blouse. I would definitely sew this one again.

M7359 Portrait.jpg
M7359 Head to Toe 2.jpg

Also Wearing: Dawn Jeans and DIY Espadrilles

Jessica Sews | Matilda Dress

Matilda Dress 5.jpg
Matilda Dress 4.jpg
Matilda Dress 3.jpg
Matilda Dress 7.jpg

Today I’m excited to share a project that took me a while to jump into, but when I did, I couldn’t stop myself from stopping! This is the Matilda Dress from Megan Nielsen Patterns. After starting with the Dawn jeans (I know you’re tired of me going on and on about them), I decided I’d try another of Meg’s designs. This dress caught my eye. It really has the feel of something I used to wear a lot back in my NYC days and feels very me. So with the pattern in mind, I started to think about what fabric I might use.

Loads of sewers have been posting their makes using this linen blend blue and white ikat from JoAnn Fabrics. I even used it for my Hayden tee in the reverse color scheme (which I also used for my inner yolk, collar stand and waistband!) ! I’m glad I scooped up so much yardage when I did because on my last visit in store I saw it was sold out. So I have this gorgeous fabric and this multi piece pattern and my challenge is at hand: matching that pattern.

Guys - I loved it. To make it work, I had to cut out each piece individually (versus cutting the left and right at the same time while the fabric is folded) to get everything to line up just so. I started with my skirt back next to the selvage edge and went from there. To get two seams to match up just right you have to take your cut piece, fold back the seam allowance and place it down on your flat fabric. From there lay down the piece you want to match 5/8” over that pressed back SA. Place the new pattern piece down, remove the original piece and cut. And over and over and over.

And I was so proud of all that matching when I discovered… I cut the wrong size. I had printed the PDF pattern, taped it up and cut two sizes too big when I put the pattern away a couple of months ago. I can’t believe my measurements would have changed so much in that time and I made the dumb mistake of not measuring twice before cutting. Luckily I was able to recut the bodice by trimming off the necessary extra and I added a couple of pleats to the skirt back (instead of taking in the CB, which would have messed up the matching) and in the end it all turned out ok.

I made a few other modifications as well. For the front pockets to get the perfect ikat repeat, I made an inverted box pleat rather than the standard pleat instructions in the pattern. I also cut the top collar as to pieces to they would mirror one another at the front collar points.

I really loved making this dress. The pattern is excellent. The fabric was really great to work with and because the ikat is woven into the fabric (instead of just printed on top) it made my matching up less time consuming than I anticipated. I really wanted to stretch this project out over a week but it ended up coming together in just 3 days. It pressed out so nicely and all of that topstitching is what I love about sewing. Perfect little straight lines give me so much satisfaction!

ALSO! I attached my buttons by machine!! I’ve never done this before. Meg mentioned it in one of her tutorials and I thought… I bet I could do that. I just set my zigzag to the same distance as my buttonholes and held it in place until I had gone back and forth 10 times. I don’t know if I can ever do buttons by hand ever again (I will…when my historical sewing gets moved to the top of my list!)

Has anyone else done a project with this fabric too? I’d love to see what you made! DM me on instagram or shoot me an email!

Matilda Dress 1.jpg
Matilda Dress 6.jpg
Matilda Dress 2.jpg

Jessica Sews | Upcycled Swiss Dot + Refashioned Levis

Denim Remake 2.jpg
Denim Remake 5.jpg
Denim Remake 4.jpg

When it comes to my sewing projects, I usually finish them within a couple of days of starting. If it gets set aside for too long, it becomes lost in the abyss/I feel guilty and hide it with other fabric. These jeans were just about to meet the same fate until I found myself nearly caught up in my sewing agenda and thinking… maybe I can get these to work. But before I tell you about that, let me rewind to the beginning.

If you’ve seen my last handful of posts, you know I am really into harvesting fabric from thrift store pieces to remake into modern styles in my own size. I LOVE DOING THIS. There aren’t a ton of local options for fabric near me and we have a really two really great Goodwill stores in town. I’ve found typically expensive fabrics - wool, silk, linen, Swiss dots, seersuckers, eyelets - the list goes on and on.

Denim Remake Before.jpg

After making a good assortment of tops (like the one in this post!), it crossed my mind I might be able to find some men’s jeans that could be upcycled into a new pair that fit me. Raw denim is awesome, don’t get me wrong, but it takes a lot of wearing and washing to get it to fade into a soft vintage blue. And that’s what I had in mind for this pair of jeans, so imagine my crazy good luck when I found a pair of men’s Levi’s in a size 50 for under five bucks.

I wanted to try to keep some of the original elements - the red tab, big back pockets and front coin pocket all came along into my new pair. I was able to cut most of the rest of the jeans out but had to go cross grain in some places, or use different fabric all together - like the inside waistband and belt looks. But I LIKE the way all of the different elements come together. I finished the bottom edge with a raw hem and the fit on these is really relaxed. Perfect for milling about the house, working outside or whatever.

The issue that gave me trouble was using thick thread in conjunction with thick fabric. My home machine just couldn’t wing it. I finally thought maybe regular thread would work and I’m glad I did because it came through. With the extra bar tacks and top stitching I think this pair will be plenty sturdy and I don’t mind going back into mend if need be.

So both the top and denim in this post are upcycled plus the band on my self made hat! You’ve seen the blouse worn here (Simplicity 8391, out of print) and the jeans are my favorite denim pattern (Dawn Jean) from Megan Nielsen patterns (literally every pair of pants i make are this pattern. What am I up to? Eight versions?)

Denim Remake 1.jpg
Denim Remake 3.jpg
Denim Remake 6.jpg

Jessica Sews | Peplum Eyelet Refashion + Wide Leg Dawn Jeans

Peplum Top and Wide Leg Dawn Jeans.jpg
Peplum Top and Wide Leg Dawn Jeans 5.jpg
Peplum Top and Wide Leg Dawn Jeans 4.jpg

There are a couple fabrics that instantly draw me in when I’m shopping for fabric at the thrift store - eyelet and chambray. You saw my chambray refashion earlier this week, so here’s one example of how I’ve harvested eyelet fabric and remade it into a different silhouette.

Before.jpg

I was instantly drawn to this navy eyelet dress, but it was a couple sizes too big for me. Sure, I could have tried to alter it down to fit, but I’ve been in more of a chop chop mood lately plus I had a pattern (Simplicity 1425) that I wanted to try out. After a wash, I went to town cutting along the seam lines to see what kind of yardage I would be left with. I’ve had some questions about how I disassemble garments and it varies from piece to piece. Something like eyelet can be a beast with all of the thread used to create the actual eyelet, so in this case I just cut along the seam edges.

From there I laid out my pattern and realized I’d need to make some changes to have enough fabric. I omitted the pleats in the peplum by folding them up on the paper pattern and cutting that smaller shape out. I also decided not to do a collar stand and have a flat Peter Pan style collar instead.

I lined both the lower portion of the bodice front and the whole back so I could wear a bra underneath. The fabric I used was left over from Bea’s 18th century dress.

On bottom I’m wearing my wide leg Dawn jeans again. I’ve only worn them a couple of times (I usually save true white for later spring and summer or vacation) and I absolutely love this style. I’m even thinking I need to go check my stash to see what fabrics I have to make a second pair! If you want to see the first way I wore them, check out this post.

Peplum Top and Wide Leg Dawn Jeans 2.jpg
Peplum Top and Wide Leg Dawn Jeans 3.jpg