Time Traveling | Edwardian Era circa 1903
/

I’ve fallen down another rabbit hole. I really didn’t intend to do any new eras this year, but somehow I landed right at the turn of the century in the Edwardian era. As I make my way through time and historical dress, I’ve come to appreciate silhouettes I was never initially drawn to. Regency didn’t tickle my fancy until I went to the Jane Austen Festival and the extreme hourglass of strong shoulders, puffed pigeon blouses and trumpet skirts didn’t feel particularly appealing to me either. Until now!!
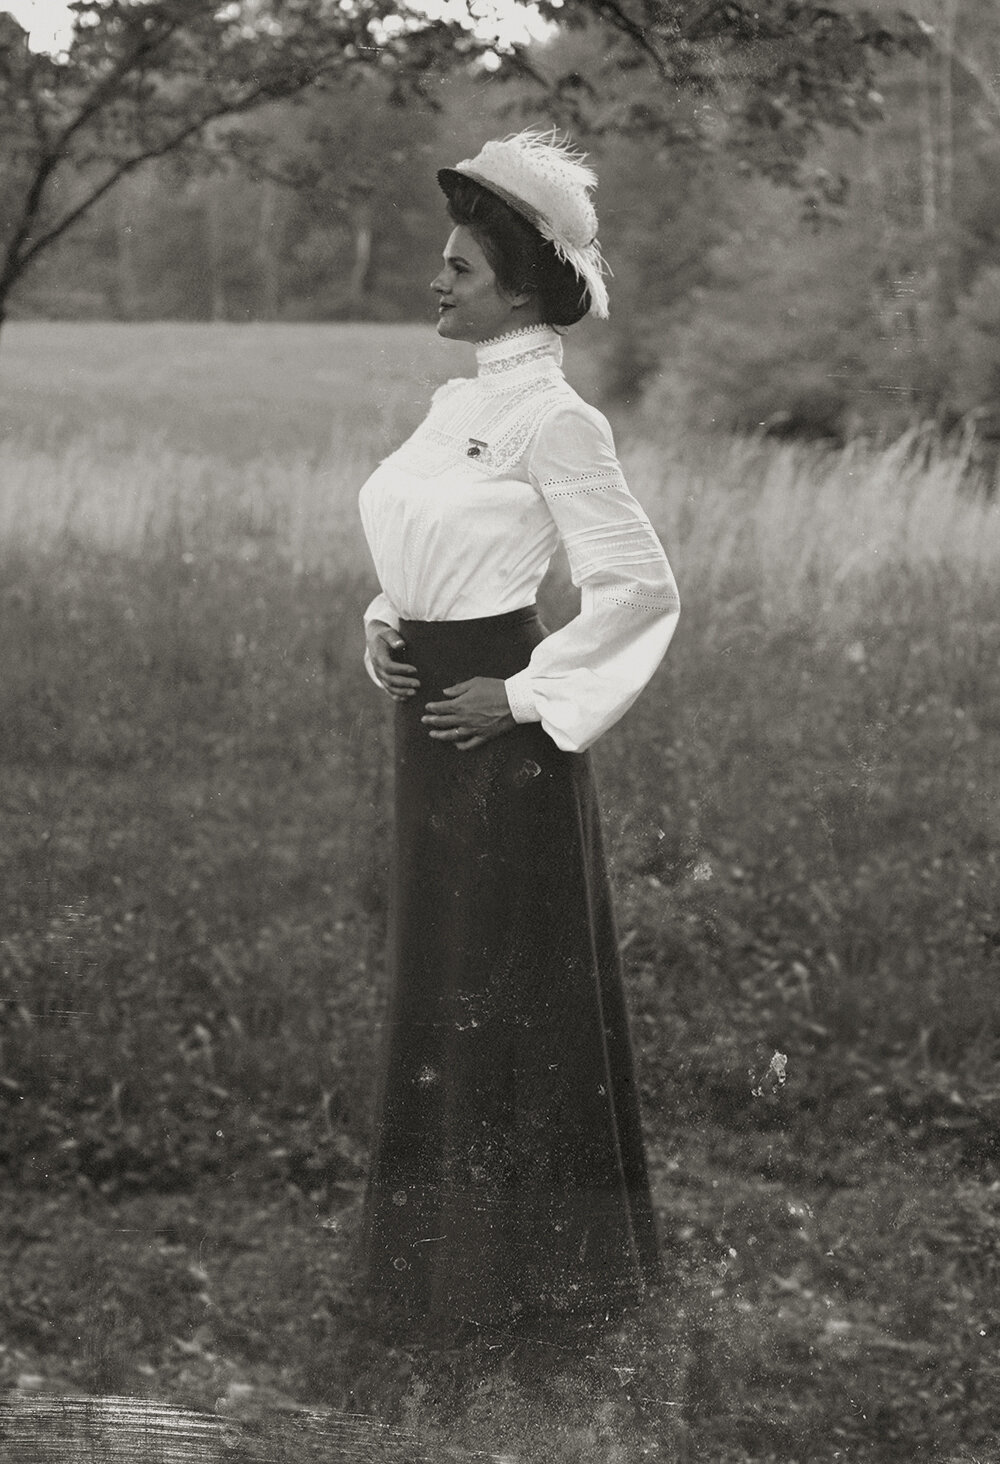
I’ve been wanting to recreate some family photos for a while (like this one of my great grandmother Mary in her 1901 wedding portrait), so with a shelter in place order upon me, I thought, there’s no time like now to test the waters! Let me tell you about my 1903 Edwardian ensemble!
Hat + Hair
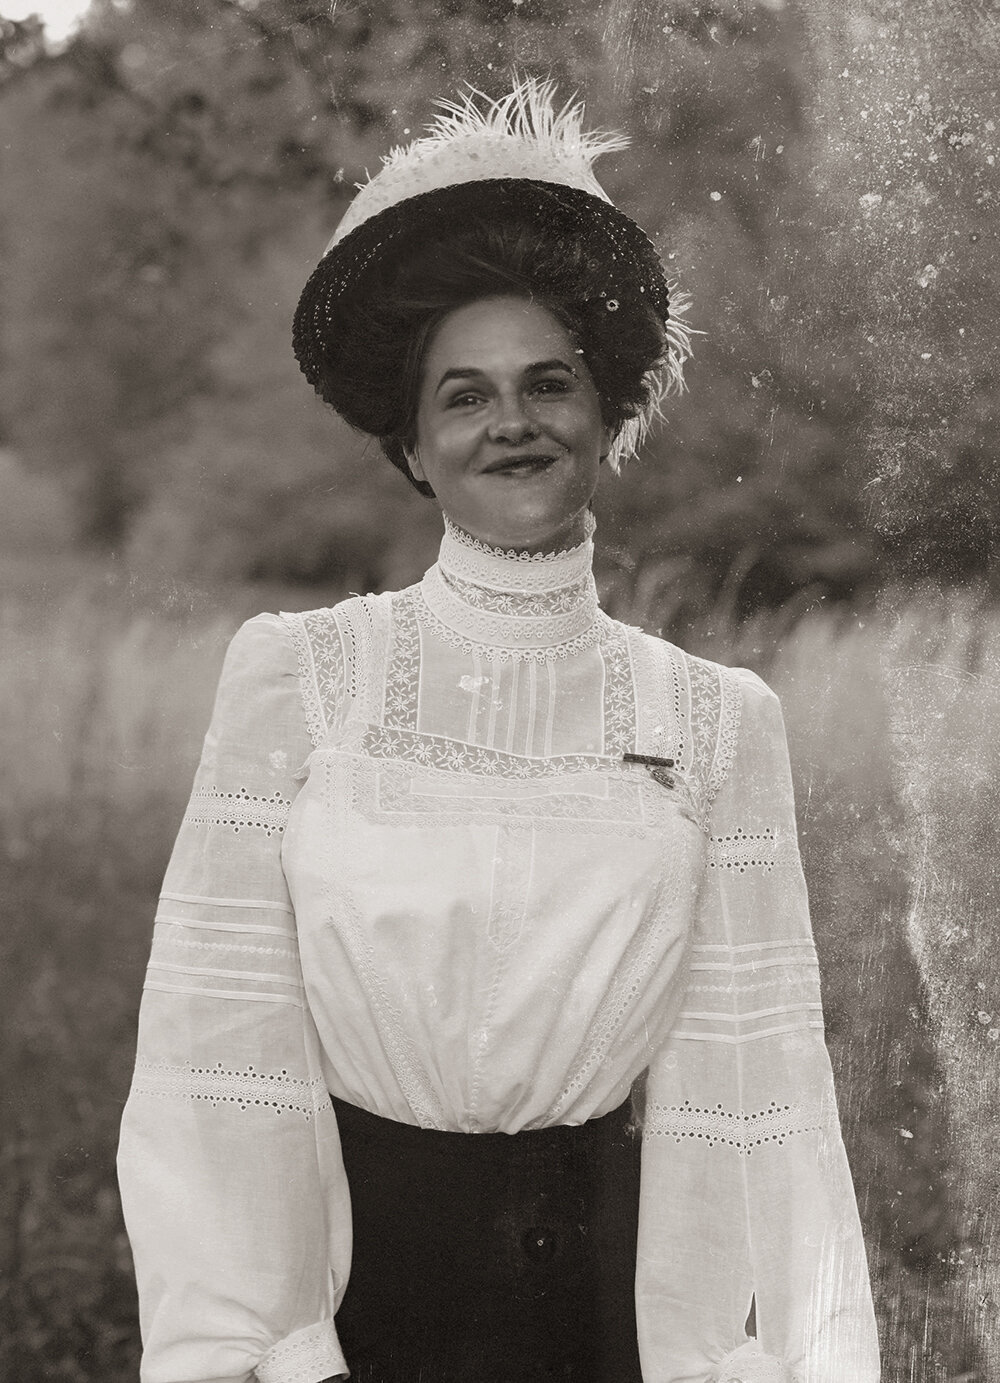
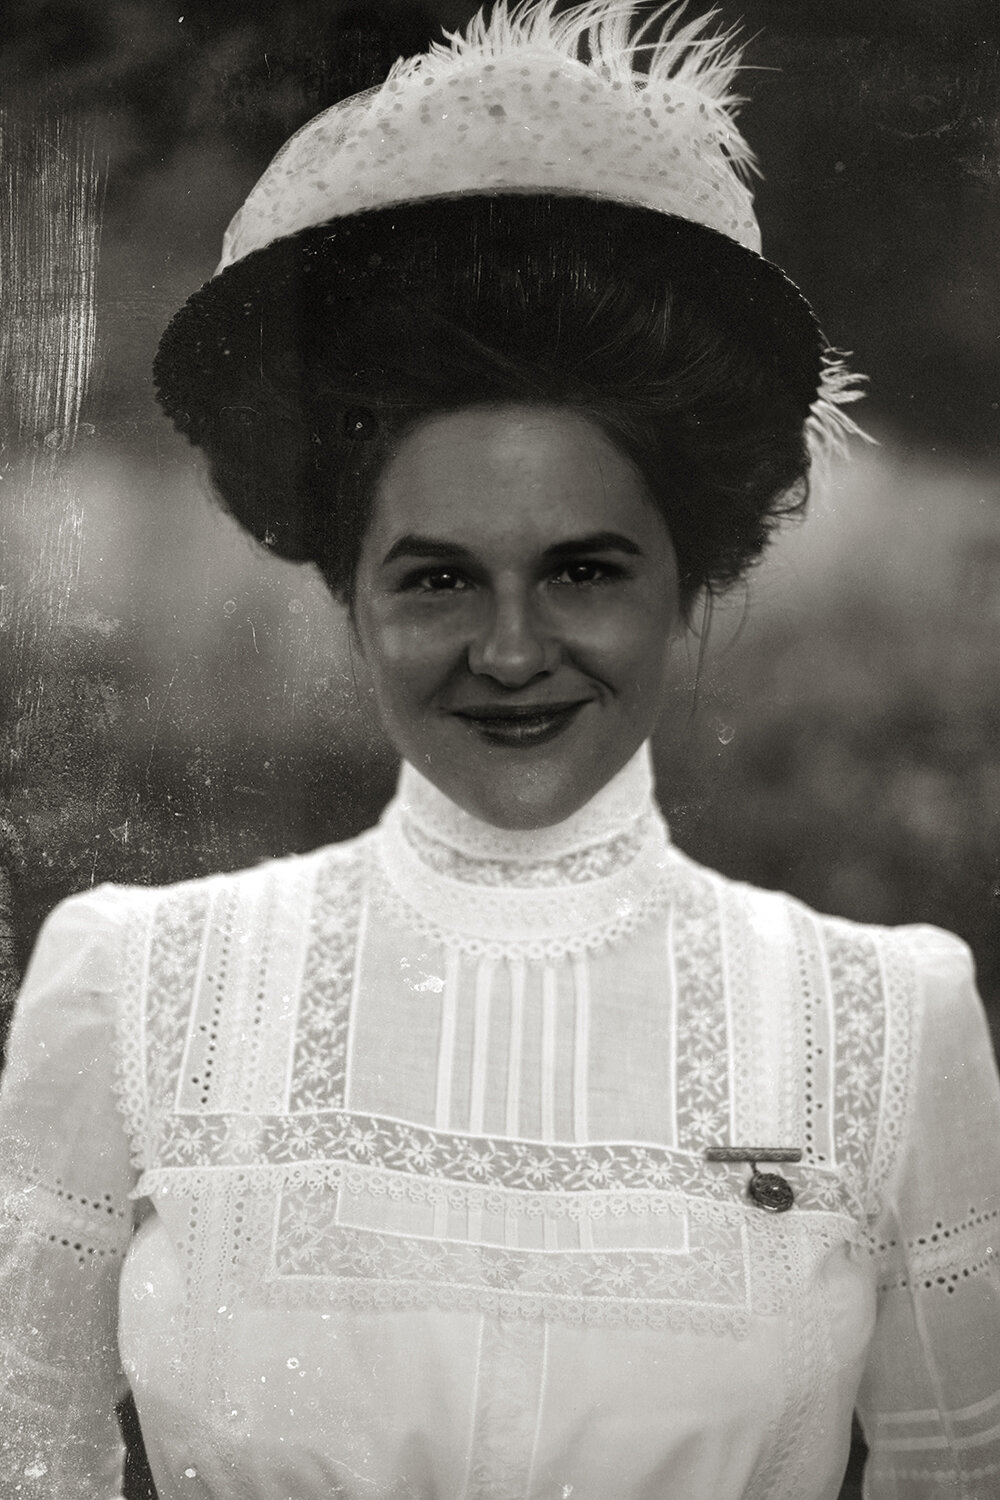
Almost every element of my costume was from things I had in my home, which includes my hat! I used the veiling off a 1960s pill box hat and the straw from another. I ordered a dozen white ostrich feathers to get more of that Edwardian volume.
To get the Gibson Girl mass of hair, I made the modern version of an Edwardian hair rat, which was essentially a hair covered wreath one places over her head like a crown, with loose hair draped over the face and heck. Once in place, that hair is wrapped over the crown and pinned down. I made my hair rat from the leg of an old pair of tights, filled with yarn. It worked perfectly!

Shirtwaist
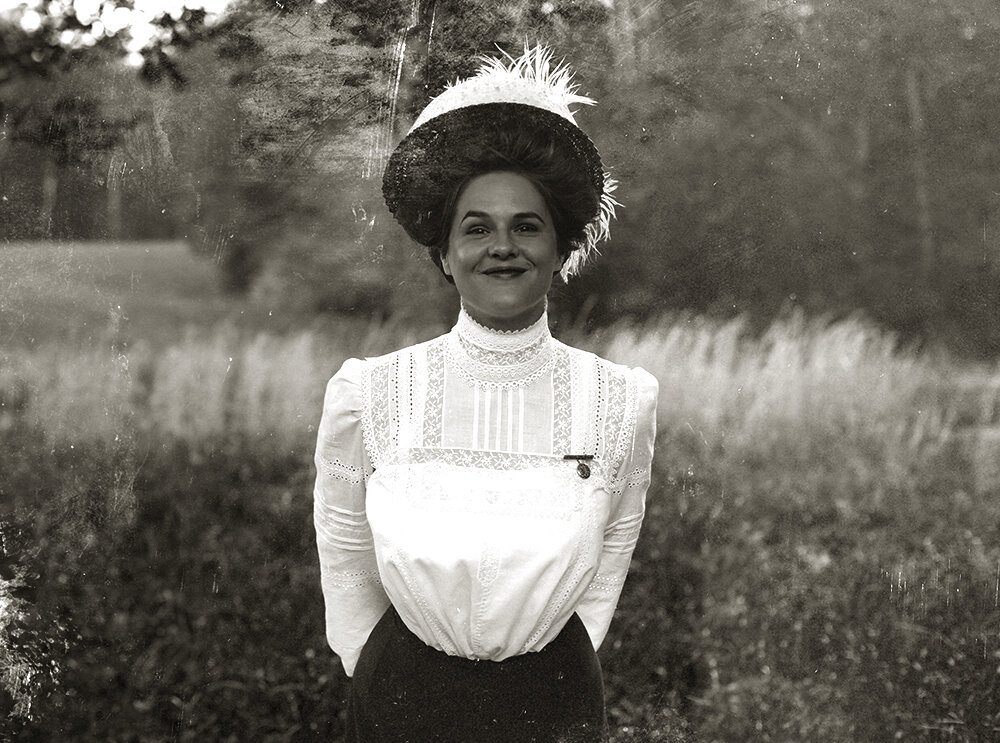
What makes a blouse fit into the Edwardian era? A high neckline, insertion lace, fine cotton and most importantly, excess volume at the front to create a pigeon bust silhouette. I opted to use the 1903 blousewaist pattern from Truly Victorian because of it’s simple design. Then the magic really comes in with the insertion lace. This entire top is actually upcycled from the skirt a 1960s dress I had in my garage (see the before here). once removed from the bodice I had over 3.5 yards of fabric to work with, plus the lace and trims that went with it. I researched designs from dozens of extant shirtwaists along with magazines from the era and this is the design I came up with. I think it looks quite authentic and I plan on wearing it for costume and modern outfits!
The high neckline is achieved with a stock - a separate collar. I used the same design elements for a cohesive look.
Under my shirtwaist I’m wearing my mid 19th century corset. I’d love to make an Edwardian S-bend corset down the line, but with my Victorian corset I’m still able to get a 10” difference between my bust and waist. The “desirable” (high fashion) proportions in Edwardian times were a bust ten inches bigger than the waist, and hips 15” bigger than the waist. This was often done with padding in both the chest and hips. Look though enough historic everyday photos and you’ll see plenty of women that don’t have such a dramatic difference (Please spare me on corsetry lectures. Most women did not tight lace to extremes like pop culture would have one believe).
I also have on a corset cover to both smooth out the lines of the corset and to add additional volume to my pigeon bust. I made it without a pattern and used scrap fabric and mismatched buttons. Make do!
Finally, I accessorized the shirtwaist with a small bar pin and locket on my left chest, as I saw in so many historic photographs from that time period.

Skirt + Shoes

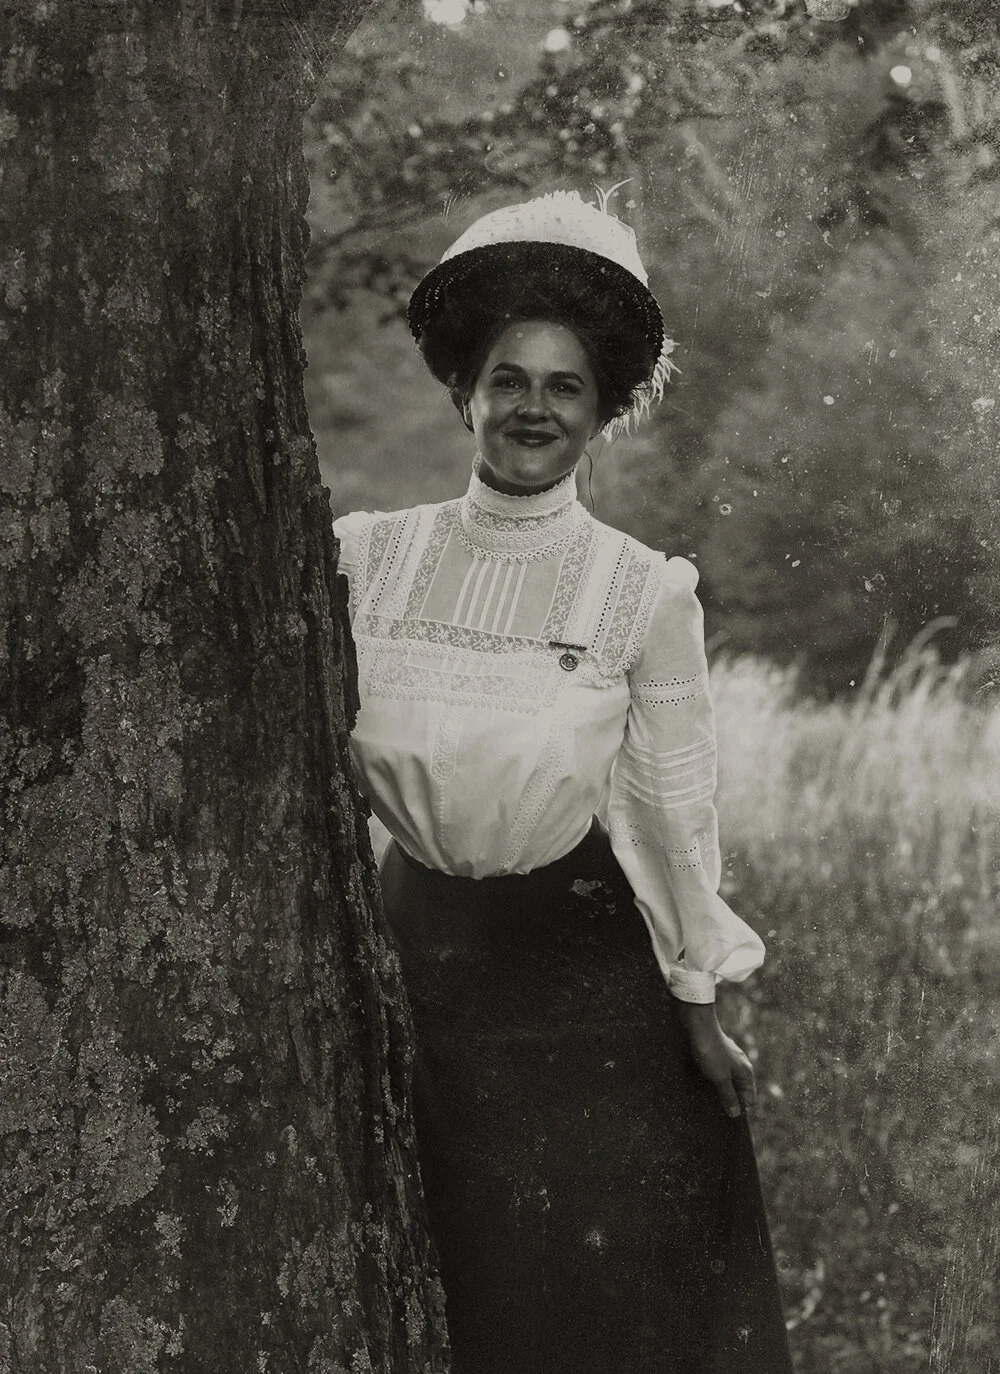
My skirt is a rather simple style and also made up from a 1903 Truly Victorian Pattern. I had to make a few adjustments to get the seven gores cut out of some navy wool I had in my stash. The hem is faced with 4” wide denim to give it more of a trumpet shape, which could be further emphasized with a starched petticoat.
My shoes are black Mae’s from American Duchess in my normal size. They did fit snuggly but have already started to stretch out nicely with one wear. Because of my skinny ankles the style I initially ordered didn’t work out, but this is a pair I see myself wearing in modern life as well as with costumes from 1900-1930! The quality is outstanding and well worth the price and the only “new” thing I bought for this entire look!
So that’s my foray into the Edwardian era! I loved making my blouse so much I made a second shirtwaist with the same pattern a week later! I plan on making a white skirt to match this shirtwaist as well because I see some lawn croquet in my future. If you’re wondering what these images look like in full color, no worries - I’ll be posting them to my Instagram in the coming days and weeks. If there’s enough interest in a tutorial for how I edit them, I’d be happy to put that together as well! I do think they help take you back in time and feel really real to me, if that makes sense!