Time Traveling | 18th Century Snow Day

Red Chintz Gown
Red Chintz Gown 7.jpg
Red Chintz Gown 3.jpg
Red Chintz Gown

It’s been a while since I’ve gotten gussied up in my 18th century gear! With a gorgeous snowy morning as my backdrop, I pulled out my red chintz Italian gown and styled it for a wintertime scene. I wore my dark red petticoat, a 1970s silk Dior scarf as a fichu, a black silk wired ribbon and pair of long black gloves. I powdered my hair and arranged two feathers in it. I went a little more dramatic with makeup (please tell me I don’t look like a badger?) and I felt so beautiful posing for these images!

Georgian Red Winter Gown
18th Century Snow Day Red Chintz Gown
Red Chintz Gown
Georgian Red Chintz Gown Snow Day

Inspiration | Yellow Regency Vest

Regency Vest Inspiration.jpg

For my latest historical sewing project, I’ve been working on a yellow linen Regency era vest. Before I debut the final piece (although it’s not a secret, you can see my progress on Instagram!), I wanted to share some of the inspiration behind my color, silhouette and embellishment choices!

Although I’m making my vest from an extant museum piece, I’m not copying it exactly. I’ve used popular color combos of the time (yellow and white), trims (Hussard inspired buttons and placement) and motifs (like the Napoleonic bee embroidered on back!). I’ve also modified the construction, but I’ll go into that when I show you the finished piece!

What are you guys sewing/crafting these days?

Time Traveling | Making My Blue Brain Hat

18th Century Brain Hat 1780

I love hats! Especially the fancy, floral, floofy numbers from bygone ears. For a large part of history, women wouldn’t leave the house without a chapeau!

Hat 3.jpg

For my 1780s look, I decided to work with a straw hat I had in my stash. Once upon a time I thought I might have a go as a milliner and thus collected a lot of straw hat bodies and blocks to make new hats of my own. This base was actually a modern hat, but the size was perfect for this project. Here’s what it looked like when I started.

After removing the inter and exterior bands I started steaming the hat out. Moisture allows the straw to relax and take a new shape (which is why you may have noticed if you get a straw hat wet at the beach, it will lack the definition it had when you bought it). I wanted it to have a very shallow crown, like a bergère hat that was popular in the 18th century. I knew I’d be covering the hat with fabric, so an identical shape wasn’t necessary - just the rough form. I also found that I could flip the back brim up and it would hold nicely, which I knew would be a good place to slip in some decorations. I gave the whole thing a good steam and let it dry.

Covering straw with fabric on 18th century hat

Next I started on my fabric covering. Around the brim I created half inch pleats using a cotton sateen, a bajillion pins and a ton of patience. I first pinned the pleats to the edge of the interior brim, as you can see at the right. As I brought them to the edge of the brim, I let them spread just a bit and then brought them back in on top where the brim meets the crown. This was an easy place to become too perfectionist and fiddle! One thing I like to remind myself about historical sewing is that imperfection is historically accurate. We’ve become so accustomed to huge racks and full size runs of identical garments it’s no wonder something handmade feels a bit foreign to the eye with a little jumping stitch here or a slightly bigger pleat there. I’ve started to really love what a handmade piece looks like - one of a kind!

So anyway, when I got the brim pleats to a place I liked with pins, I hand sewed it down to the straw.

With the whole brim complete, I moved onto the brainy bit at the top. I used the same fabric but in a darker shade of blue and I love the combination of the two. For this part I turned to The American Duchess Guide to 18th Dressmaking (which I highly recommend!) and used their tutorial in the 1780s section to create the texture. Once it was all pinned in place, it also got tacked down with heavier buttonhole thread.

Hat 8.jpg
Under Side 18th Century Hat

Now that the top of my little hat looked perfect, I set out to make the inside of the crown just as lovely. I made a very large and shallow tube (only a few inches deep) which I gathered at one side and created a drawstring channel at the other. The gathers were drawn in to match the circumference of the crown and sewn down. The drawstring channel was also draw up using a piece of string, tied, trimmed and tucked into the new crown covering. I also made two ties that were tacked down before the gathered interior crown bit went on. These let me to pull the hat down tightly and further emphasize the flipped up back!

Feathers on 18th century hat

Lastly was the question of feathers - how many and in what placement. After trying a bunch of different combinations, I settled on just one white feature layed horizontally in the back and tacked down.

In all I used 1 yard of light blue fabric and just a half yard of the darker blue. I had enough leftover to make a matching waist sash/belt to coordinate everything together. Because there are so many pieces to an 18th century kit (shift, stays, petticoats, bum rolls, socks, shoes, buckles, gown, fichu, apron and hat to name a few) I think I’ll keep my costumes from this era in the same general color story with this pretty blue as the common link.

I can’t decide if I should make one more gown (I do have the fabric on hand) as a birthday present to myself (it would photograph so beautifully in the snow!), do some modern sewing or start planning for the next era. I realized when I was sick for a day earlier this week that I cannot not have a project sitting around to pick up and play with. And as all of our outdoor chores are coming to an end for the season and it’s time to sit by the fire for the next few months, I do think another lap project is in order. Are you interested in progress shots or is a big reveal more fun? I’m not sure which way to take this one on. Let me know what you think!

Inspired by | Red Chintz

Red Chintz Inspiration 3.jpg

In the past few weeks i have been sewing up a storm and am in the process of putting the finishing touches on my 1780s Italian gown. Before the big reveal, I wanted to pull together my inspiration images and tell you a little more about my fabric choice.

Usually when I set out to sew something, I have an idea in my head of what the finished piece will look like before I even begin. It’s been very different this time around! I had my pattern (Fig Leaf Patterns 101) ordered and I knew I wanted to do a print, but I kept getting tripped up on what combination of fabrics to use. As you can imagine these 18th century dresses take a lot of yardage so there’s the question of cost. I also want to be appropriate for the event we’re attending, so this wouldn’t be a grand courtly number (ie, not silk) either.

Red Chintz Side by Side.jpg
Fries Museum Chintz.jpg

Then one day I bit the bullet when I saw PennyRiver on Instagram doing a little flash sale on some of her stash. She had a Colonial Williamsburg chintz I’d had my eye on and at a discount - so I snapped it up. At just three yards I knew I’d have to be extra careful with my pattern layout and cutting, but at worst I could make it up into a jacket to be worn with a petticoat.

All this long story is to say that after I’d bought the fabric I realized every costumer under the sun seemed to be making white chintz Italian gowns. For good reason too - chintz patterns were all the rage during the 1700s, especially the latter half of the century. But you know me - I can’t look like everyone else! Which finally landed me on the idea of overdying the fabric and repainting in the print by hand.

So that’s exactly what I did.

It took roughly 30 hours after my kids went to bed each night over my dining room table, four white gel pens, three boxes of chalk paint markers and five true crime podcast series. And I am so in love with the final result!

I’d like to have my entire look complete before sharing too much, but there is a little back view of the dress on my instagram. I’ve also realized it’s really tricky to photograph these colors in a way that reflects their real life hues, but hopefully when I have my real photographer (Adam!) he’ll be able to do them justice.

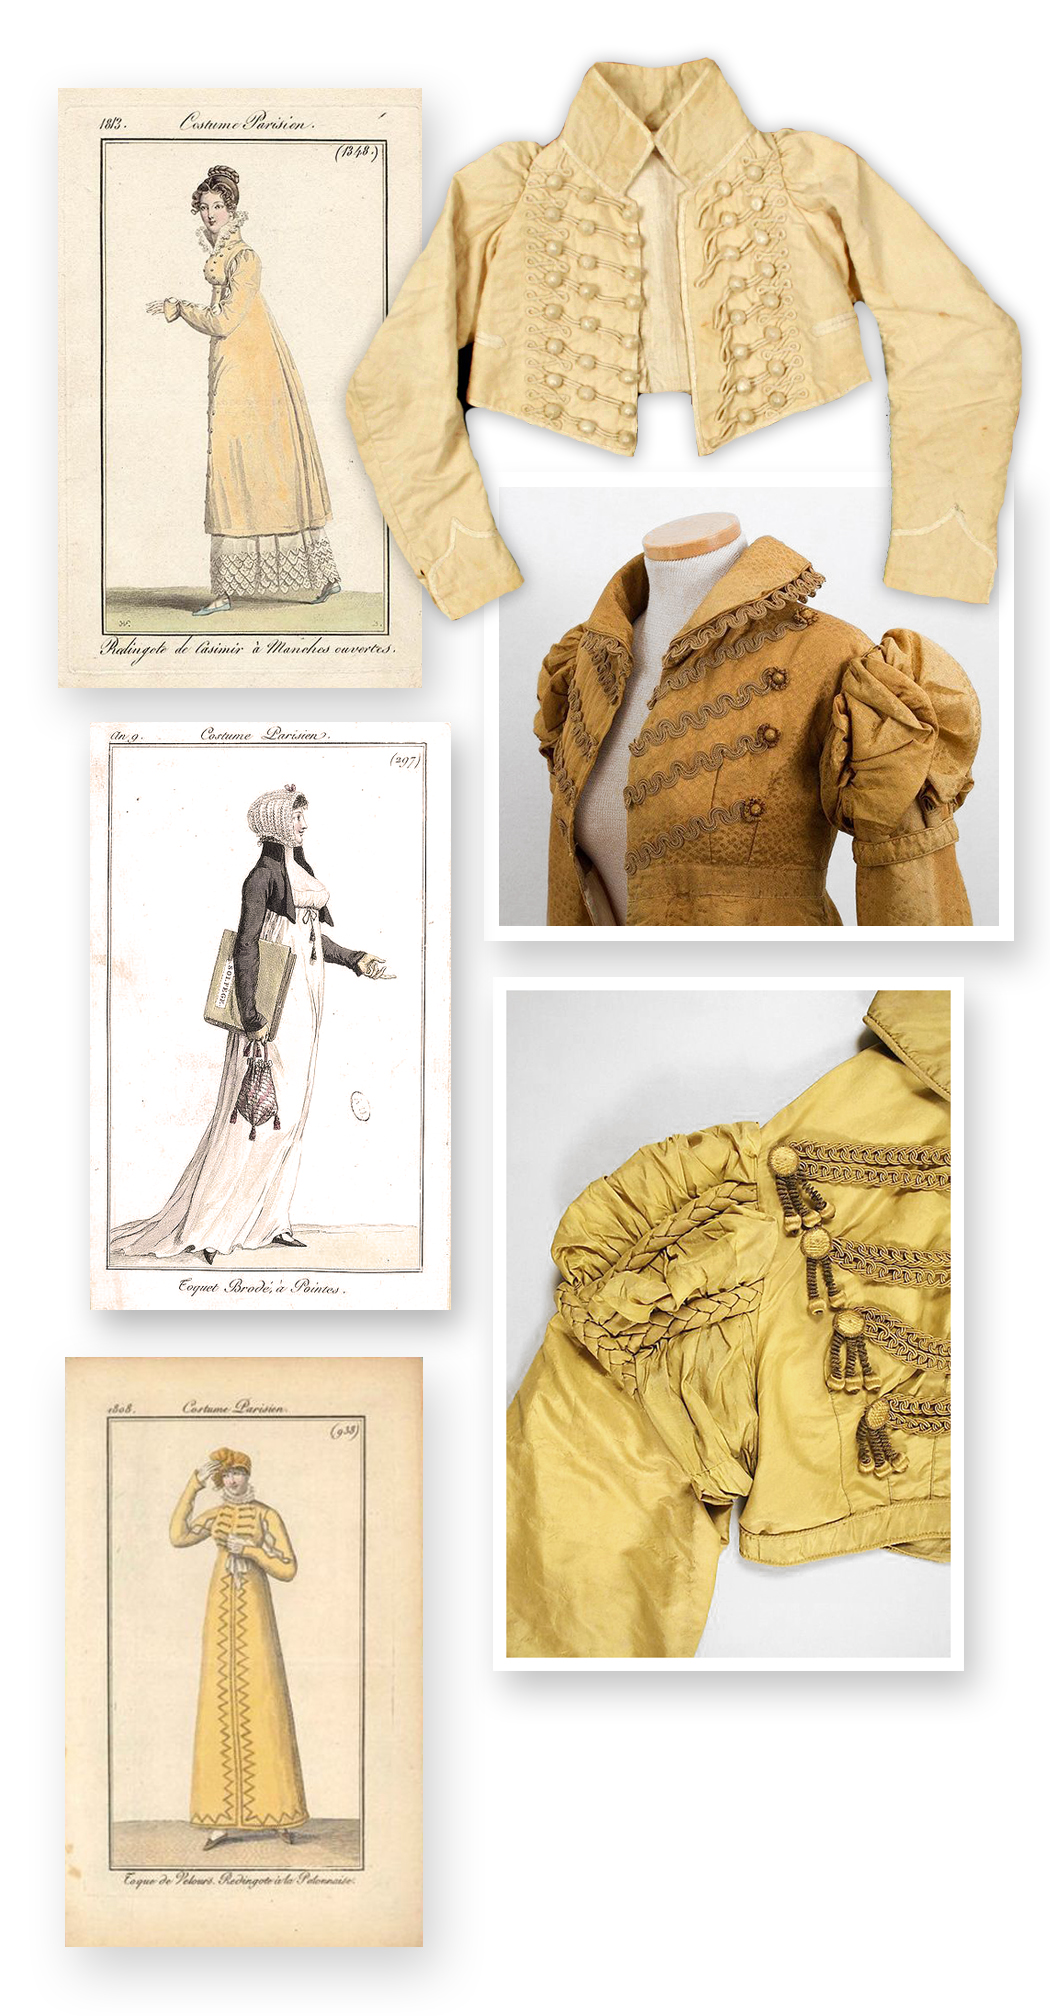
If you’d like to see all of my inspiration, including some images that I didn’t post here, check out my Pinterest board! Can I just time travel back to the 18th century please (for a limited time, I know life was not easy back them for a multitude of reasons, but let’s just embrace the fantasy aspect and ignore the realities!)

Red Chintz Inspiration 5.jpg