Time Traveling | Early 19th Century Corded Stays

Corded Stays Jessica Quirk B.jpg
Corded Stays Jessica Quirk J.jpg
Corded Stays Jessica Quirk C.jpg
Corded Stays Jessica Quirk H.jpg
Corded Stays Jessica Quirk D.jpg

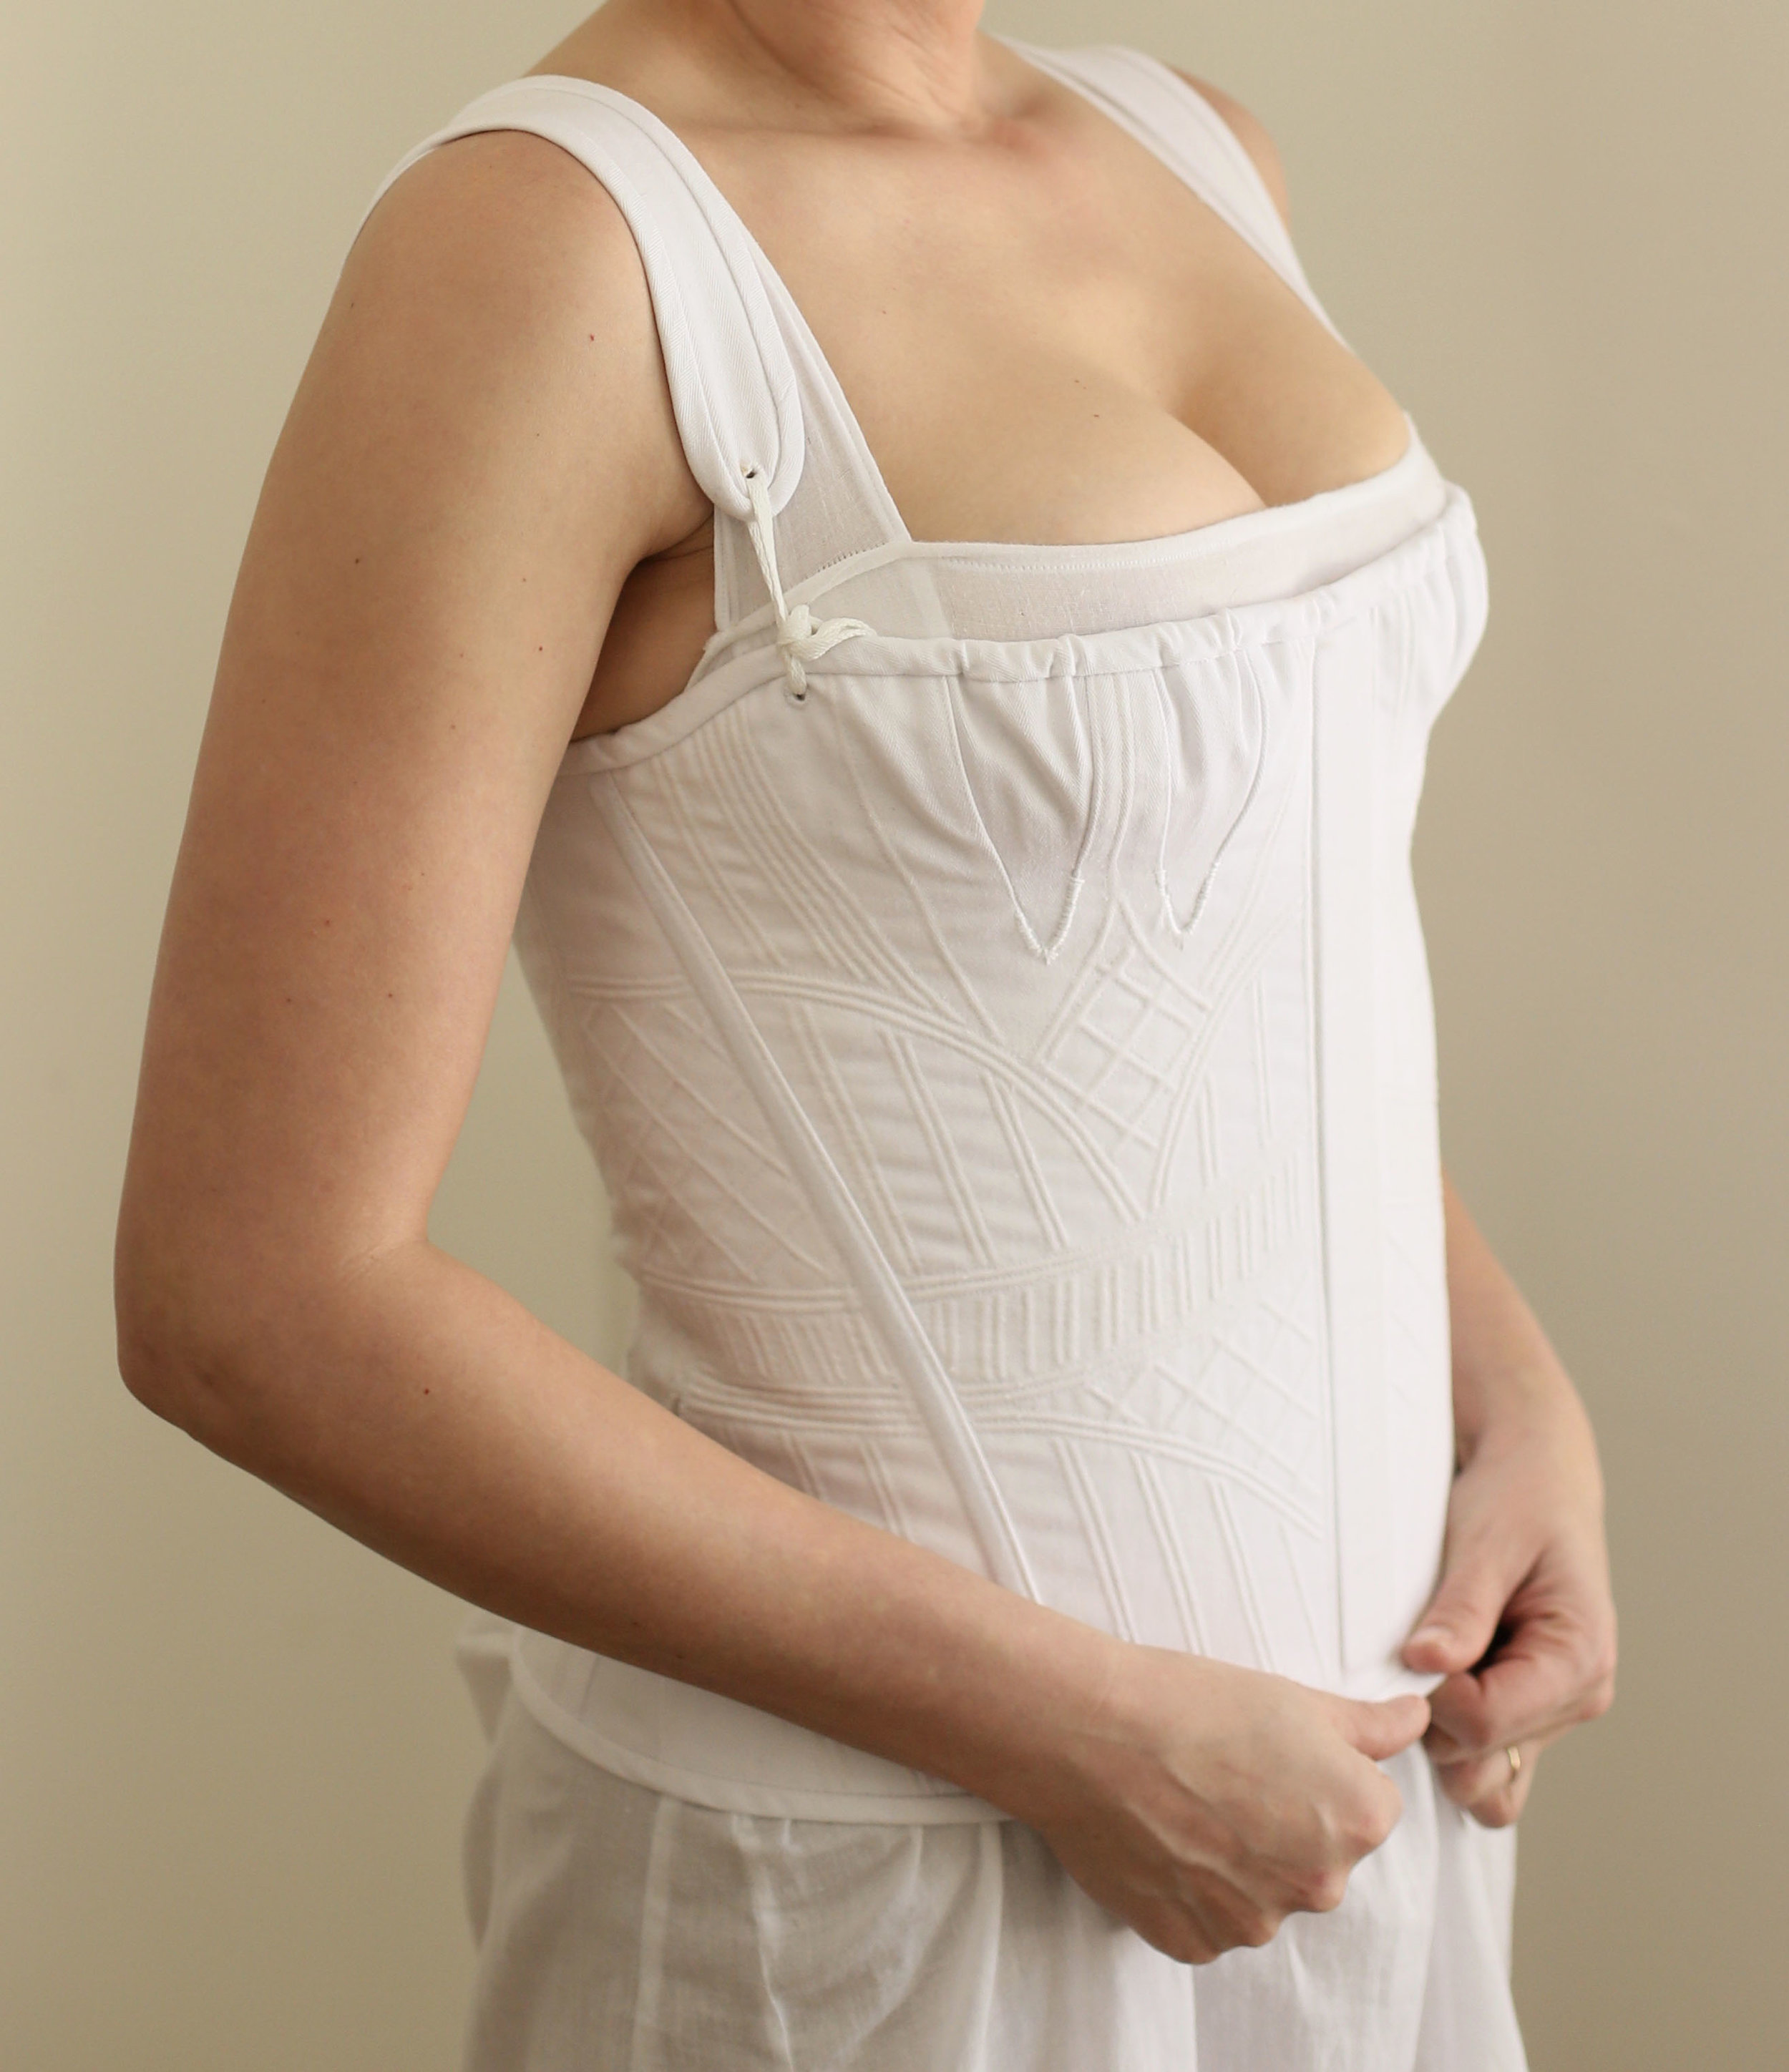
I’ve been on a sewing roll in 2019 and my latest project is a pair of early 19th century stays. As fashion moved towards a neoclassical influence around the turn of the century, the undergarments worn also evolved. Instead of shaping the torso into a conical shape (like my first pair of stays), the shape of the bosom was more defined by lifting and separating the bust (versus just smushing them up like previous centuries).

The construction for this new shape incorporates gussets, or triangular shaped inserts, to give more shape to the stays. To me this is probably the first version of the bra we know and wear today - from flattened uniboobs to more rounded cups.

When it comes to my historical undergarments - you know me - the more elaborate, the better! Enter the idea for corded stays. These actually fall more towards the 1820-1830s due to the cording, but I’m hoping the shape of this garment will work for costumes between 1800-1840. Plus I wanted to make something spectacular, and I think I’ve done it!

For my base pattern, I worked with the Laughing Moon Mercantile 115 and chose a white coutil (a tightly woven fabric made for corsetry). I made a quick mock up in size 16, determined I could size down and got to the business of cutting and cording my pieces.

Corded Stays Jessica Quirk F.jpg

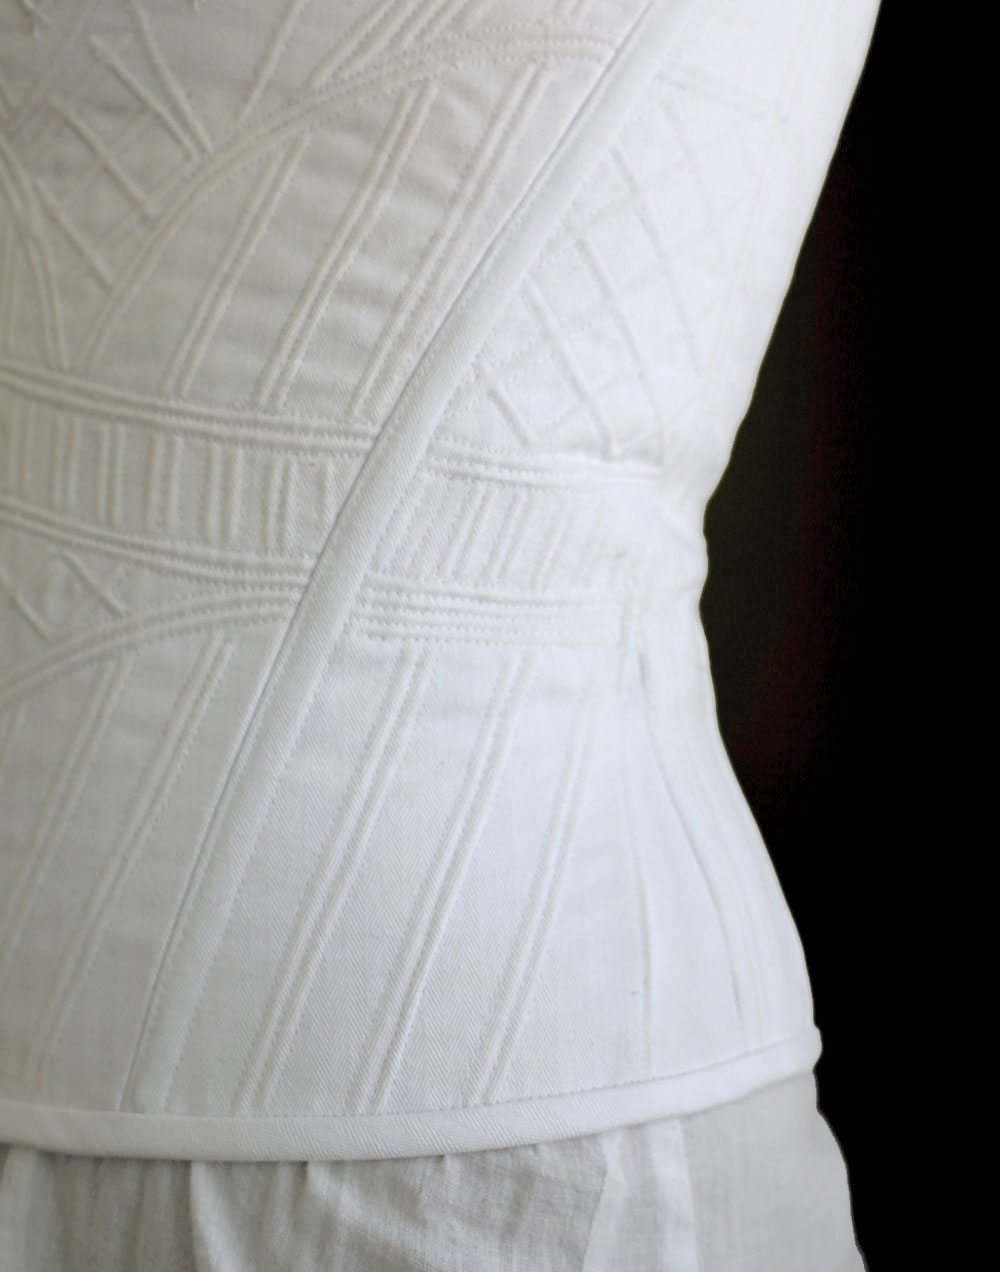
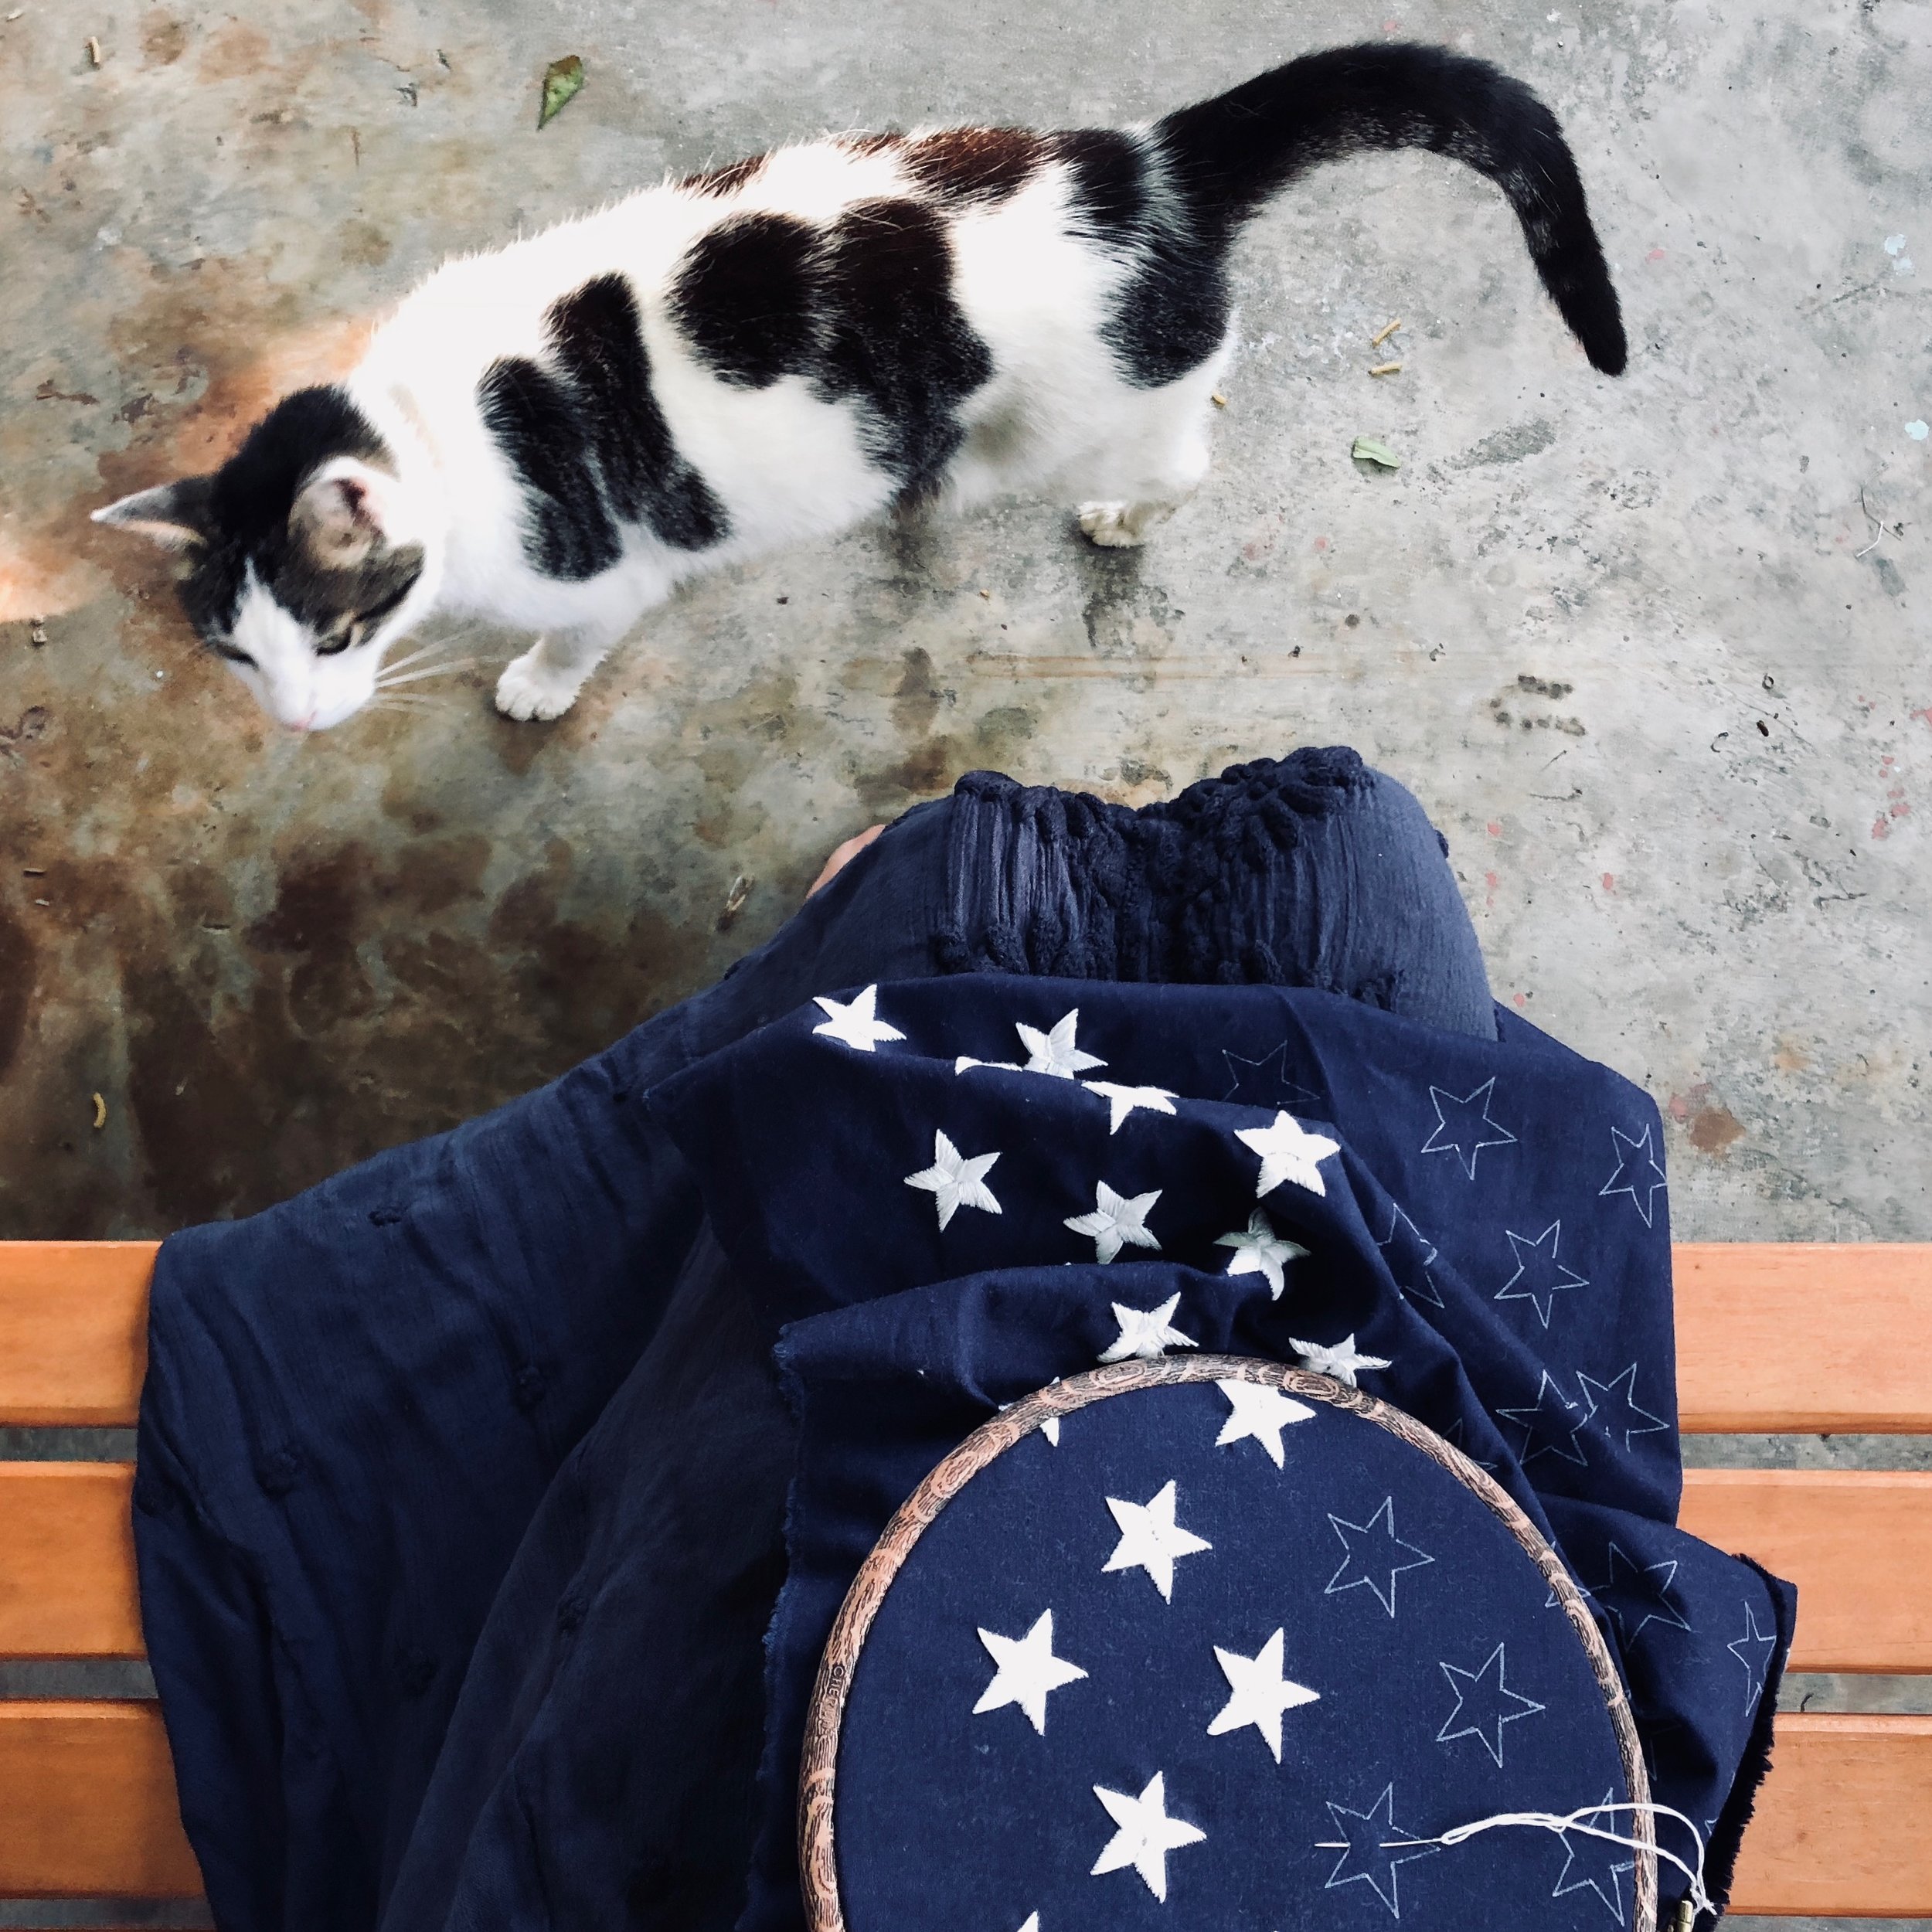
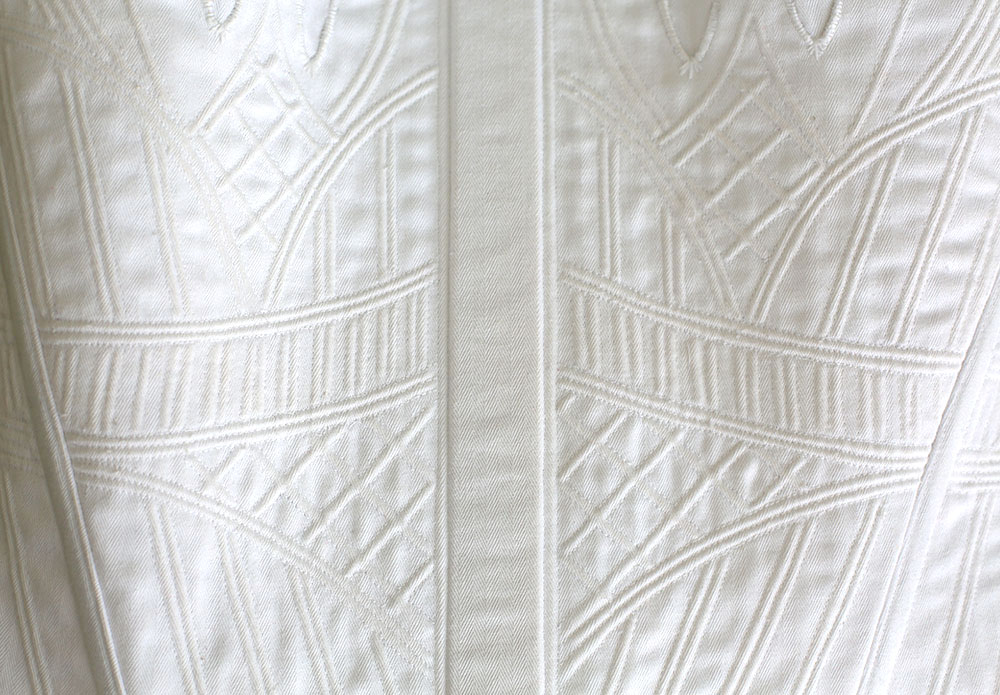
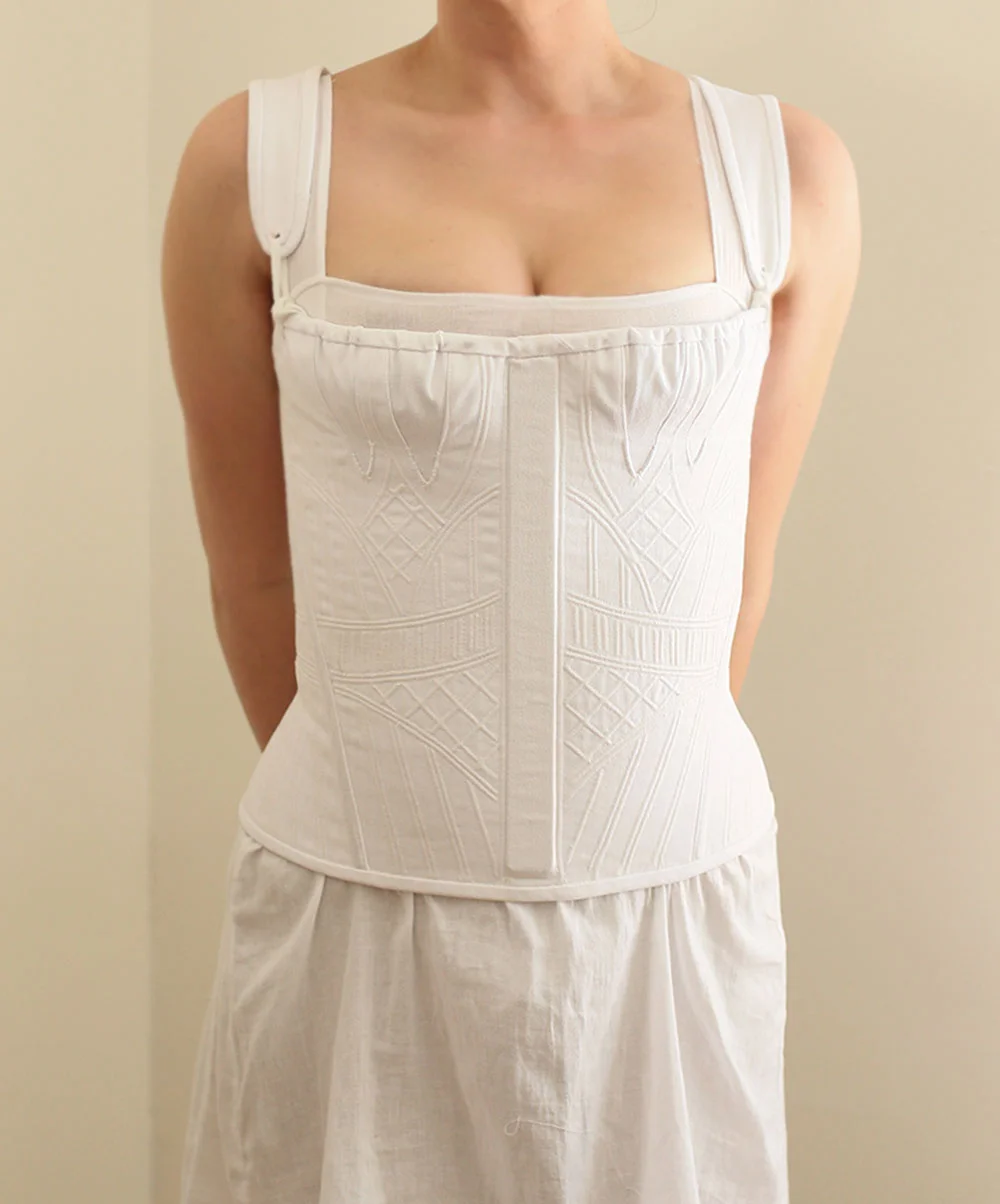
For my cording design I used extant museum pieces (specifically this one) as my inspiration. I first drew sketches of the overall look and then moved to creating them on my paper pattern. I then taped my fabric and cording design to my windows and traced them with a water soluble pen. The design I started with is far less intricate than my final design because I just kept adding, adding, adding channels (even after front and back sides were joined) but I’m really glad I did. This is an intentionally softer style corset (there’s way more breathing room than my earlier pair) and isn’t meant for major waist reduction like mid 19th century - 20th century styles. It does provide posture correction and some shaping, but my rib cage can expand so much more than a heavily boned version. There are only four total boning channels, plus the front busk pocket so all of the extra cording gives the garment more strength. Plus I think it’s really beautiful!

After the channels are sewn, loose tails are threaded into a needle and taken to the back side. Every single stop and start of a stitching line! After a while I altered my technique a bit so I could sew one whole section (like 4 parallel lines) without cutting my thread. It can get mighty messy with all of those threads on the backside. Once they were pulled to the back, I tied the bobbin and top threads together and cut them near the knot. Then comes the fun part of actually getting the cording into the channels.

I did this using a combination of large needles, needle nose pliers and a fierce determination to carry on even when my fingers were so sore! You need the pliers to grab the needle and keep it from slipping as you gather the thick fabric and push the needle through. I can’t imagine even getting one channel complete without them! For the majority of the channels, I used a blunt tapestry needle, but I also used a long (4-5”) sharper needle to quickly get me through shorter channels. I had to be very careful to not puncture my top fabric with the needles and keep the cording (I just used cotton yarn) in place.

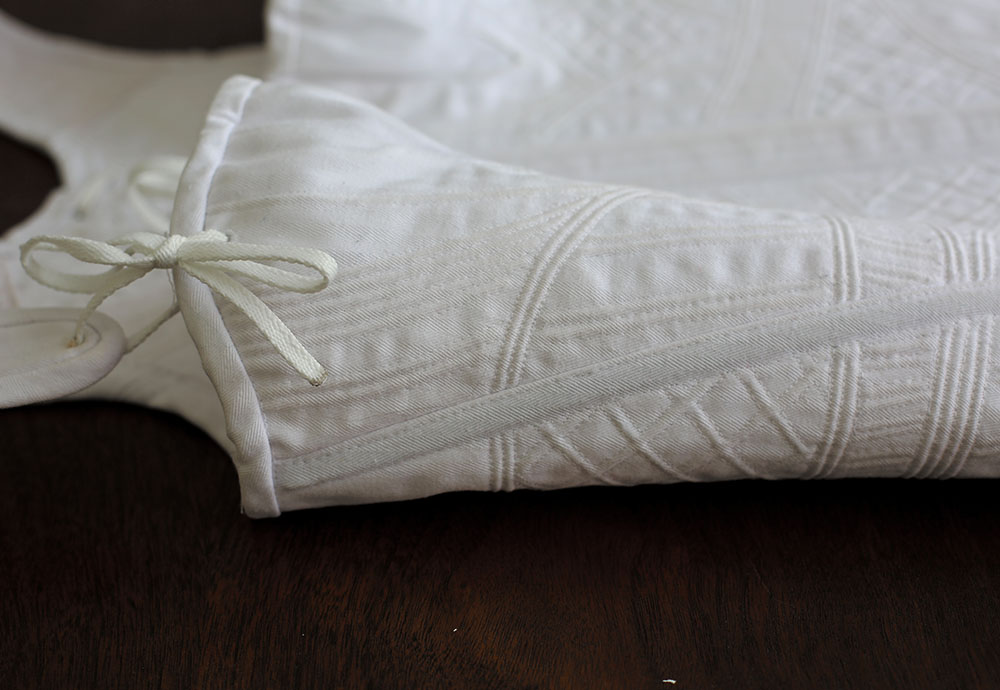
After the gussets were sewn and flossed (part embroidery, part stabilization), I moved onto the back eyelets. Those are all hand sewn and call me crazy but I LOVE doing them. They’re so cute and strong! Finally, after the straps were sewn to the back, I did bias binding around both the top and bottom edges. This is another thing I really love! If you’re precise, it looks so crisp and amazing. During that process I also added a drawstring channel to the top of the front so I could draw in the excess space created by the bust gussets.

The center front busk is a flat wooden piece inserted into a pocket. In my early construction phases I just used a freebie paint stick (as many a historical costumer has recommended online!) but wanted something a little more special and straight (there’s a small indentation about 2” from one edge on both left and right sides I didn’t want showing through my stays. Adam was able to run out to his woodshop and brought back a gorgeous ash version (wood leftover from our dining room floors!) in under 5 minutes! Thanks Adam!

This project took about seven working days to complete (during weekends, while kids are playing or at night). My pattern, fabric and lacing were a gift from my mother in law - thank you Mary!!!) and I harvested old steel bones (creepy!) from a corset I’m not planning on wearing again.

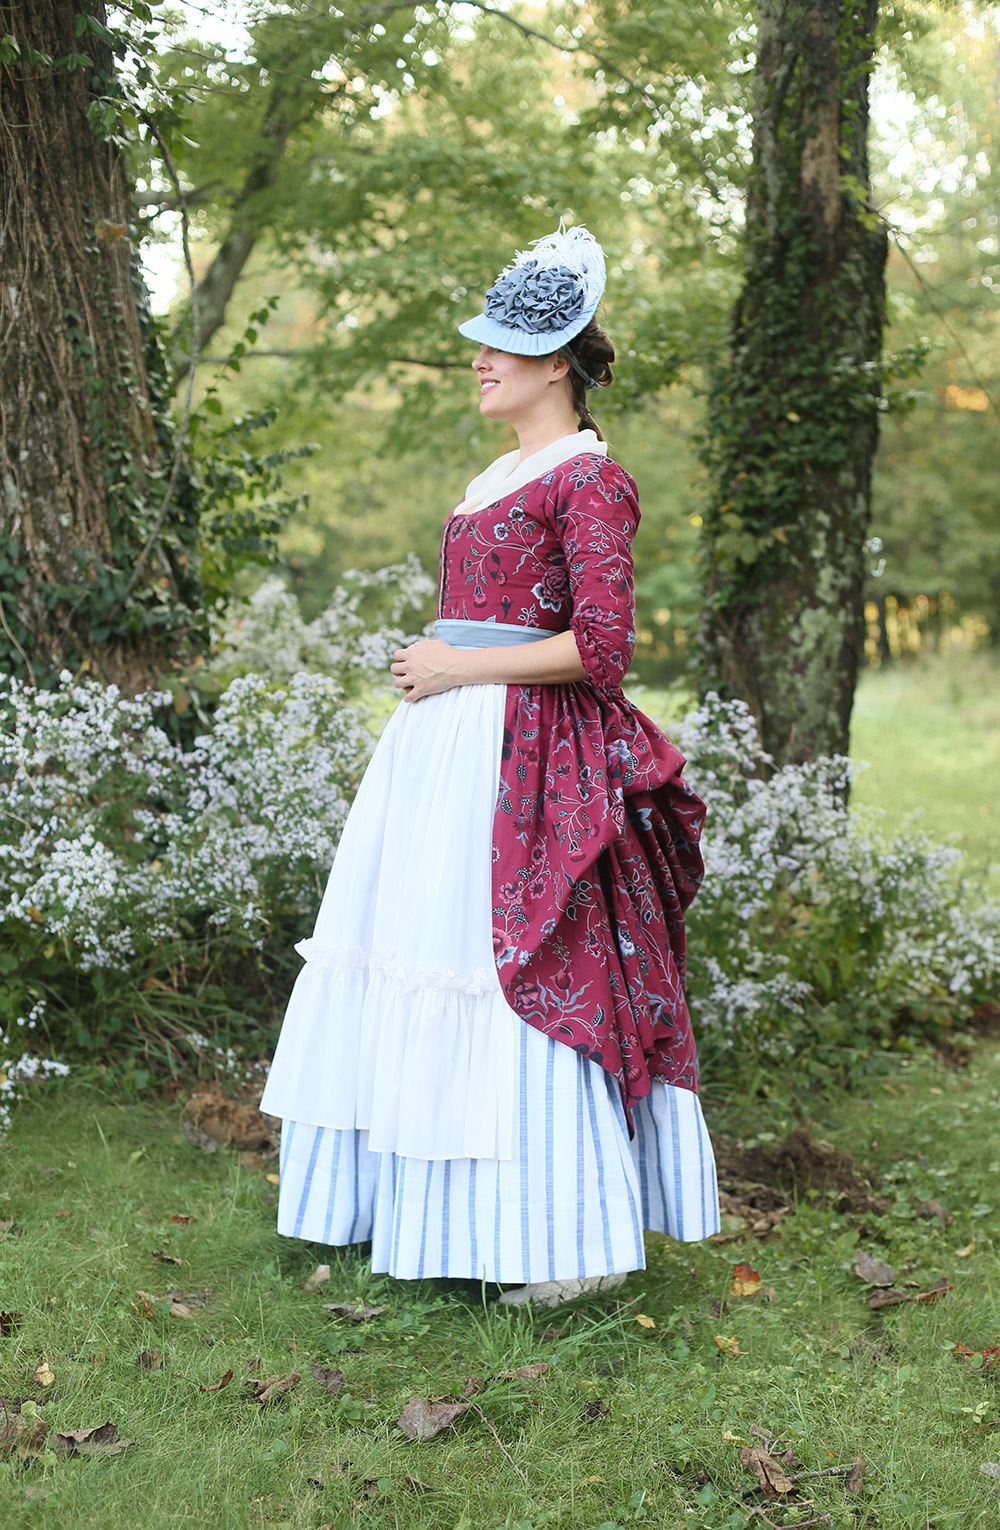
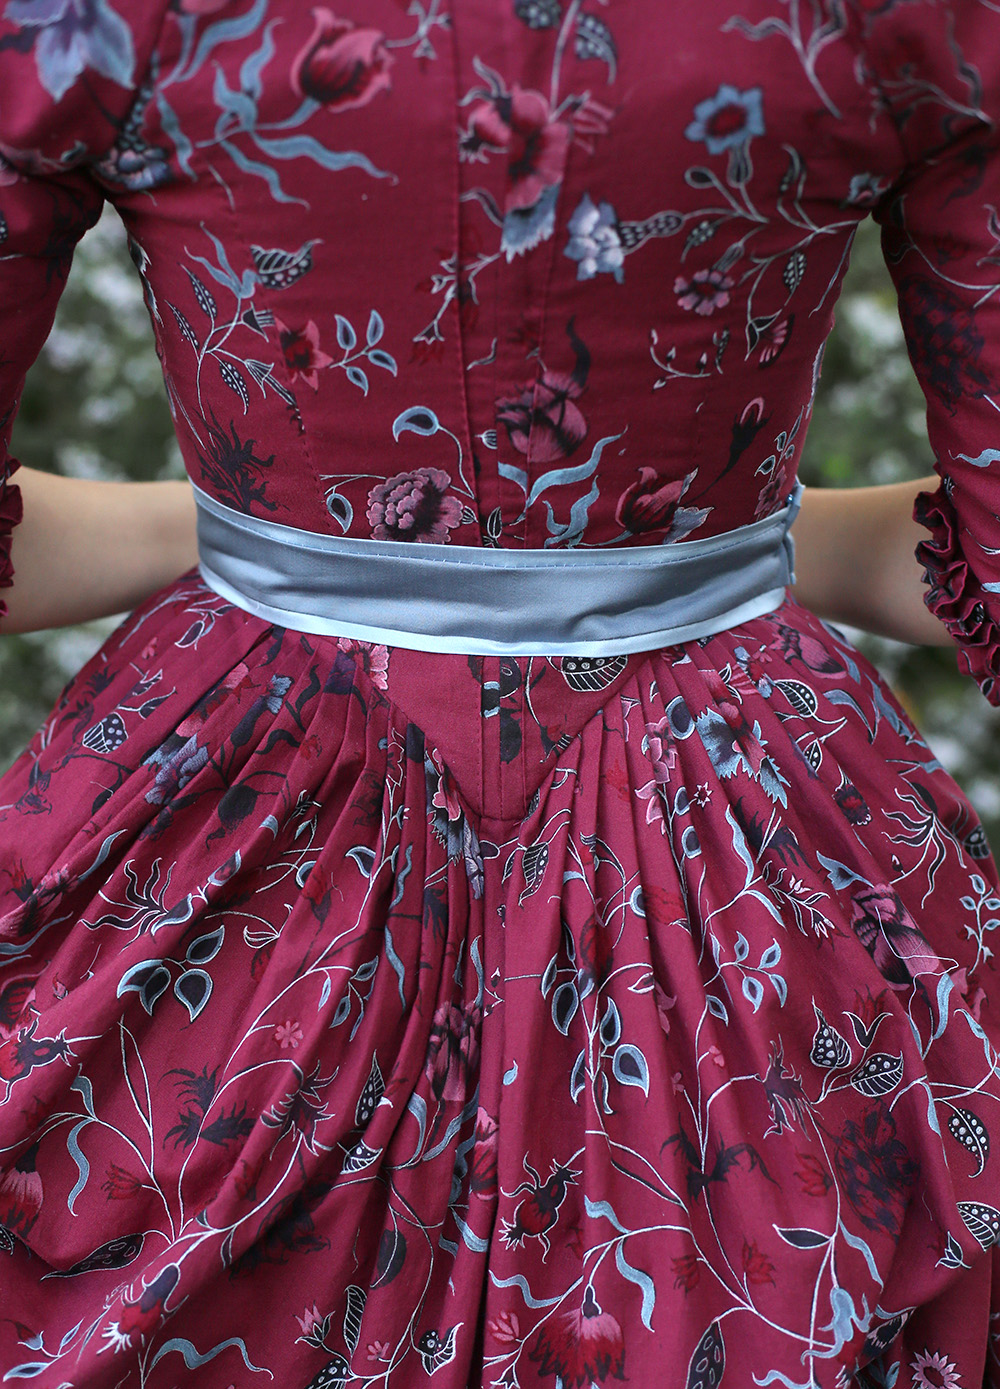
In the end I’m excited to add this piece to my costume closet and start making regency style dresses to be worn over it. If you’d like to see more behind the scenes, check out my Instagram Highlights to watch the process!

Corded Stays Jessica Quirk M.jpg
Corded Stays Jessica Quirk E.jpg
Corded Stays Jessica Quirk A.jpg

Time Traveling | 1780s Italian Gown

1780s Italian Gown 17.jpg
1780s Italian Gown 14.jpg
1780s Italian Gown 1.jpg
1780s Italian Gown 8.jpg

Ta da! Here’s a look at my completed 1780s Italian Gown that I’ve sewn for an event later this month. It was a complicated project - from making historical undergarments like a linen shift, stays, petticoats and bum rolls, to the finishing touches like a silk neck scarf, sheer cotton apron and hand made brain hat! And then there’s the fabric, which was an existing reproduction print that I over dyed and recolored by hand painting in with a new palette of colors. And every single stitch was a pleasure! I learned a lot about hand sewing during this project (I love using silk thread now!) as well as new-to-me techniques. This post is going to be a long one, so grab a cup of tea in your prettiest teacup and let me tell you more about this project!

Historical Background

Italian gowns were very popular during the latter part of the 18th century, replacing English gowns almost entirely. What’s the difference you ask? English gowns look similar from the front in many ways, but the key difference is how the back portion of the dress is constructed. An English gown is fitted to the body through a series of pleats tapering to the waistline and then opening up into a full skirt. The other key style of the 18th century was the Robe a la Francaise which flowed from the top of the back bodice downwards to the hem.

1780s Italian Gown 18.jpg

By contrast, the Italian gown features four main back bodice sections that were cut pattern pieces (not pleated), a very pointed center back and a separate skirt with small (1/4 inch) pleats.

Cotton prints, imported from India (and appropriately called Indienne) were also very popular during this time period. They were predominantly on a white ground and the number of colors increased the cost of the fabric. I started out with a white chintz print, but I wanted to be a little different from the crowd so went with red instead (read more about my inspiration here).

In the end, I wanted this project to be a mix of historical reference and accuracy paired with personal design preferences. Something informed by the past but also not a carbon copy of a portrait or extant museum piece. I think I did that!

If you’d like to see some of the images I used as inspiration, here’s a link to the pinterest board I’ve been adding to for the last three months.

Now… onto the dress!

1780s Italian Gown 15.jpg
1780s Italian Gown 9.jpg

Gown

To create this dress I used the Fig Leaf 101 pattern and cut the sleeves one size smaller. I fit the dress with a mockup after completing my stays, which give the torso a conical shape that minimizes and curve of the bust (and pushes it upwards for major cleavage!)

The fashion fabric is a reproduction cotton (see it white here) I picked up from my insta-friend Penny River Costumes (see her etsy shop here) which was dyed using Rit dye in Wine and then painted in using white gel pens and chalk paint pens. It took between 20-30 hours to complete, but was incredibly satisfying and relaxing! I’d work on it at night after my kids went to bed while drinking some red wine and listening to podcasts. Needless to say I will not be testing this dress out in the rain and plan on being very careful not to get it dirty and will only spot clean it as necessary.

The dress bodice is lined in left over natural linen from my stays. The 18th century seamstress was incredibly thrifty and did whatever she could to conserve fabric and notions. I found myself unpicking seams and reusing the thread and carefully cutting my fabric to make best use of the yardage. Speaking of, I was able to eek the gown out of just three yards of fabric and even pattern matched at the center front bodice! Another thing I love about 18th century sewing - 1/4” seam allowances!

As for the construction, I chose to reference the pattern instructions but used modern techniques. I assembled it in the way you might do a lined tailored jacket by sewing both lining and fashion bodices and then joining them via the neckline/front opening. I used my machine for these seams, as well as the sleeve lining. From there, I turned to hand sewing for attaching the outer sleeves, skirt and finishing the lining. I also made use of the selvage edges in any place possible to get more out of my fabric. The front edge and bottom hems are merely turned once and finished with a tiny running stitch.

At the last minute I pinned up my skirts a la polonaise (not a true polonaise, which has a different bodice cut and construction!), because my hem is just short of the petticoat. I can fix that for the next time I wear it, both by doing proper tapes under the skirt (to hold it up just right) or by shortening my petticoat a smidge. Each skirt is over 9 feet of hem and I have a lot to get done (i.e. the costumes for the rest of my family!) so that’ll come down the line. Hopefully before my event or I’ll continue to wear it poofed up or don my red petticoat instead.

Underpinings

Although they aren’t visible from these pictures, let’s talk a little about what goes on underneath the gown! First there’s the shift - a simple linen slip with a wide neckline, sleeves and knee length hem. Women of the 18th century didn’t have huge wardrobes and to help keep the outer dresses clean longer, shifts were worn. Women of all social classes would have more than one shift that could be regularly laundered. On top of that are my stays. Next is a quilted petticoat that I gave a double turned hem which really gives my skirts more width and bounce! Lastly is a split false bum which accentuates the narrow point of the bodice and fullness of the skirt at the same time.

The shift is from Simplicity by American Duchess, the petticoat was done using my measurements (the hem is 4x my waist circumference) and the false bum is from the American Duchess Guide to 18th Century Dressmaking.

1780s Italian Gown 11.jpg

Petticoat and Apron

I actually made two petticoats for this dress - although I didn’t begin with that plan. I began with a white cotton petticoat, made in a similar manner as the quilted petticoat and dyed it three times to try to get a deeper burgundy than the dress. My first attempt was splotchy, my second was a perfect match (but was too matchy matchy for me which says something!) and the last was a quick dip in black dye.

After my first dye I thought perhaps I had some more white cotton laying around and could do a light tea dye to see if an ivory petticoat would work. That’s when I stumbled on some white and blue striped cotton I got for a song ($2/yd and super wide!) in my stash. I pleated in all of the white stripes so it made a blue waistband and sewed that up in one night. I kept going back and forth on which petticoat to use and at the last minute thought - what about a Georgian style apron?! I had some super sheer cotton (from Burnley and Trowbridge) to spare, so using historical references, I made a simple apron with a pretty ruffle at the hem. I was so against aprons at the start of this project and now it might be my favorite accessory. The brightness of the white was something I changed by a dip in a tea bath to create a very delicate ivory.

Accessories

1780s Italian Gown 2.jpg

I’d like to do a whole post on my hat, so I’ll briefly tell you that I used an old hat I already had, removed the original interior and exterior bands, reblocked it and then covered it with cotton sateen. I used the American Duchess book as a reference for the brainy top and did pleated fabric around the brim. It was entirely hand sewn!

To coordinate, I made a simple belt using left over fabric in two shades of blue! It’s not laying as smooth and flat as I would hope, so I’ll probably take it apart and use a sturdier fabric as as a base and then cover it up again.

At my neckline, I’m wearing a silk gauze scarf tucked into the bodice of my gown. I’d like to add some sort of decoration to the center front - perhaps a bow or a corsage of little pink roses?

I also made a sheer silk cap (using the American Duchess Guide) but did not wear it for these photos. I may go with a huge hairdo and cap for my event just for something different next time I wear it) In the meantime, If you’d like to see it now, check out my instagram stories for videos!

Lastly, my shoes were a gift from my mom and are from American Duchess (as are the buckles). I was planning on thrifting or recovering something else so receiving these was just… ahh, I feel like I could cry. Thank you so much mom, not just for the shoes, but for being encouraging of my sewing my entire life and for being so enthusiastic when I text you updates of my costume. It really means a lot to me! I’m wearing over the knee socks I already had that are DvF, but the color and pattern feel like something a funky Georgian would wear! Hems were intentionally short during this era to show off those beautiful shoes, socks and sexy ankles!

1780s Italian Gown 7.jpg
1780s Italian Gown with American Duchess Kensingtons
1780s Italian Gown 4.jpg

Final Thoughts

You guys - I really love costuming. REALLY REALLY. If you watch my videos you can probably sense my excitement and passion for this hobby. I would say it’s a new hobby, but it reminded me of how I used to do this as a child and it’s so cool how it’s all come full circle. I love history, I love research, I love historical dress, I love using my hands, being technical and artistic in one project and I love how I feel when I wear these pieces. I love thinking of how women would express themselves through clothing 250 years ago just as they do today. I love how pieces were meant to be mixed and matched and how a smart woman would chose colors and fabrics to make the most of her wardrobe. I love the way my skirts flow as I walk, how I hold my posture wearing my stays, how I lift my chin to keep my hat from wobbling around, how my apron and feathers dance in the breeze. I feel like me wearing this ensemble. I love everything about this project and I cannot wait to wear it at an immersive historical event with my husband and children also done up in their 18th century wears! And it should also be noted that the community of women who share their expertise and passion are so inspiring! I’ve messaged so many of them with questions and they are so welcoming and knowledgable! You know who you are! Thank you!

Lastly - are there any Hoosier or Midwestern 18th Century enthusiasts out there? Please be in touch - I would love to host an event locally and have you join!

1780s Italian Gown 12.jpg

Inspired by | Red Chintz

Red Chintz Inspiration 3.jpg

In the past few weeks i have been sewing up a storm and am in the process of putting the finishing touches on my 1780s Italian gown. Before the big reveal, I wanted to pull together my inspiration images and tell you a little more about my fabric choice.

Usually when I set out to sew something, I have an idea in my head of what the finished piece will look like before I even begin. It’s been very different this time around! I had my pattern (Fig Leaf Patterns 101) ordered and I knew I wanted to do a print, but I kept getting tripped up on what combination of fabrics to use. As you can imagine these 18th century dresses take a lot of yardage so there’s the question of cost. I also want to be appropriate for the event we’re attending, so this wouldn’t be a grand courtly number (ie, not silk) either.

Red Chintz Side by Side.jpg
Fries Museum Chintz.jpg

Then one day I bit the bullet when I saw PennyRiver on Instagram doing a little flash sale on some of her stash. She had a Colonial Williamsburg chintz I’d had my eye on and at a discount - so I snapped it up. At just three yards I knew I’d have to be extra careful with my pattern layout and cutting, but at worst I could make it up into a jacket to be worn with a petticoat.

All this long story is to say that after I’d bought the fabric I realized every costumer under the sun seemed to be making white chintz Italian gowns. For good reason too - chintz patterns were all the rage during the 1700s, especially the latter half of the century. But you know me - I can’t look like everyone else! Which finally landed me on the idea of overdying the fabric and repainting in the print by hand.

So that’s exactly what I did.

It took roughly 30 hours after my kids went to bed each night over my dining room table, four white gel pens, three boxes of chalk paint markers and five true crime podcast series. And I am so in love with the final result!

I’d like to have my entire look complete before sharing too much, but there is a little back view of the dress on my instagram. I’ve also realized it’s really tricky to photograph these colors in a way that reflects their real life hues, but hopefully when I have my real photographer (Adam!) he’ll be able to do them justice.

If you’d like to see all of my inspiration, including some images that I didn’t post here, check out my Pinterest board! Can I just time travel back to the 18th century please (for a limited time, I know life was not easy back them for a multitude of reasons, but let’s just embrace the fantasy aspect and ignore the realities!)

Red Chintz Inspiration 5.jpg

Making an American Flag

Home Made American Flag by Jessica Quirk

Between going elbows deep into my own family tree and becoming fully intrenched into the Hamilton soundtrack and Revolutionary War history, somewhere along the way I decided I wanted to sew my own American Flag. 

And it's kind of strange because I haven't felt all that patriotic in the past year and a half. As a little girl I helped my grandma make paper poppies for the American Legion Auxiliary (of which I was a member!), I went to Girl's State in high school. I was (almost) voted Most Likely to be a Politician for senior superlatives (but a boy won... i was the only girl in the category). I've watched almost every presidential debate since I was voting age. I love history, learning about past presidents, period dramas - you name it. 

Hand Made American Flag
Jessica Quirk holding her handmade American Flag

But since late 2016, it's all really turned me off. I've always been really vocal about voting and there are issues I feel strongly about, but I also felt like keeping the peace between my friends and family who voted differently. Sometimes I can run off at the mouth in the fury before the second Tuesday in November. I'll admit to that. But this past election felt more personal and created more fractures than ever before. Maybe I wasn't old enough to really feel it, but when the other party would win the presidency in years past, I'd be a little bummed out but not breaking down into tears. And maybe it's all because social media just makes everyone louder and less civil? Or maybe because (some of) those in charge don't set a very good model for respectful discourse? Or maybe being seven months pregnant and feeling hyper protective of my children made me scared to see our culture start crumbling? 

That's when I turned off the TV (never plugged it in actually) and logged out of facebook. I turned my attention away from the ticker tape on the bottom of the screen and towards being a good mom to my son and new baby. It was the only way for me to keep it together. Now I find myself needing to find something, anything, to find pride in our country. 

So I opened my genealogy charts. When I started tracing my family lines back in time I found at least four direct connections to the Revolutionary War (like my sixth great grandfather Philip Roush - who was at the Battle of Yorktown, no less!!) There's my second great grandfather Carl Schroeder who fought for the Union in the Civil War (and he was an immigrant!). Of course there's Herman Amos Roush who I wrote about a week or so ago and his participation in WWI. Both of my grandfathers served in during World War II - one in the navy, the other as a Merchant Marine carpenter.  And then there's the mothers, sisters, wives and daughters who all had leading and supporting roles at home during those times of conflict. 

These links to the past gave me a renewed sense of pride for (some parts of) American history. My people played a roll in becoming a new nation, the fight against slavery, and ultimately against the hatred of the Nazis. These are things I can be proud of and these things inspired me to make my flag. 

And because I want to be a representative of the America that believes in Life Liberty and the Pursuit of Happiness. I interpret these ideals to mean the right to live your life with whomever you love, to believe in whatever higher power you feel called to (or none at all), to have autonomy over your body, the freedom to vote in a way that best matches your ideals, to speak freely (both in favor of and against the policies of your government), to be treated equally under the law regardless of your gender or skin color and to pursue happiness in a way that benefits you without causing harm to others. These are the parts of being American that I value and this is part of why I've sewn my own flag. 

Last but not least, this year I've set myself a goal of either buying things secondhand or making them myself. I've been slowly updating my front porch (photos soon!) and I felt like an American flag would be a nice final touch. Sure - I could have bought one - maybe even found one at a thrift shop or garage sale - but then I wouldn't have had the pleasure of embroidering the stars or sewing the stripes. Could a great grandmother of mine made such a flag years ago? Would she have stitched her name into the corner? I'm thinking about adding at least my initials in matching thread as the final touch. What an heirloom this might be!

So why did I make a flag? To get patriotic again, remember my ancestors, and to use my hands. And I'm so happy to have it ready in time for the Fourth of July! As for the actual construction, I had initially planned on this being a DIY post, but as I went further and further into the project, I realized I'm unable to write instructions for something this advanced. If you've had a lot of quilting experience I believe it's something you could achieve, but it's not a beginners project. That said, I do have some progress shots below and I've included a little commentary on each one!

I am so proud of my American flag and what it represents to me.  

Home Made American Flag Front.jpg
Girl Holding American Flag Jessica Quirks Homemade American Flag
Flag in Breeze 1.jpg