Time Traveling | 1780s Italian Gown
/


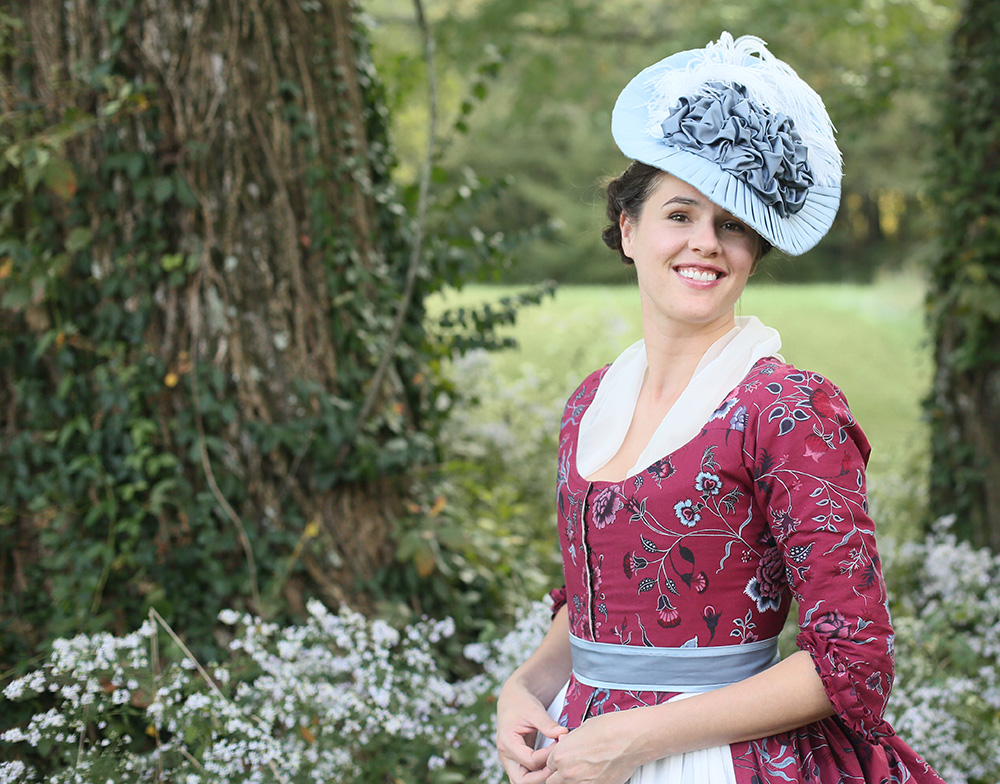
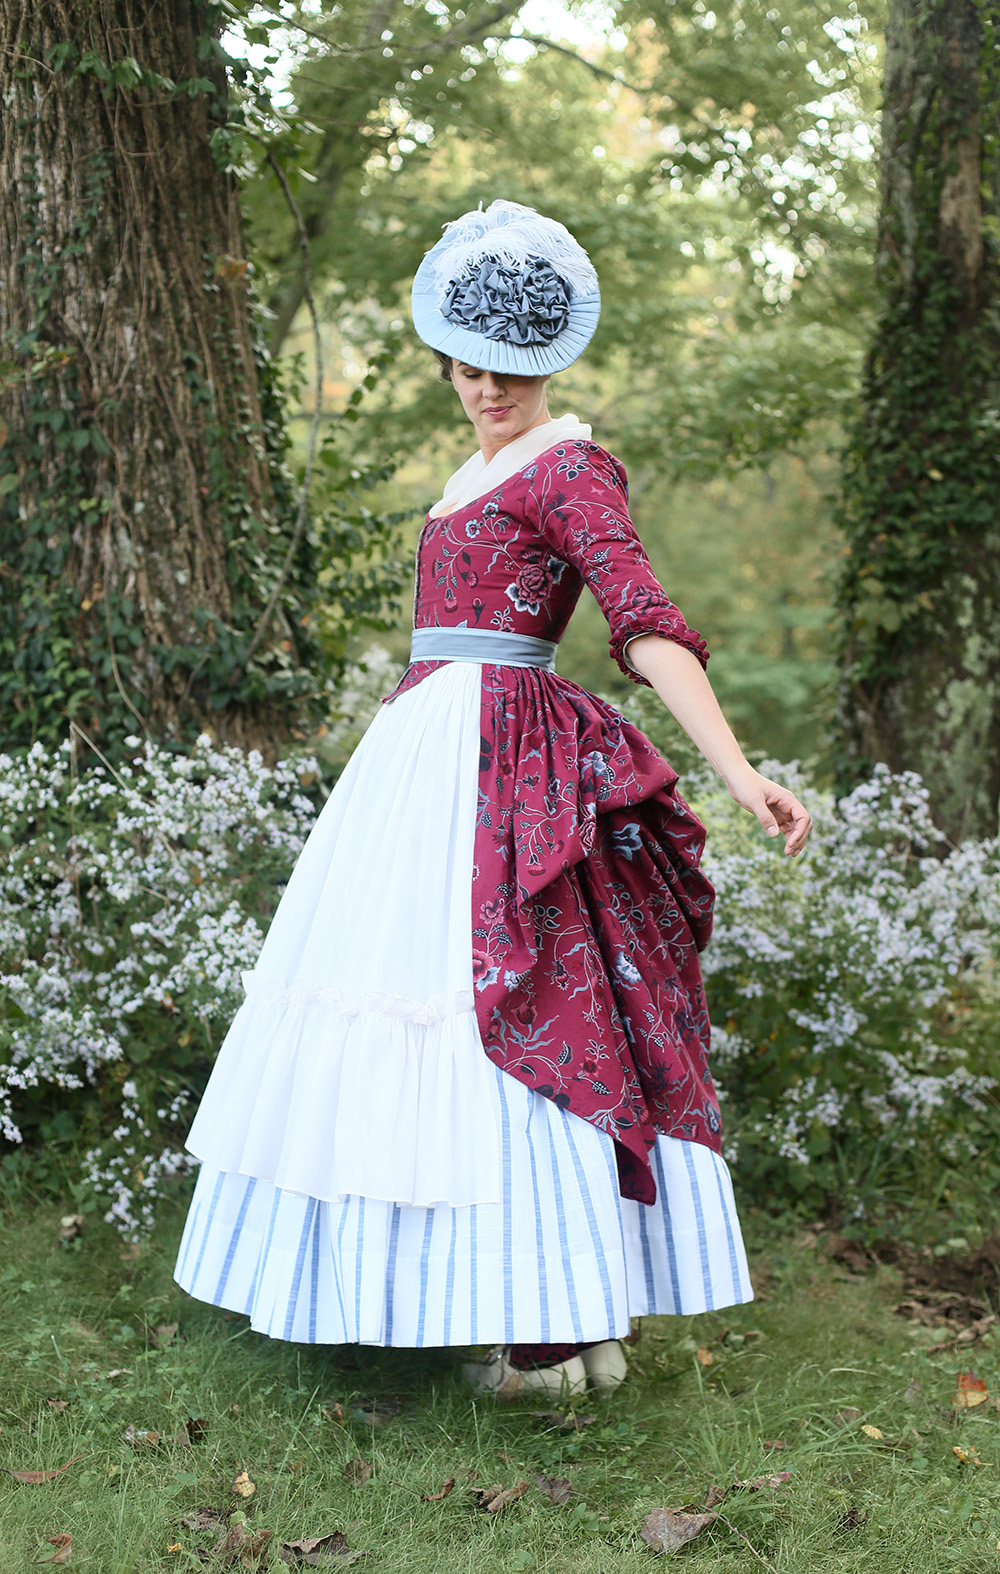
Ta da! Here’s a look at my completed 1780s Italian Gown that I’ve sewn for an event later this month. It was a complicated project - from making historical undergarments like a linen shift, stays, petticoats and bum rolls, to the finishing touches like a silk neck scarf, sheer cotton apron and hand made brain hat! And then there’s the fabric, which was an existing reproduction print that I over dyed and recolored by hand painting in with a new palette of colors. And every single stitch was a pleasure! I learned a lot about hand sewing during this project (I love using silk thread now!) as well as new-to-me techniques. This post is going to be a long one, so grab a cup of tea in your prettiest teacup and let me tell you more about this project!
Historical Background
Italian gowns were very popular during the latter part of the 18th century, replacing English gowns almost entirely. What’s the difference you ask? English gowns look similar from the front in many ways, but the key difference is how the back portion of the dress is constructed. An English gown is fitted to the body through a series of pleats tapering to the waistline and then opening up into a full skirt. The other key style of the 18th century was the Robe a la Francaise which flowed from the top of the back bodice downwards to the hem.
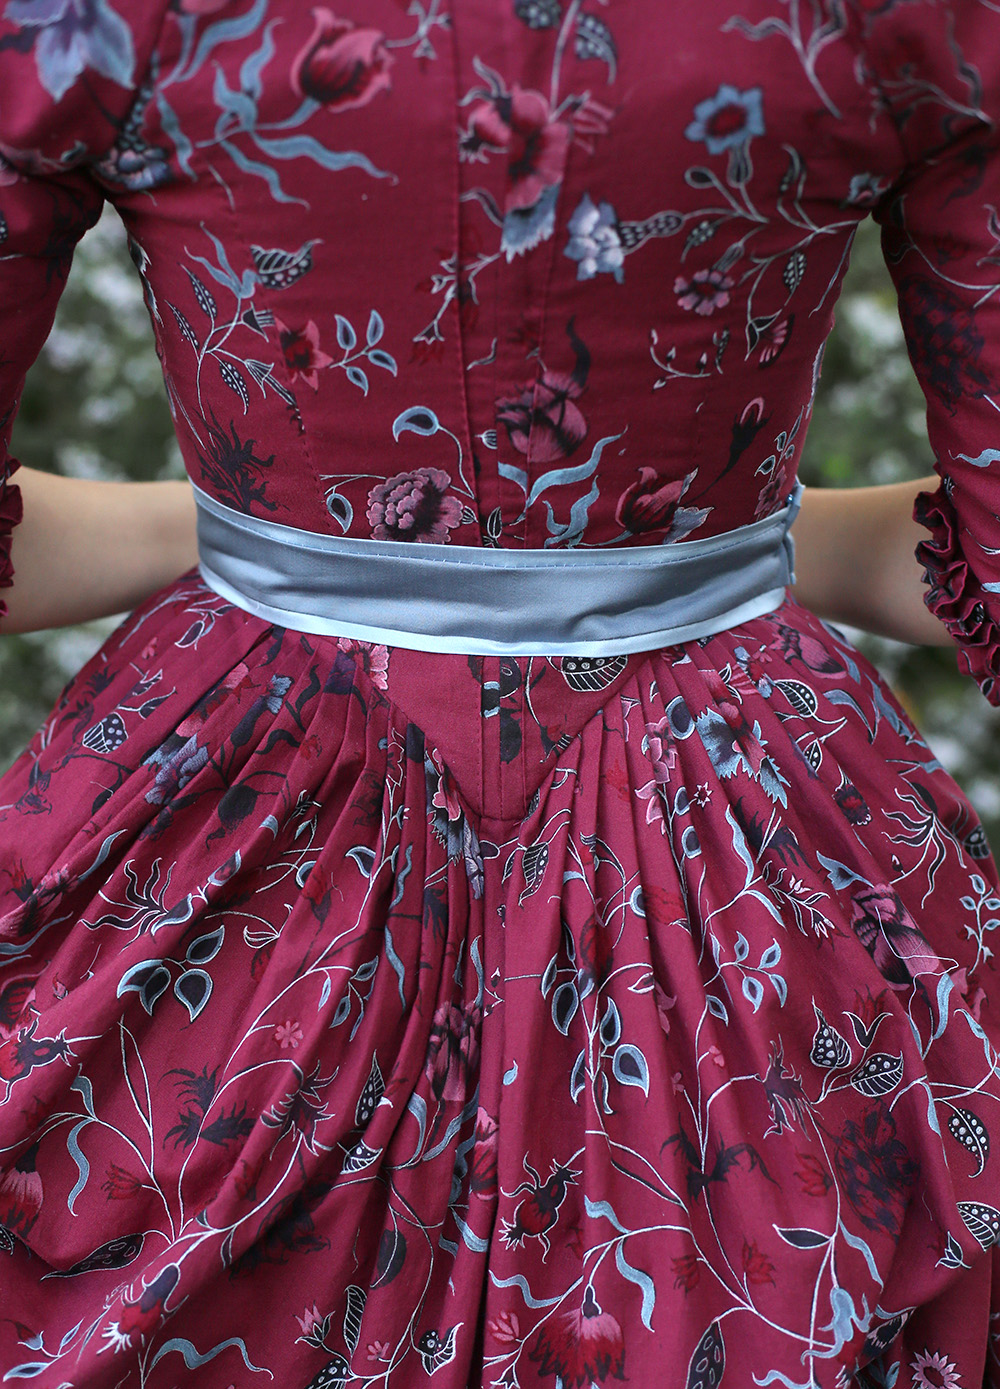
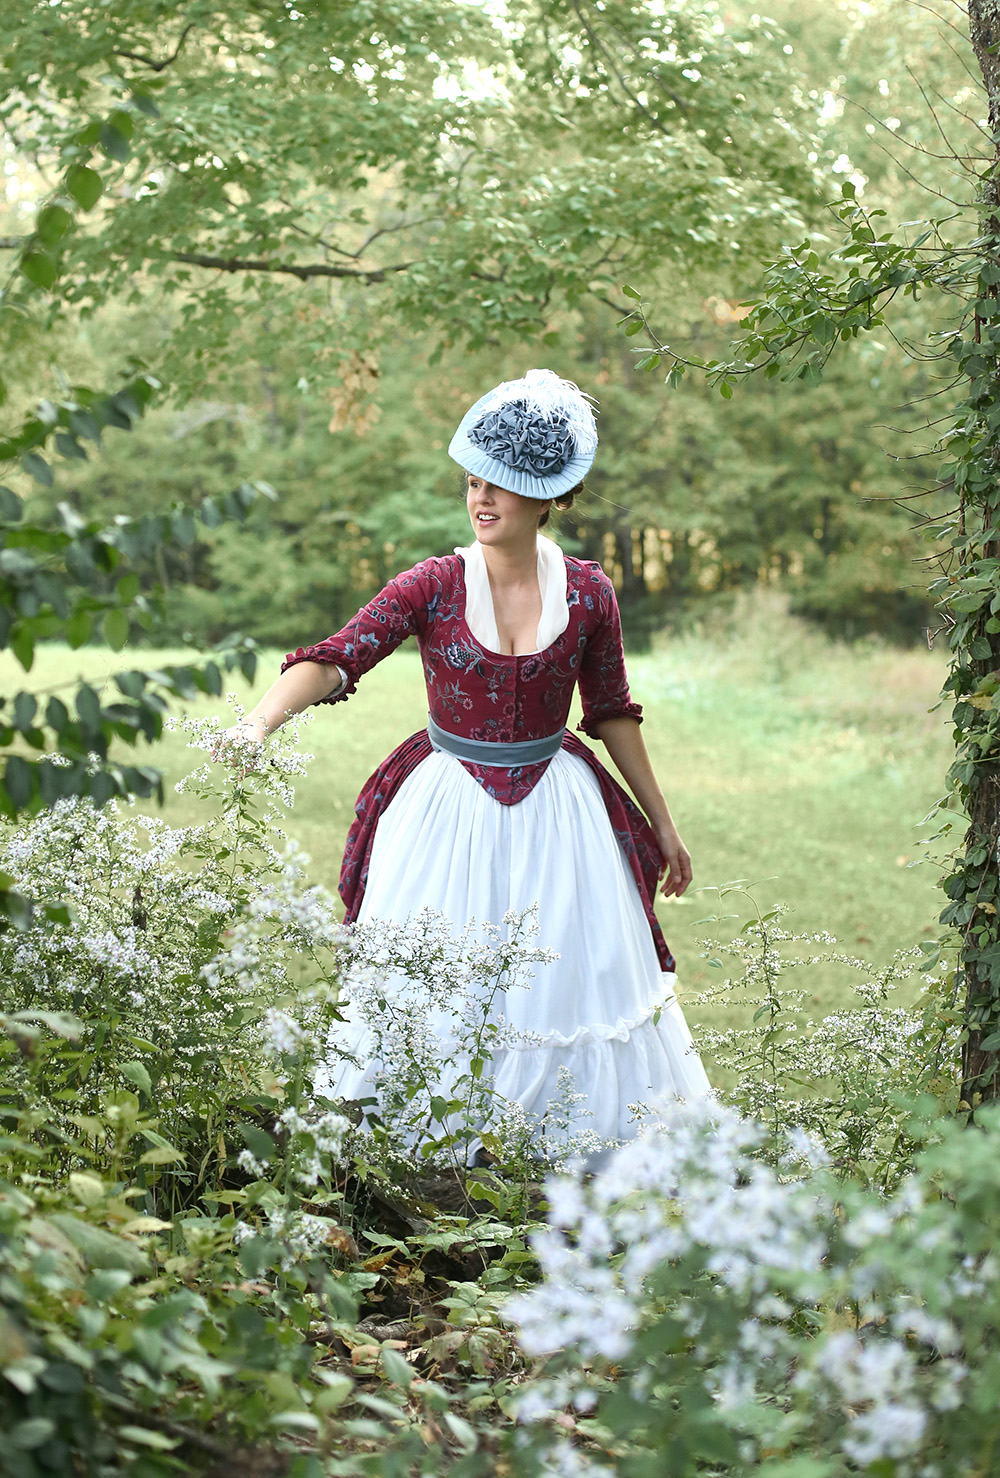
By contrast, the Italian gown features four main back bodice sections that were cut pattern pieces (not pleated), a very pointed center back and a separate skirt with small (1/4 inch) pleats.
Cotton prints, imported from India (and appropriately called Indienne) were also very popular during this time period. They were predominantly on a white ground and the number of colors increased the cost of the fabric. I started out with a white chintz print, but I wanted to be a little different from the crowd so went with red instead (read more about my inspiration here).
In the end, I wanted this project to be a mix of historical reference and accuracy paired with personal design preferences. Something informed by the past but also not a carbon copy of a portrait or extant museum piece. I think I did that!
If you’d like to see some of the images I used as inspiration, here’s a link to the pinterest board I’ve been adding to for the last three months.
Now… onto the dress!

Gown
To create this dress I used the Fig Leaf 101 pattern and cut the sleeves one size smaller. I fit the dress with a mockup after completing my stays, which give the torso a conical shape that minimizes and curve of the bust (and pushes it upwards for major cleavage!)
The fashion fabric is a reproduction cotton (see it white here) I picked up from my insta-friend Penny River Costumes (see her etsy shop here) which was dyed using Rit dye in Wine and then painted in using white gel pens and chalk paint pens. It took between 20-30 hours to complete, but was incredibly satisfying and relaxing! I’d work on it at night after my kids went to bed while drinking some red wine and listening to podcasts. Needless to say I will not be testing this dress out in the rain and plan on being very careful not to get it dirty and will only spot clean it as necessary.
The dress bodice is lined in left over natural linen from my stays. The 18th century seamstress was incredibly thrifty and did whatever she could to conserve fabric and notions. I found myself unpicking seams and reusing the thread and carefully cutting my fabric to make best use of the yardage. Speaking of, I was able to eek the gown out of just three yards of fabric and even pattern matched at the center front bodice! Another thing I love about 18th century sewing - 1/4” seam allowances!
As for the construction, I chose to reference the pattern instructions but used modern techniques. I assembled it in the way you might do a lined tailored jacket by sewing both lining and fashion bodices and then joining them via the neckline/front opening. I used my machine for these seams, as well as the sleeve lining. From there, I turned to hand sewing for attaching the outer sleeves, skirt and finishing the lining. I also made use of the selvage edges in any place possible to get more out of my fabric. The front edge and bottom hems are merely turned once and finished with a tiny running stitch.
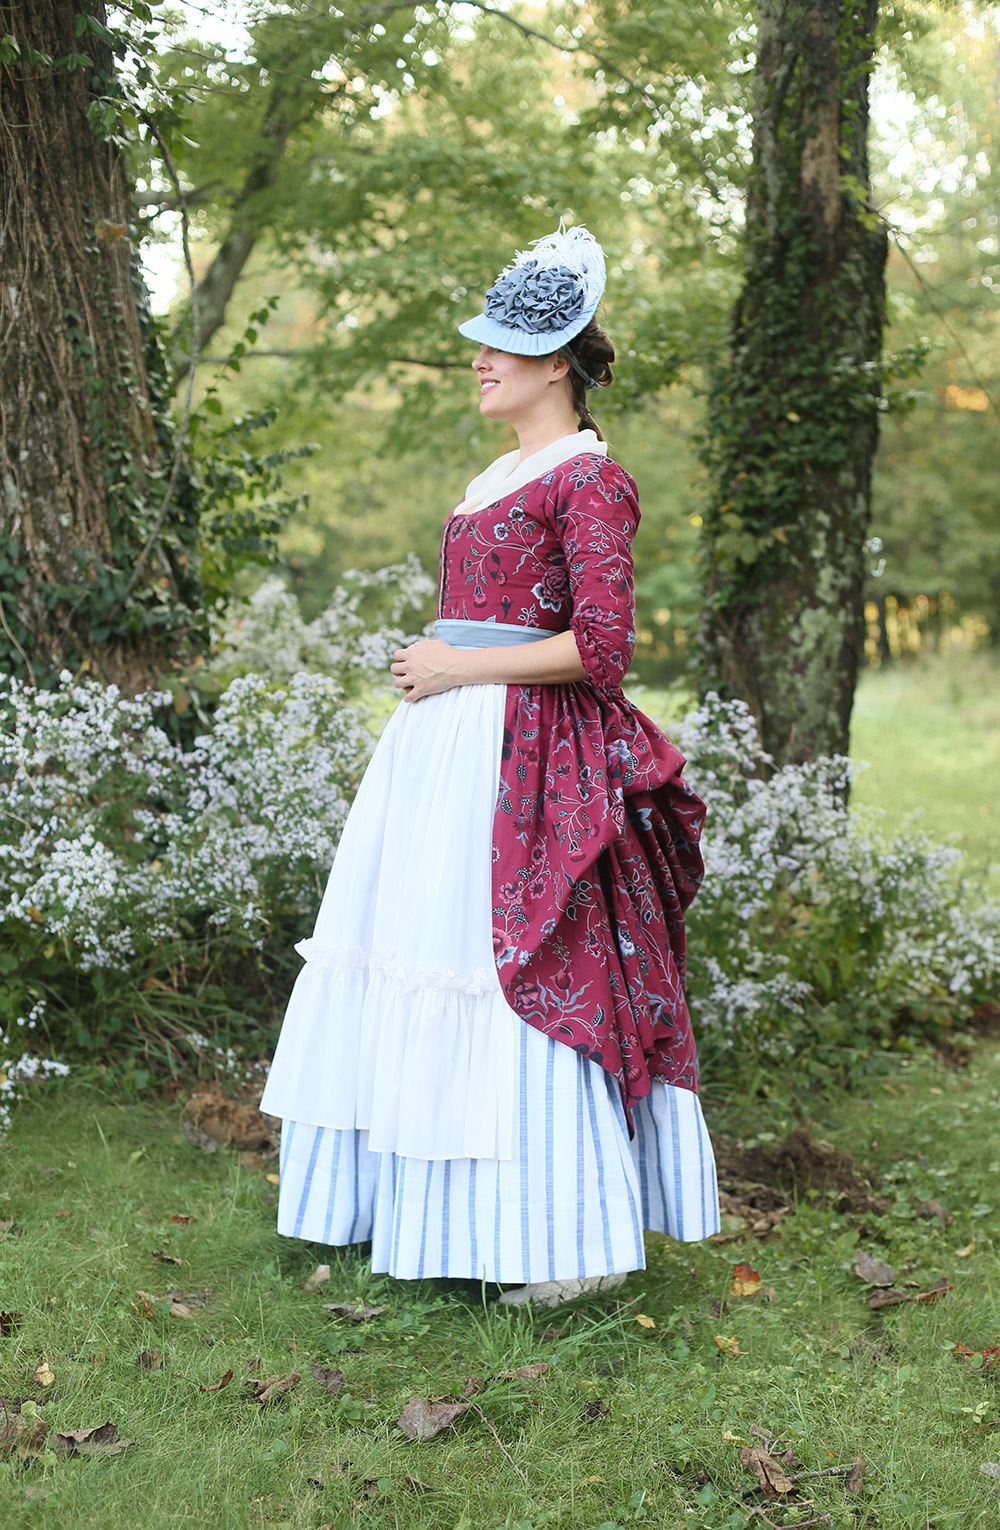
At the last minute I pinned up my skirts a la polonaise (not a true polonaise, which has a different bodice cut and construction!), because my hem is just short of the petticoat. I can fix that for the next time I wear it, both by doing proper tapes under the skirt (to hold it up just right) or by shortening my petticoat a smidge. Each skirt is over 9 feet of hem and I have a lot to get done (i.e. the costumes for the rest of my family!) so that’ll come down the line. Hopefully before my event or I’ll continue to wear it poofed up or don my red petticoat instead.
Underpinings
Although they aren’t visible from these pictures, let’s talk a little about what goes on underneath the gown! First there’s the shift - a simple linen slip with a wide neckline, sleeves and knee length hem. Women of the 18th century didn’t have huge wardrobes and to help keep the outer dresses clean longer, shifts were worn. Women of all social classes would have more than one shift that could be regularly laundered. On top of that are my stays. Next is a quilted petticoat that I gave a double turned hem which really gives my skirts more width and bounce! Lastly is a split false bum which accentuates the narrow point of the bodice and fullness of the skirt at the same time.
The shift is from Simplicity by American Duchess, the petticoat was done using my measurements (the hem is 4x my waist circumference) and the false bum is from the American Duchess Guide to 18th Century Dressmaking.
Petticoat and Apron
I actually made two petticoats for this dress - although I didn’t begin with that plan. I began with a white cotton petticoat, made in a similar manner as the quilted petticoat and dyed it three times to try to get a deeper burgundy than the dress. My first attempt was splotchy, my second was a perfect match (but was too matchy matchy for me which says something!) and the last was a quick dip in black dye.
After my first dye I thought perhaps I had some more white cotton laying around and could do a light tea dye to see if an ivory petticoat would work. That’s when I stumbled on some white and blue striped cotton I got for a song ($2/yd and super wide!) in my stash. I pleated in all of the white stripes so it made a blue waistband and sewed that up in one night. I kept going back and forth on which petticoat to use and at the last minute thought - what about a Georgian style apron?! I had some super sheer cotton (from Burnley and Trowbridge) to spare, so using historical references, I made a simple apron with a pretty ruffle at the hem. I was so against aprons at the start of this project and now it might be my favorite accessory. The brightness of the white was something I changed by a dip in a tea bath to create a very delicate ivory.
Accessories

I’d like to do a whole post on my hat, so I’ll briefly tell you that I used an old hat I already had, removed the original interior and exterior bands, reblocked it and then covered it with cotton sateen. I used the American Duchess book as a reference for the brainy top and did pleated fabric around the brim. It was entirely hand sewn!
To coordinate, I made a simple belt using left over fabric in two shades of blue! It’s not laying as smooth and flat as I would hope, so I’ll probably take it apart and use a sturdier fabric as as a base and then cover it up again.
At my neckline, I’m wearing a silk gauze scarf tucked into the bodice of my gown. I’d like to add some sort of decoration to the center front - perhaps a bow or a corsage of little pink roses?
I also made a sheer silk cap (using the American Duchess Guide) but did not wear it for these photos. I may go with a huge hairdo and cap for my event just for something different next time I wear it) In the meantime, If you’d like to see it now, check out my instagram stories for videos!
Lastly, my shoes were a gift from my mom and are from American Duchess (as are the buckles). I was planning on thrifting or recovering something else so receiving these was just… ahh, I feel like I could cry. Thank you so much mom, not just for the shoes, but for being encouraging of my sewing my entire life and for being so enthusiastic when I text you updates of my costume. It really means a lot to me! I’m wearing over the knee socks I already had that are DvF, but the color and pattern feel like something a funky Georgian would wear! Hems were intentionally short during this era to show off those beautiful shoes, socks and sexy ankles!


Final Thoughts
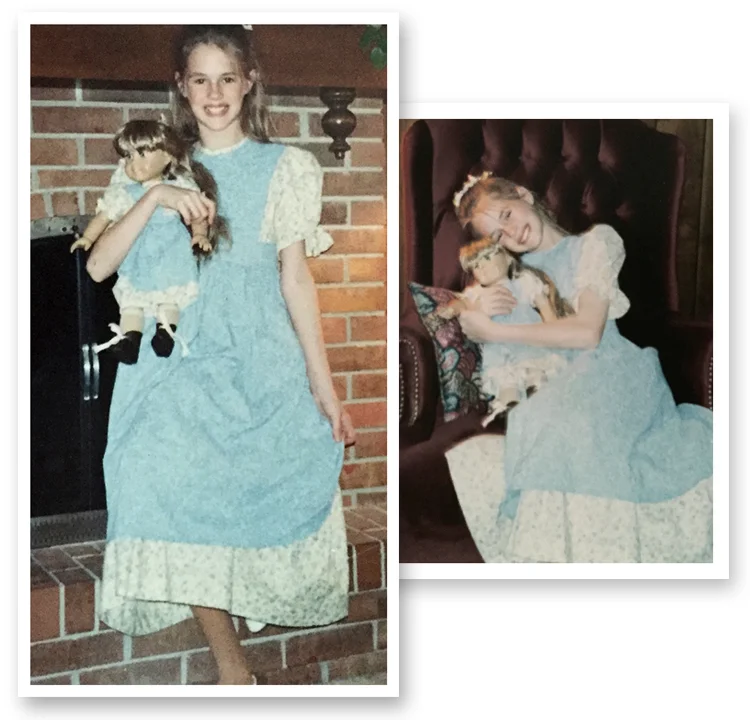
You guys - I really love costuming. REALLY REALLY. If you watch my videos you can probably sense my excitement and passion for this hobby. I would say it’s a new hobby, but it reminded me of how I used to do this as a child and it’s so cool how it’s all come full circle. I love history, I love research, I love historical dress, I love using my hands, being technical and artistic in one project and I love how I feel when I wear these pieces. I love thinking of how women would express themselves through clothing 250 years ago just as they do today. I love how pieces were meant to be mixed and matched and how a smart woman would chose colors and fabrics to make the most of her wardrobe. I love the way my skirts flow as I walk, how I hold my posture wearing my stays, how I lift my chin to keep my hat from wobbling around, how my apron and feathers dance in the breeze. I feel like me wearing this ensemble. I love everything about this project and I cannot wait to wear it at an immersive historical event with my husband and children also done up in their 18th century wears! And it should also be noted that the community of women who share their expertise and passion are so inspiring! I’ve messaged so many of them with questions and they are so welcoming and knowledgable! You know who you are! Thank you!
Lastly - are there any Hoosier or Midwestern 18th Century enthusiasts out there? Please be in touch - I would love to host an event locally and have you join!