Jessica Bakes | Rainbow Cake

Cake Stand.jpg
Rainbow Cake Layers
Rainbow Cake

A few weeks ago our little Felix turned four and requested a rainbow birthday cake. The end result was really pretty easy and incredibly delicious! This isn't a really a recipe (I used a box mix!) but here's how we got the effect.

We used one box of white cake mix and divided it into six bowls (a heaping 1/2 C). I've seen them done with traditional thick layers, but that ends up being like 3 full cakes and this normal sized guy was enough sugar for this family over the course of a weekend!

Next we added food coloring (nothing fancy - just the standard kind you get in the baking aisle) and dolloped each batch out into a very thin layer in a 9" cake pan. Bake at 350 for about 10 minutes. I did three at a time. 

Once cool (that happens pretty quickly!), layer them up! I frosted this cake with my favorite icing - approximately two packages of cream cheese and 5 C of powdered sugar and a little squeeze of almond flavoring. 

As you can see, the cakes aren't the exact same size, but I don't think that takes away from the effect once the cake is cut into! In fact, I almost always do my cakes "naked' and only use frosting between layers (here's Beatrix's first birthday cake, and Felix's first birthday cake - OMG look at how tiny he was! Time flies (and drags on. The days are long and the years are short)

To top it off we did a generous topping of rainbow sprinkles and a few decorative stars with the remaining icing. 

Rainbow Cake Slice.jpg
Box Mix Rainbow Cake DIY

Our Farmhouse | White Washing a Stone Fireplace

Stone Fireplace Makeover

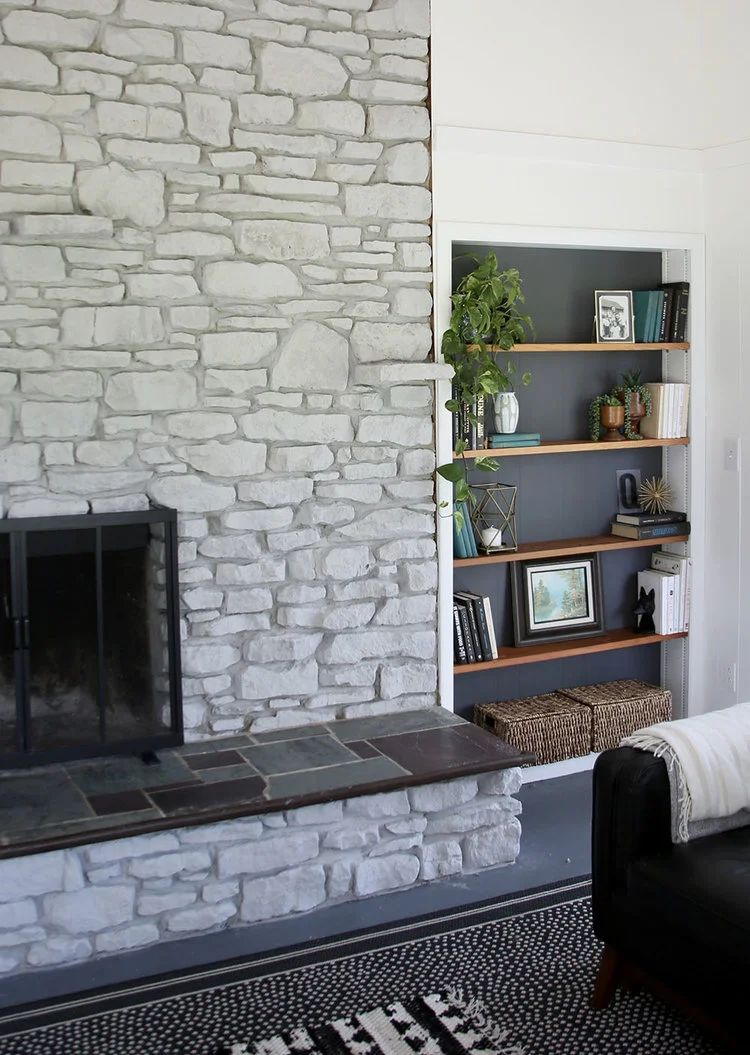
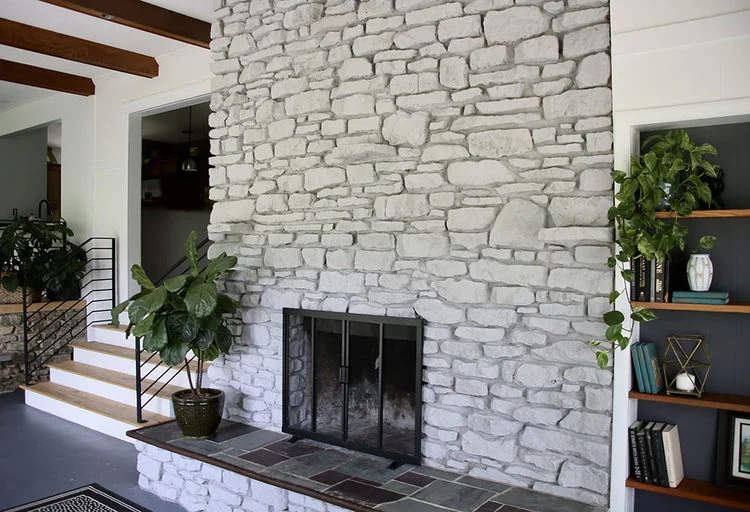
One of the most dramatic updates in my home cost less than $100 and was something I did myself over the course of a (kid free) weekend - white washing my stone fireplace. A lot of you have been asking me for more details, so buckle up! Here we go. 

White Washed Stone Fireplace
White Washing Fireplace

The giant sandstone fireplace was a huge selling point for us - we use it daily in the winter and love the cozy feeling a wood burning fireplace brings to a home. One thing I didn't love - the soot stains from years of use and the dirty look that came along with it. I tried scrubbing it but never got the stone to look the way I wanted. I also don't love brown tones, so... I took a risk and I love the final result.

But before we go on - I must caution you - this is a permanent solution. The porous nature of the stone absorbs the white wash and there is NO GOING BACK. I've seen some not-so-great examples on Pinterest that really had me pressing pause on this project for a long time. That said, there are also some gorgeous results out there, so I knew it was possible. 

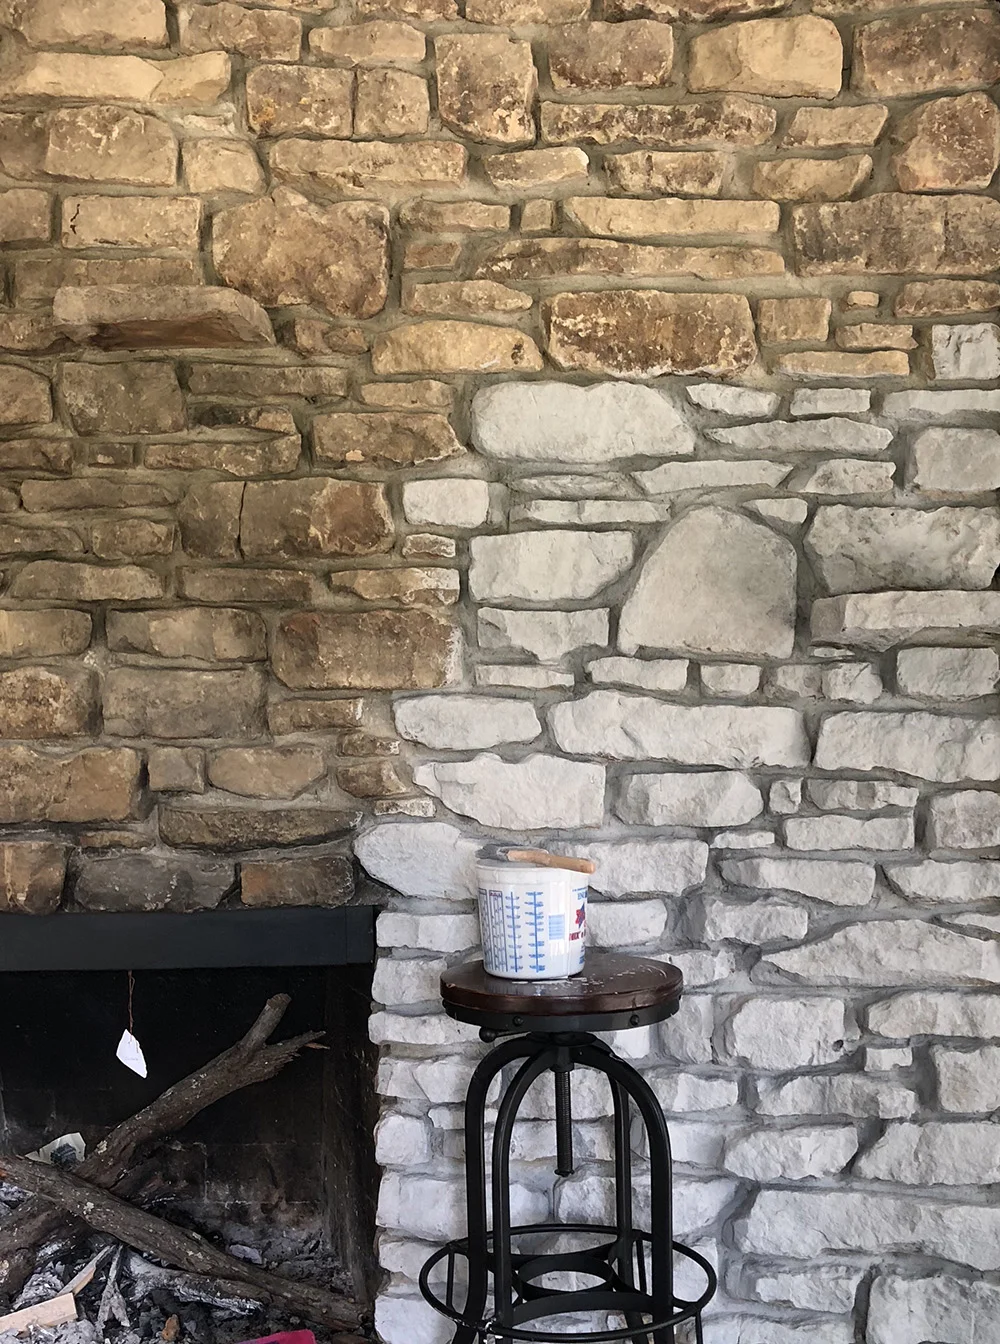
The process is pretty simple. I chose Rustoleum Chalked paint in Aged Grey and used a measuring bucket to ensure I could get the same ratio of paint to water with each batch (1:1 worked great for me). Once you've mixed up your paint and water, all you need is a stiff brush, rags to dab the wet slurry, a couple of awesome podcasts and time. Check out these progress shots (click to for larger view)

Fireplace Lead.jpg

I think this project was successful for a couple reasons:

 The 1:1 mixture of paint allowed for some of the natural variation in the color of the stone to come through. No matter what ratio you use, make note of it and repeat it! 

Matte paint is a must. Chalk paint worked well for this and the grey tone looks really nice against my bright white walls.

I worked in small sections and dabbed excess liquid as I went, especially in places I wantd some of the rock patterns to be more visible.

The actual texture of the stone work has a lot of highlights and shadows which adds to the dimension of the finished project.

I'm thrilled with the final results! It brightens the room by reflecting all of that pretty natural light and maintains an organic look. If you haven't seen the full room make over, you can do that here.

White+Washed+Stone+Fireplace+and+Sunroom+Makeover.jpg

Lastly, this is kind of wild, but I was nominated and selected as a finalist by Domino Magazine for Best Renovation Blog as part of their Design Blog Awards. WTH!? The winner will get featured on their site and win a trip to Chicago! Public votes will determine that! If you've enjoyed any of my before and after makeovers, I'd love your support! 

Ā 

Ā 

Time Traveling | Making 18th Century Stays

Stays Leader 3.jpg
Embroidery 1.jpg
Stays Full 3.jpg
Stays Embroidery.jpg
Stays Leader 4.jpg

Voila! I've put the finishing touches on my 18th century stays and I could not be more excited and proud of the final result. I've made these as the foundation to complete my 1780's style costume that I'll wear this fall with my family to a Revolutionary War re-enactment. But before I go into any of those plans, let me tell you more about this project!

Historical Background

Once upon a time, stays were the foundation to every woman's daily outfit. They provide an elegant conical shape, give back support, lift and enhance the bosom (hello!) and inform one's posture. Women of all social classes wore stays, which later evolved into corsets. Normally stays would be worn with a linen shift or chemise underneath, but I haven't completed mine yet so I'm just wearing a simple white dress I already had in my closet. 

Inspiration

I wanted my stays to have an antique quality to them, which is why I chose natural linen as my fashion fabric. I also knew I wanted to make them a little extra special, and chose to embroidery an 18th century design. I'm not going for a super bourgeois look nor am I wanting to be a laborer/camp follower. So although this fabric does lend itself to a more modest (financially speaking) approach, I think the embroidery makes it special and a little more luxurious. All that said, no one but me and you will see this piece because it will be completely covered by my gown and petticoats!  

Embroidery 3.jpg

Embroidery

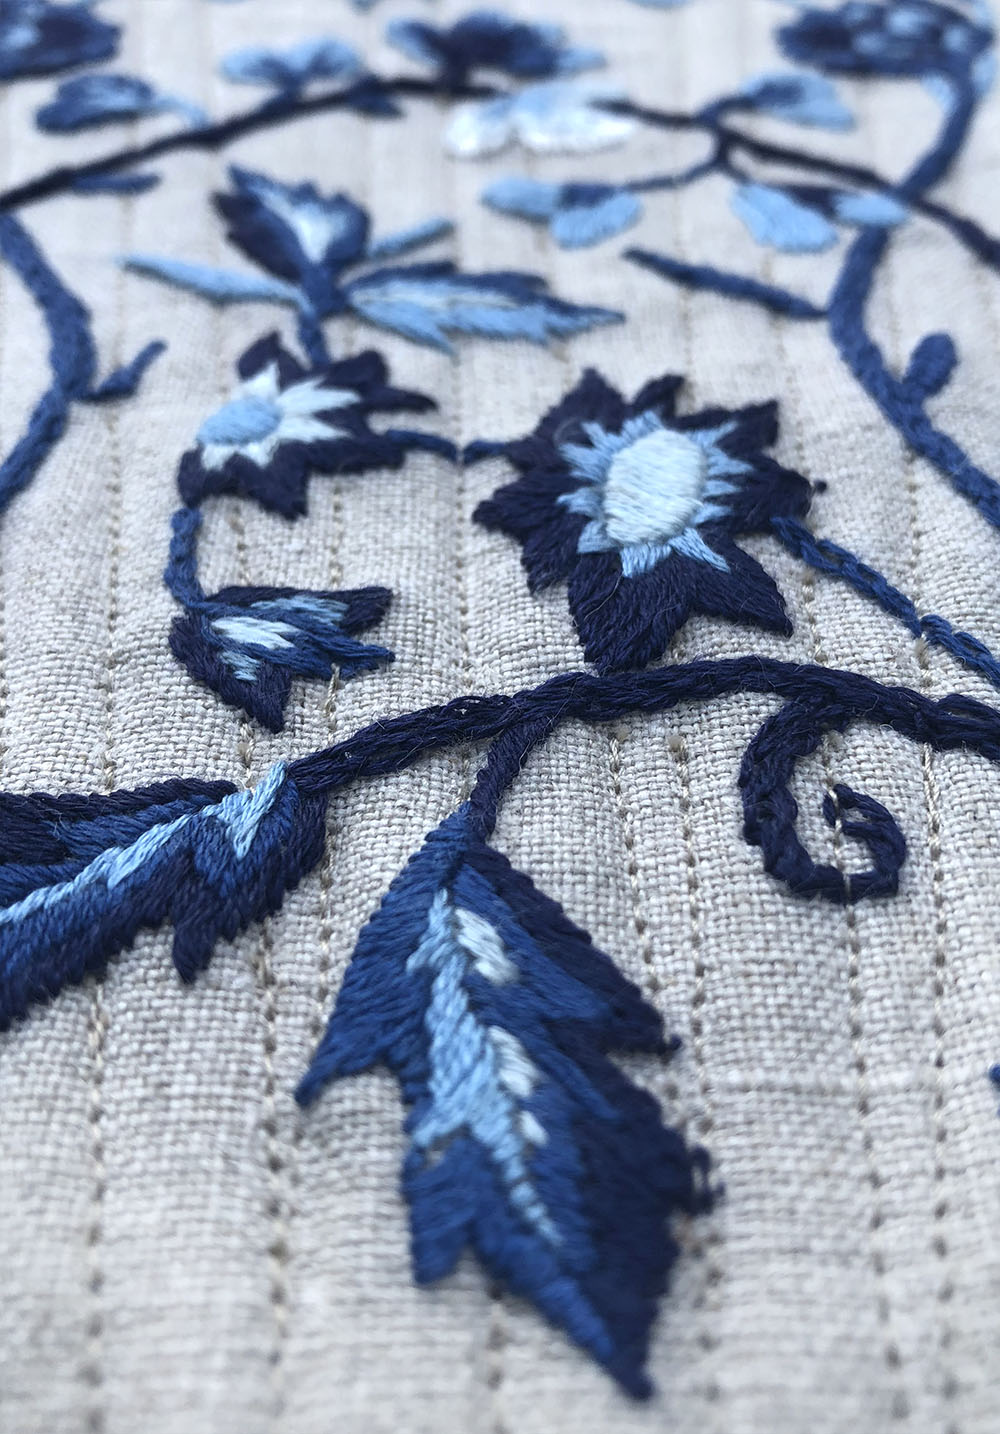
The floral design I've used was actually something I found at a garage sale! The pattern was part of a Colonial Williamsburg embroidery kit for a bell pull. I used this design as a basis by scanning it into Photoshop and adjusting it to fit the center front pattern piece (which was a PDF download). Next I printed that design out to scale on adhesive embroidery paper, which dissolves in water once you have completed your design. It was really cool! I also recolored it into shades of blue, which really pop against the natural linen! 

Pattern

I purchased the digital download from RedThreaded patterns online. I met the proprietress Cynthia at the Jane Austen Festival and she was great! I had a look at her stock corsets and this particular 18th century design spoke to me. I like the look of the horizontal boning and the shaping of the all in one tabs. I sewed a medium and did not make alterations to the pattern pieces. I did add some additional decorative boning channels because I love the ribbed effect it creates.

Stitching Notes

Stays Back.jpg

Because I embroidered the motif directly onto the linen, I did a lot of stopping and starting with my boning channels, as I did not want to sew over/through my design (minus some small branches). The end result is so beautiful and I don't think the starts and stops will negatively effect the functionality!

I used a faux silk charmeuse (It's poly and the best I could find locally! It has a really nice hand feel for not being the real thing) for my binding and hand sewed it around the entirety of the stays, using the bias to create as smooth of an effect as possible. This was fiddly, but I actually really loved doing the hand work on this step. I then wrapped the bias around the edges and basted it into place. Finally, I stitched in the ditch oh-so-carefully to hold the binding in place.

I also really loved doing all of the eyelets BY HAND (there are 24 of them!) Using a sewing awl and button thread, these lil guys are so sturdy. And they're beautiful! 

Finally - I did end up making two orders for my boning and had to adjust the lengths (I needed longer) than the pattern notions suggested. And that's my fault because the pattern says to measure before you order (but I wanted all of the supplies at once...)

Final Thoughts

I LOVED this project. All of the handwork was really enjoyable and something I am able to do as my children play nearby or while they are napping (getting time with my sewing machine is a different story). Sewing it was a pleasure and it's fun to create something with such attention to detail, even if I'm the only one who will be able to appreciate them.

Actually lacing up and wearing these stays was even better than making them!! I love the silhouette it creates and how it really directs how you move about. Weird as it may sound, I always feel more myself when I'm dressing in costume and this foundation garment is no exception. It's remarkably comfortable and doesn't constrict my breathing as you might expect. Now I cannot wait to get started on my 1780s Italian style gown! 

Project Sources

Stays Happy 1.jpg
IMG_3335 copy.jpg