Jessica Makes: Blue Suede Shoes

Blue Suede Shoes 2.jpg
Blue Suede Shoes 3.jpg

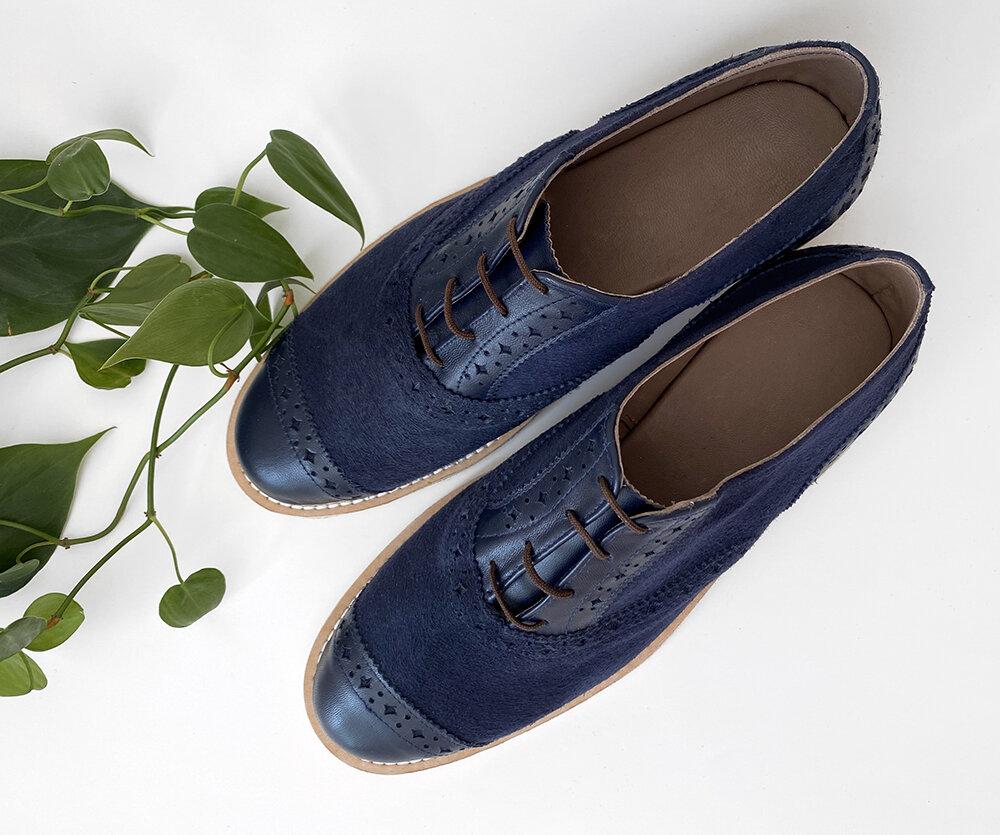
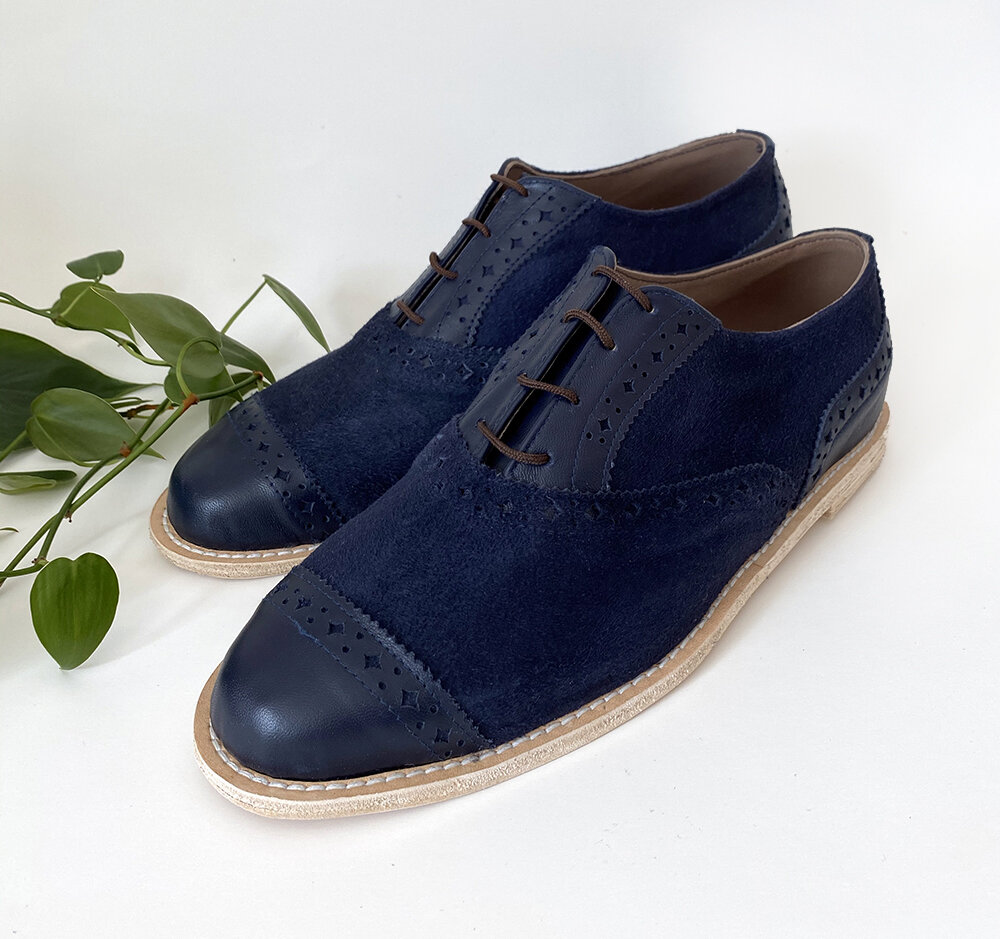
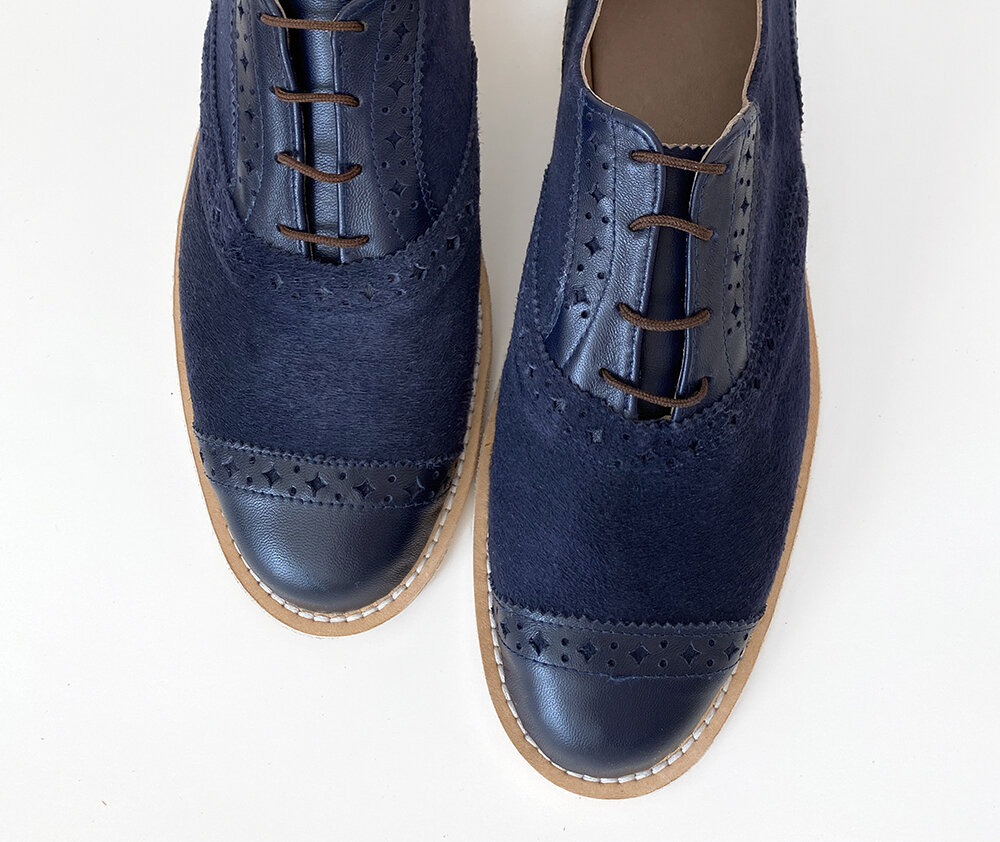
Until up to about a month ago, I never, in my wildest dreams, thought I’d be able to make a pair of shoes at home with my regular sewing machine and that they would be cute and wearable. I always thought home shoemaking was limited to espadrilles and moccasins sewn by hand. Fast forward to now and I’ve just finished my first pair of Brogue Oxfords out of leather and I’m really chuffed with the final result.

Whenever I try something new I like to take a class (like I did with knitting and millinery), so after following I Can Make Shoes on Instagram for a while, I signed up to take the Boot Making online class. I went through the curriculum a couple of times while I waited for my supplies to arrive from overseas, while also knowing that I’d also need to make a trip to Indianapolis to pick up leather. Me and my parents were in Indy for a while this January, so my mom and I went to Landwerlen’s Leather Supply together and it was amazing. We had such a good time picking out leathers and one of the hides I found was this lovely navy lambskin.

I’d been sketching out a lot of boot ideas when I mentioned the idea of making this style of shoe to my dad. I remember watching him shine is own shoes when I was a kid and the Oxford style always reminds me of him. I just kept thinking about it in navy, so instead of forcing myself to carry on with my boot plans, I went back to YouTube and watched as many videos of Oxford shoemaking as I could find. Granted, they’re all professionals or factory settings, but combining those videos with the ICMS course, I felt confident enough to get started. (I filmed a little bit of this and posted it on my Instagram)

First I made my own pattern by taping up my last (shoe mold) and drawing up the design. From there I made a mock up out of felt just to get a grip on the underlaps and proportions. One thing about leather is that you’ve only got one shot at sewing it properly, so it’s good to have your fitting and planning squared away before you begin. But I’m getting a little ahead of myself because I also did my broguing (hole punching… and don’t quote me on that because I’m not sure it’s the technical term) before I sewed anything together. So it was a lot of measuring and a couple re-dos until I had my uppers stitched together.

I then made a lining pattern, stitched it together and sewed it to my upper. For those of you interested in further detail, I really suggest signing up for a class or doing some research/reading. If you’re the kind of person that likes to be very meticulous and has a grip on the engineering of garment construction, you’d definitely be able to make shoes. I wouldn’t call it hard, but definitely a challenge…the process humbled me quite a bit!

Once the upper and lining of the shoe are connected, the tongue sewn in and the lacing holes cut, the shoe now gets attached to the insole and sole. This involves a lot of glue and patience. I found cutting the thick leather for the sole and the heels and then smoothing it out, to be the most difficult part of the process. I felt good when I got the sole edges even, but professionals take it even further using hot tools, wax, even broken glass and dye to complete soles. I like the way these look now, but I’d love to continue learning so I can take my future pairs up a notch.

I made one shoe at a time, from start to finish. I learned a lot on my first shoe and made some improvements on the second. And next time, I’ll get even better!

I haven’t worn these out of the house yet (read: Midwestern winter) but when the sidewalks are clear and dry I’ll be giving these a spin. They’re very comfortable. Now I just need to decide what I’ll wear with them!
Blue Suede Shoes 4.jpg
Blue Suede Shoes 5.jpg

Me Made Everyday | Fall 2020 Closet Tour

2020 CLOSET.jpg

Here are the patterns featured in my Fall 2020 #memade Closet Tour:

You Got a Sewing Machine for Christmas... Now What?

You’re the proud new owner of a sewing machine… now what? This post will guide you through what tools, fabric, notions (the sewing term for the materials you’ll use during a sewing project that aren’t fabric) you’ll want to have on hand to make your first project!

STEP ONE: Gather Your Tools and Supplies

First comes the sewing machine (and iron!) then all the tools of the trade. There are dozens of handy little gadgets that you may want to eventually have in your sewing box, but the following are what I consider to be essential for getting started. I’ve linked up to all of them with affiliate links, but you should be able to find them at your local sewing supply or fabric store too.

*I have these tools, but I rarely, if ever, use them. In school we were forbidden to use seam rippers (they’re small but mighty tools and can really screw things up with one slip).

I consider the above to be the bare minimum, but I also use the following, which may help you too:

If this seems a little too costly and overwhelming, focus on the top list and only buy what you need for your first project. I’ve amassed my tools over the course of 30 years. Some little things end up being worth their weight in gold (high quality scissors are absolutely worth it in my opinion) and other things just don’t get used much (ahem, thimbles). But each sewer will be different and appreciate tools more or less depending on what they sew!


STEP TWO: Measure Yourself

You’ll want to take accurate measurements of your body before you select a pattern and buy the correct amount of fabric. Do this in the undergarments you plan to wear with your piece and in front of a mirror.

Remember that your body is a living, moving creation!! Throw away your old notions of what size means. It’s much better to sew a garment that fits your body as it is right now rather than to associate yourself with a number and worry if it goes up or down. It’s important to regularly check and record your measurements because they’ll probably change depending on the time of day, the time of the month or the year! I’m always a little softer at the New Year but after a summer of outdoor chores, I firm up. And that’s fine!


STEP THREE: Select a Sewing Pattern

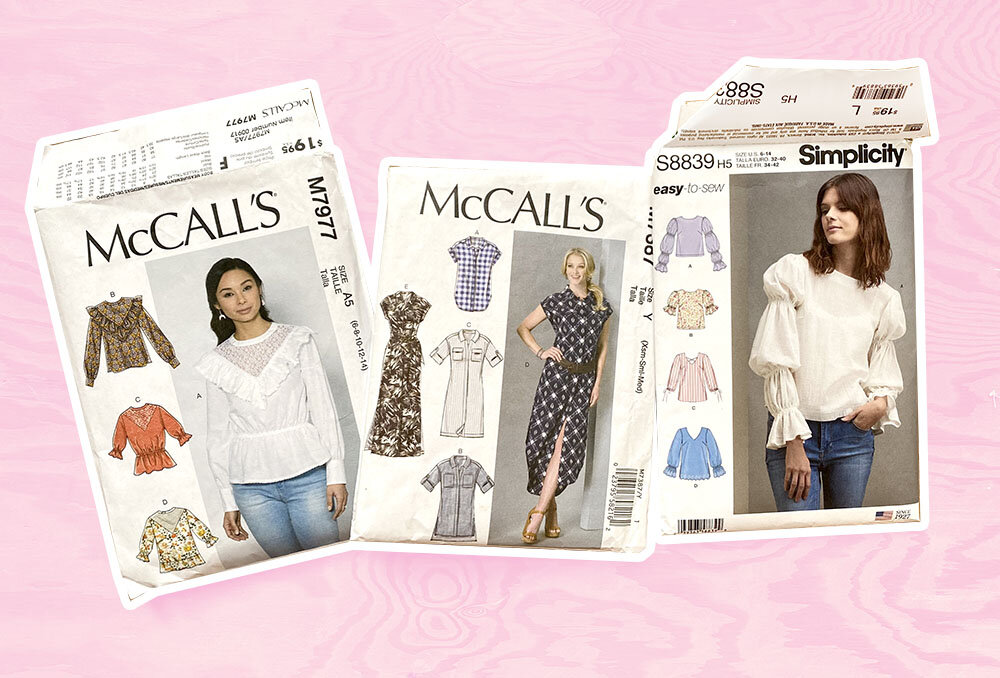
Modern sewing patterns from McCall’s and Simplicity. I’ve made each of these multiple times!

Modern sewing patterns from McCall’s and Simplicity. I’ve made each of these multiple times!

You’ll want to use an indie or commercial sewing pattern, which combines both instructions and pattern pieces to make your project. Choose a project like a pillow case, A-line skirt or pajama bottoms. The commercial pattern books (for brands like McCall’s, Vogue, Butterick and Simplicity) will be at a central table for you to browse at your local sewing store. Pick a pattern that is marked VERY EASY.

For new sewers, I like to recommend simple projects requiring little more than straight seams. Believe it or not, sewing a straight line does take practice! (On my first day of college level sewing classes, we were given print outs like this to practice on with an unthreaded machine!)

While you’re browsing the books, take note of other patterns that look interesting to you, even if they’re too advanced right now. I always write these down and keep the numbers handy (by brand) for when pattern sales come around (at least four times a year patterns will go on sale for $1.99-$5 at Joann Stores and Hobby Lobby). But for this first project, don’t bite off more than you can chew. It’s better to gain experience making more simple projects first and practicing basic skills than getting confused and frustrated with something over your head.

a few of the many vintage patterns I’ve collected over the years

a few of the many vintage patterns I’ve collected over the years


STEP THREE: Purchase All Necessary Materials (Fabric + Notions)

All of the materials you need to complete a pattern will be listed on the back of the envelope, but it can be a little overwhelming to read for a new sewer. Let’s break it down section by section!

Front.jpg

FRONT

The top of the pattern will have the pattern company name and the pattern number in bold type.

Pro Tip: Use this with a hashtag on social media to see how other sewers have made this garment! Example: #M7838

You’ll see photographs or line art drawings of the garment from the front, labeled alphabetically with different options for sewing, called views, or different options within the pattern. You can make them all if you want! The front will also have the size combination for the pattern (read more on sizing below!) which are as follows:

(XS - S - M) (M - L - XL)

Misses’ (6-8-10-12-14) (14-16-18-20-22)

Plus (18W-20W-22W-24W) (26W-28W-30W-32W)

ALWAYS COMPARE PATTERN SIZES AGAINST YOUR BODY MEASUREMENTS - THEY ARE NOT THE SAME AS READY-TO-WEAR.


BACK

Pattern Flap.jpg

The envelope flap will have a size chart to help you determine what size to make.

Sewing pattern sizes are NOT the same as retail ready-to-wear sizes and should be determined by taking your measurements (here’s a video guide!). You’ll want to have these written down before you purchase your pattern and supplies so you can be sure you have enough fabric to make your project.

If you are between sizes - for example your waist is smaller proportionally than your bust or hips, you can grade between sizes, which sounds hard but is as simple as blending the line between the two (we will cover that in the future!) Pick the pattern size that encompasses your largest measurement. It’s much easier to take in (make a garment smaller) than to let it out.

Remember these measurements correspond with your body, not the measurements of the garment. Commercial patterns tend to have more ease or room for body movement.

Back of Pattern.jpg


At the very top of the back of the pattern the difficulty level of the dress will be listed ranging between Very Easy - Easy - Average - Advanced. I strongly recommend moving your way through each category as you gain confidence and skill.

Suggested Fabrics give the sewer ideas on what fabrics to choose for their project. Sometimes the fiber (cotton, linen, rayon, wool, etc) will be suggested in addition to the weave (example: chambray, poplin, crepe, taffeta).

Trust me when I say there are A LOT of possible fabric suggestions - far too many to describe here. I don’t even know what every fabric is and I took a college course on textiles! Your best bet is to pull out your phone and Google it. Or ask someone who works at the fabric store (although that can be hit or miss).

I’d ask you think of your own clothes and how they feel to the touch when you’re determining what fabric to select. This is called hand. So a designer might say a fabric has a nice hand and what they mean is that it’s nice to touch. Drape is the way the fabric falls or lays. Fabric like denim has little to no drape (in other words, it’s very stiff) while silk charmeuse is incredibly drapey (it skims the body). TOUCH and MOVE fabrics you’re considering for your project. Do they remind you of a shirt or dress you already have? That’s a good sign!

Patterns will also indicate if the fabric you choose should have stretch. I’m rather new to this kind of sewing, so I prefer to give my advice on rigid or non stretch fabrics.

For new sewers, I recommend medium weight, non stretch 100% cotton fabric for your first project. It’s not so thick that your machine gets jammed and it’s not so slippery that it’s challenging to sew. I still love creating with these kinds of cottons because they are a joy to sew.


Next you’ll see a chart with the yardage requirements. Each size contained in the pattern will have a corresponding amount of fabric listed beneath it. On the far left will be the views listed alphabetically plus 45” and 60”. These are fabric widths and will be written on the end of the bolt of fabric. Narrower fabric will take more yardage than wide fabric. If I were to make view A with 45” wide fabric for a size 16, I would need to buy at least 3 yards of fabric.

I say at least because I prefer to have a little flexibility when I’m cutting out. Fabric also shrinks a little in the wash, so to compensate for that, I’ll round up by a quarter of a yard (9”). If you’re making a pattern with a large pattern, stripes or plaid and you want them to match at seam lines, you should buy even more. This can be an advanced technique, so for now, I’d recommend to buy smaller prints and stay away from large plaids or stripes).

***I don’t want to completely disregard the asterisks next to the yardage (they signify extra yardage for fabric with a nap) but I’ll just say that, as a beginning sewer, you should only choose flat fabrics with no nap (i.e. no pile or raised fibers - like corduroy or velvet).

Additional fabrics

If your pattern requires any additional fabrics, such as coordinating trims, lining or fusible interfacing, it will be listed next. Don’t skip on interfacing either! It’s used in parts of the garment that need more strength. When in doubt, I go with a medium or lightweight interfacing. The end of the bolt will be labeled with the thickness, which should correspond/match your fabric.

Notions, or additional materials needed for a project, will be broken down by view. These may include buttons, zippers, hooks and eyes, lace trim, bias tape* and much much more. Don’t forget to buy matching thread as well!

*I really prefer making my own bias tape for a couple reasons. Firstly, it’s better quality than the stiff packaged stuff, and secondly, if made from your fashion fabric, will be a perfect match to your garment. It’s cut on the diagonal of the fabric, so if you do choose to make your own, you will need extra yardage.

Finished Garment Measurements

This section breaks down what the finished garment should measure for all pattern sizes included. The difference between the body measurement and the finished garment is called ease. For example, if I have a 38” bust and I made a size 16, the finished garment should be 43.5”, giving me ease of 5.5”. Next time you put on a woven shirt, try pulling it at your bust or waist to see how much you can pinch away. This is the ease of that garment.

Lastly, you’ll see illustrations of the different garment views from front and back called line art. The more I look at this pattern, the more I want to sew it!


It’s Time to Sew!

Now that you’ve gathered together a pattern, fabric + notions and sewing supplies, you’re ready to start your project! Here’s how to thread a modern sewing machine:

CHECKLIST:

  • Buy your tools

  • Measure your body

  • Pick a pattern

  • Select Fabric + Notions

It’s time to start your project! Remember that with patience and a commitment to learning, you can sew anything. Google is your friend! And if I can help with sewing techniques, I’d love for you to let me know so I can add them to my YouTube channel.

Sewing Machine.png

Jessica Sews | Buffalo Gal

M7977

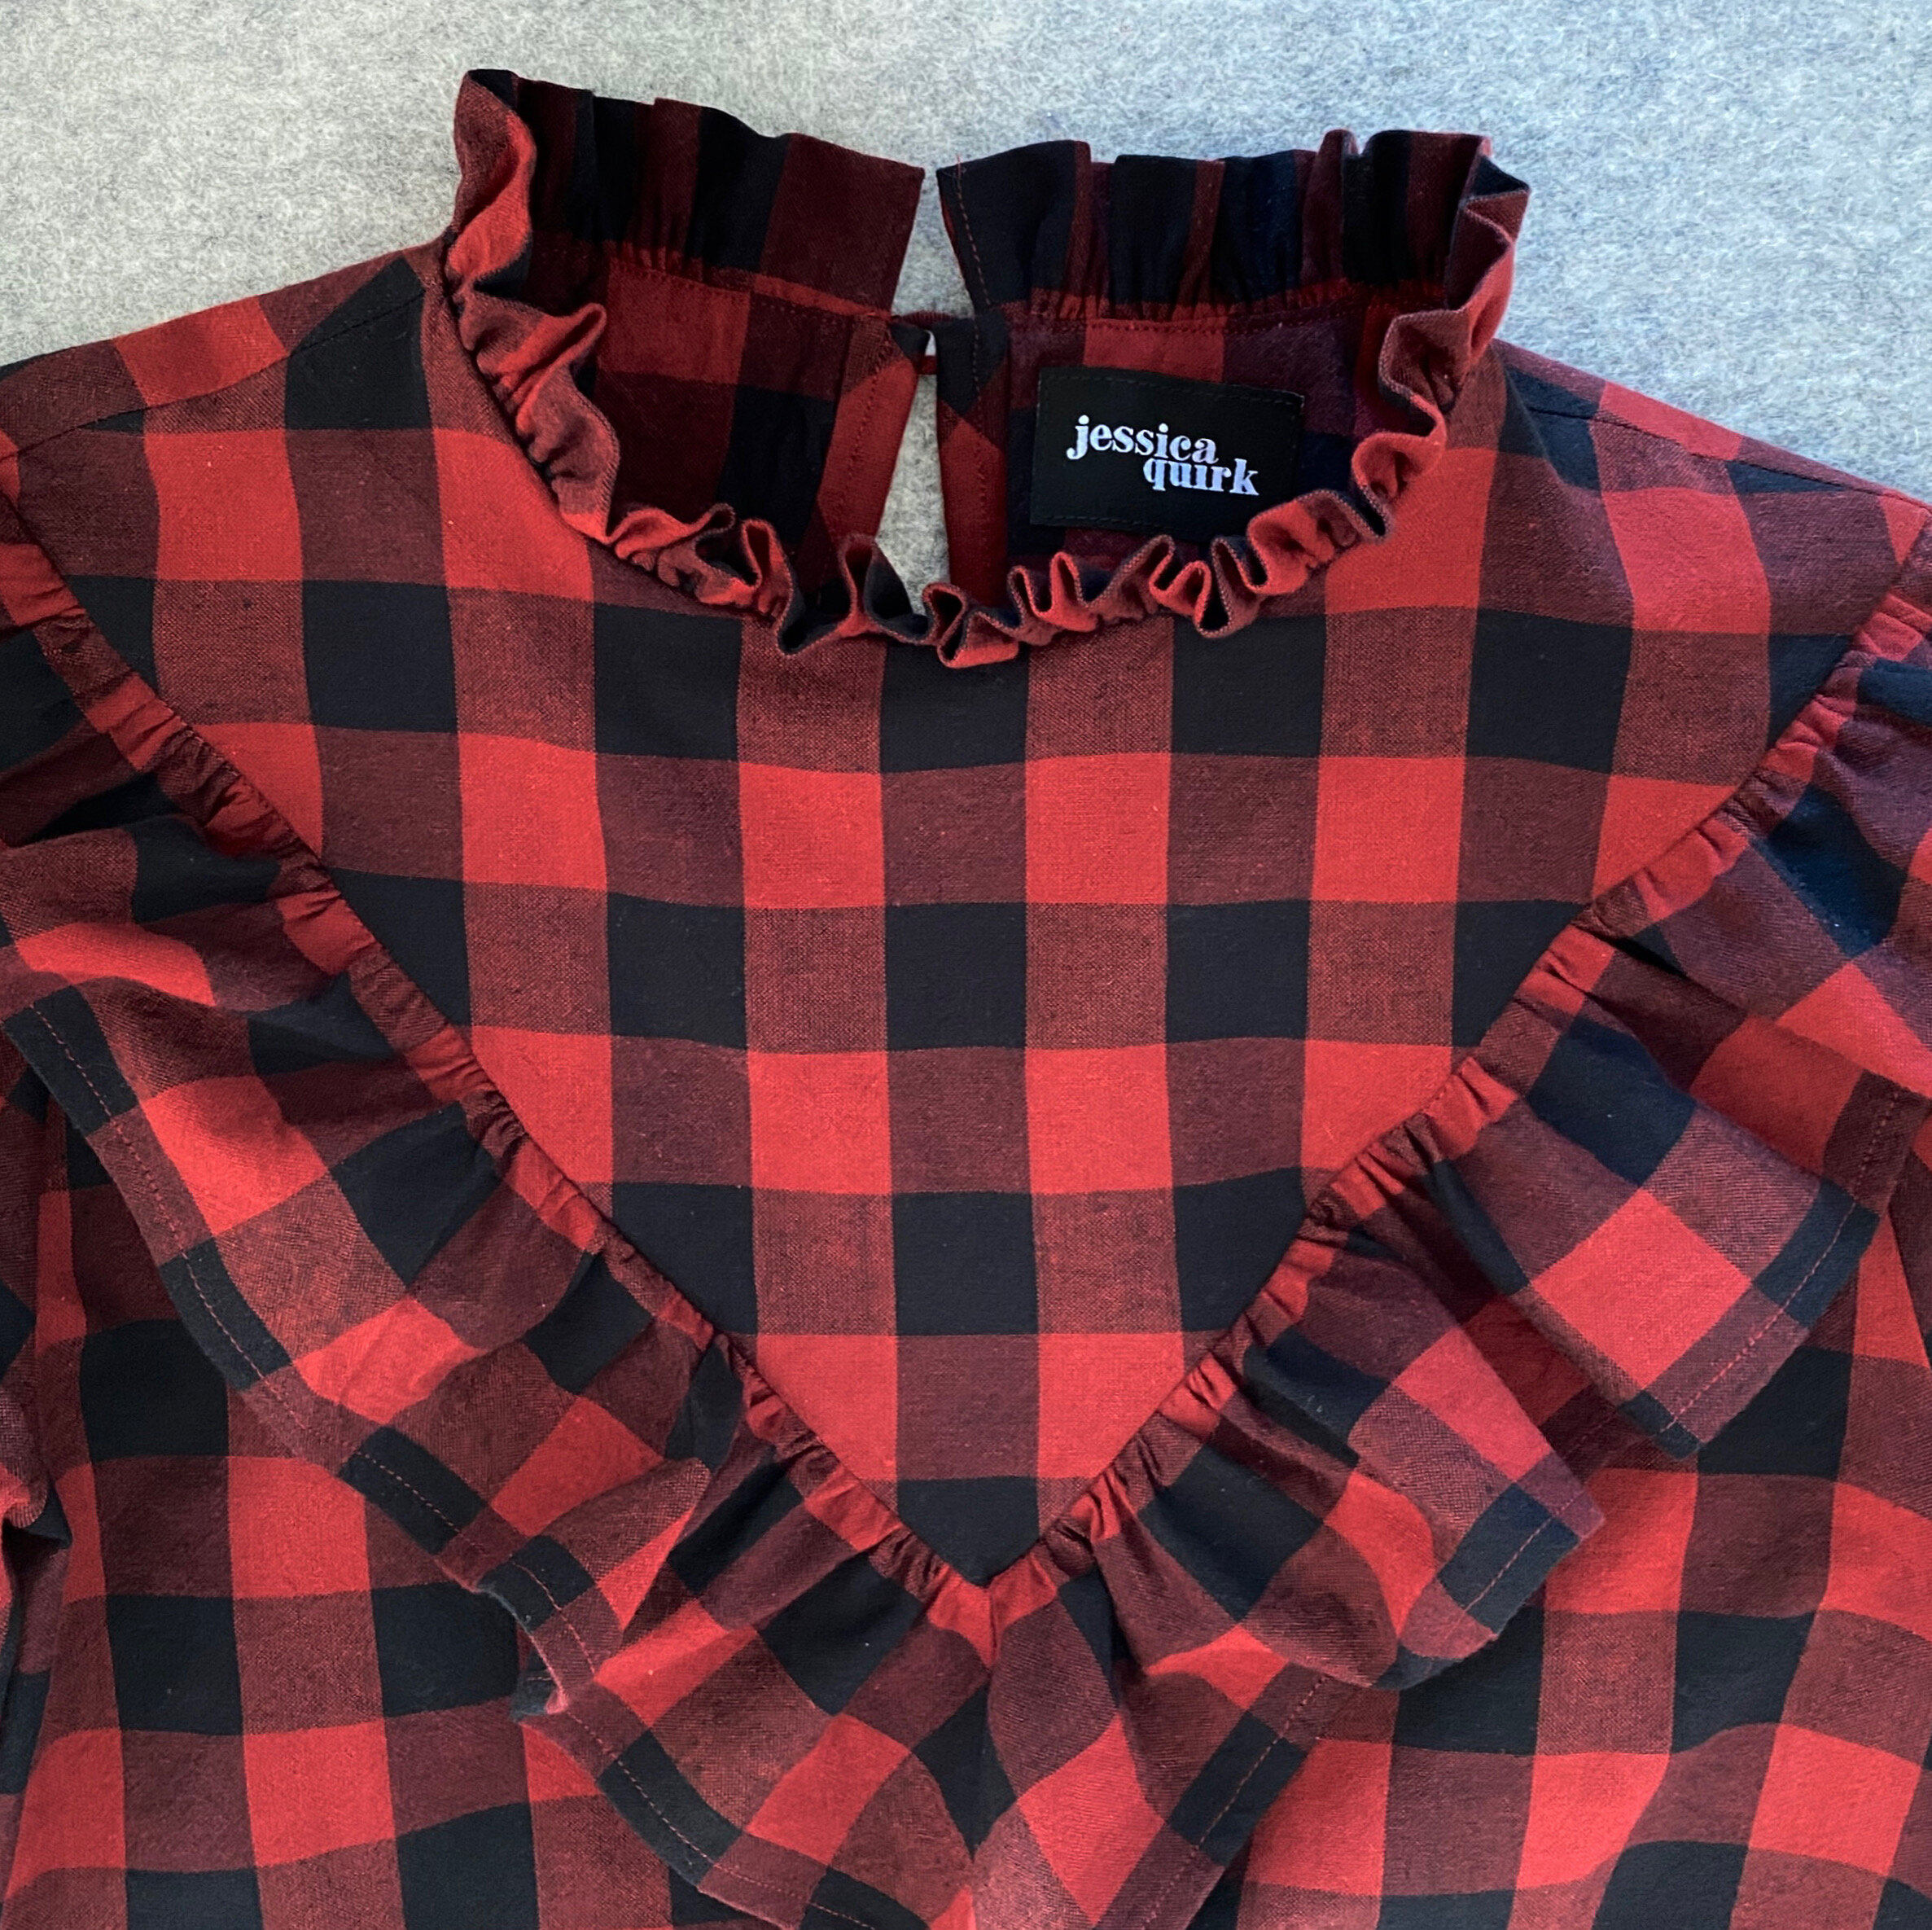
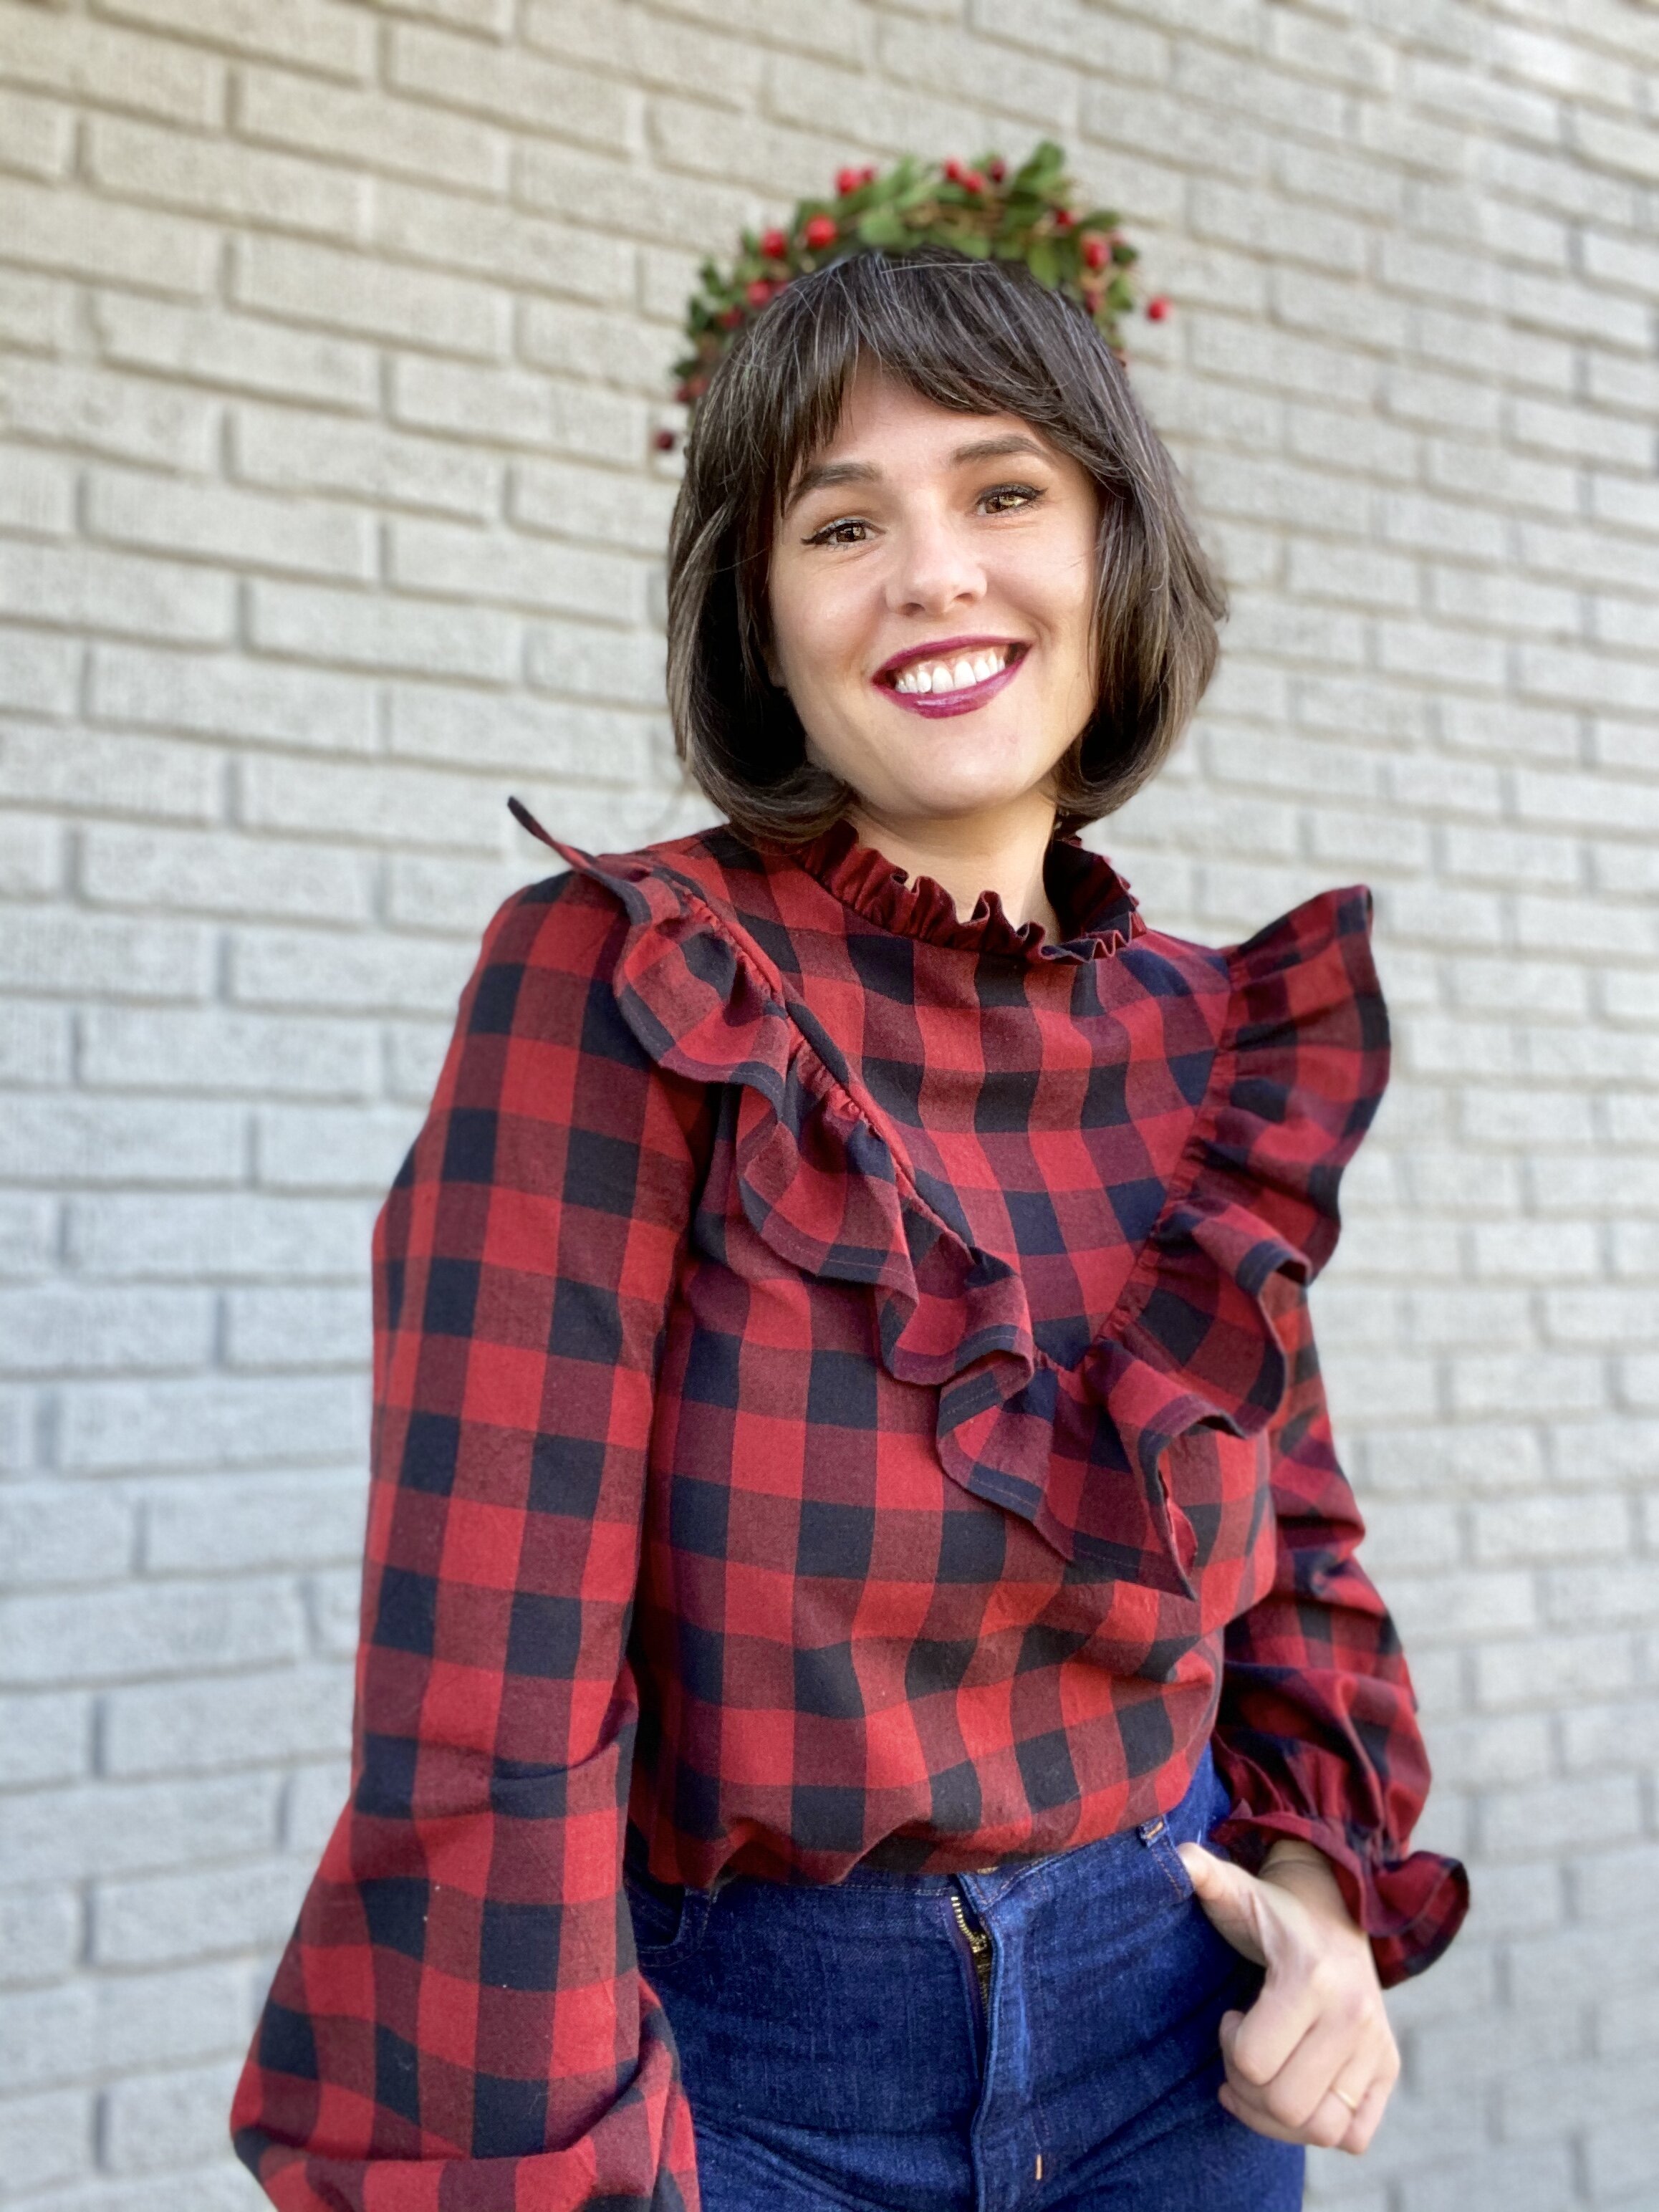
This season I’ve been all about ruffles and puffs and big, statement sleeves. One pattern in my stash that checks all those boxes (and is a joy to sew) is McCalls 7977. I’ve made it up a bunch of different ways - short sleeves, no sleeves and in both upcycled and new fabrics. My latest shown here, is one of my favorites (who am I kidding? I love them all!)

I did make a few modifications as follows: I cut the neckline slightly higher than the pattern pieces and drafted facings to fit. Then I gathered a short ruffle and sewed it between the bodice and facing (plus understitching on the facing side).

On the sleeves, I cut them long (27” from the sleeve head) and made a bias casing, which I sewed 1.5” up from the hem of the sleeve. This is a lot quicker than a full cuff with three buttons on each side.

The bit that makes me most proud of this piece is the plaid matching. It adds another level of attention to detail and engineering to get it to work out and there’s no where to hide with 1” plaid. In fact, when I was learning proper techniques in college we always worked in 1 or 1/4” gingham. I’ve had some requests for a tutorial on this and it’s on my list! Stay tuned!

D5200838-6AC8-4743-94C2-0D579AA5E096.JPG
IMG_8615.jpg