Jessica Sews | Kismet Blouse

Kismet1.jpg

Long time no blog! Let’s jump into one of my recent projects, shall we? I just finished up another version of McCalls 7977 using a gorgeous Sharon Holland print (Fleuron Sanctuary) from Art Gallery Fabrics.  When I saw the print showing up on some of the quilting instagrams I followed I searched and searched until I found two yards via Milkshakes and Sunshine on Etsy.  It shipped so fast so once it arrived it was straight into the wash to cut and sewn the next day. 

Close Up of Kismet Blouse

This fabric gave me seventies bedsheet vibes, which is a look I’m all about these days. I knew I wanted to pair it with some kind of crocheted cotton trim on a full sleeves for an early Laura Ashley feel. (You can see my inspiration board for this year here)

From there I scanned my pattern collection and pretty quickly decided M7977 would be the perfect way to incorporate the two. If you’d like to see some of my process, I’ve saved it in an Instagram highlight.

Working with this fabric was really dreamy. It’s light, almost like a poplin and very easy to cut and sew. I love the way it drapes and forms the ruffles - it’s really really lovely. Last night I bought two more prints from this collection!

M7977 in Fleuron Sanctuary Kismet

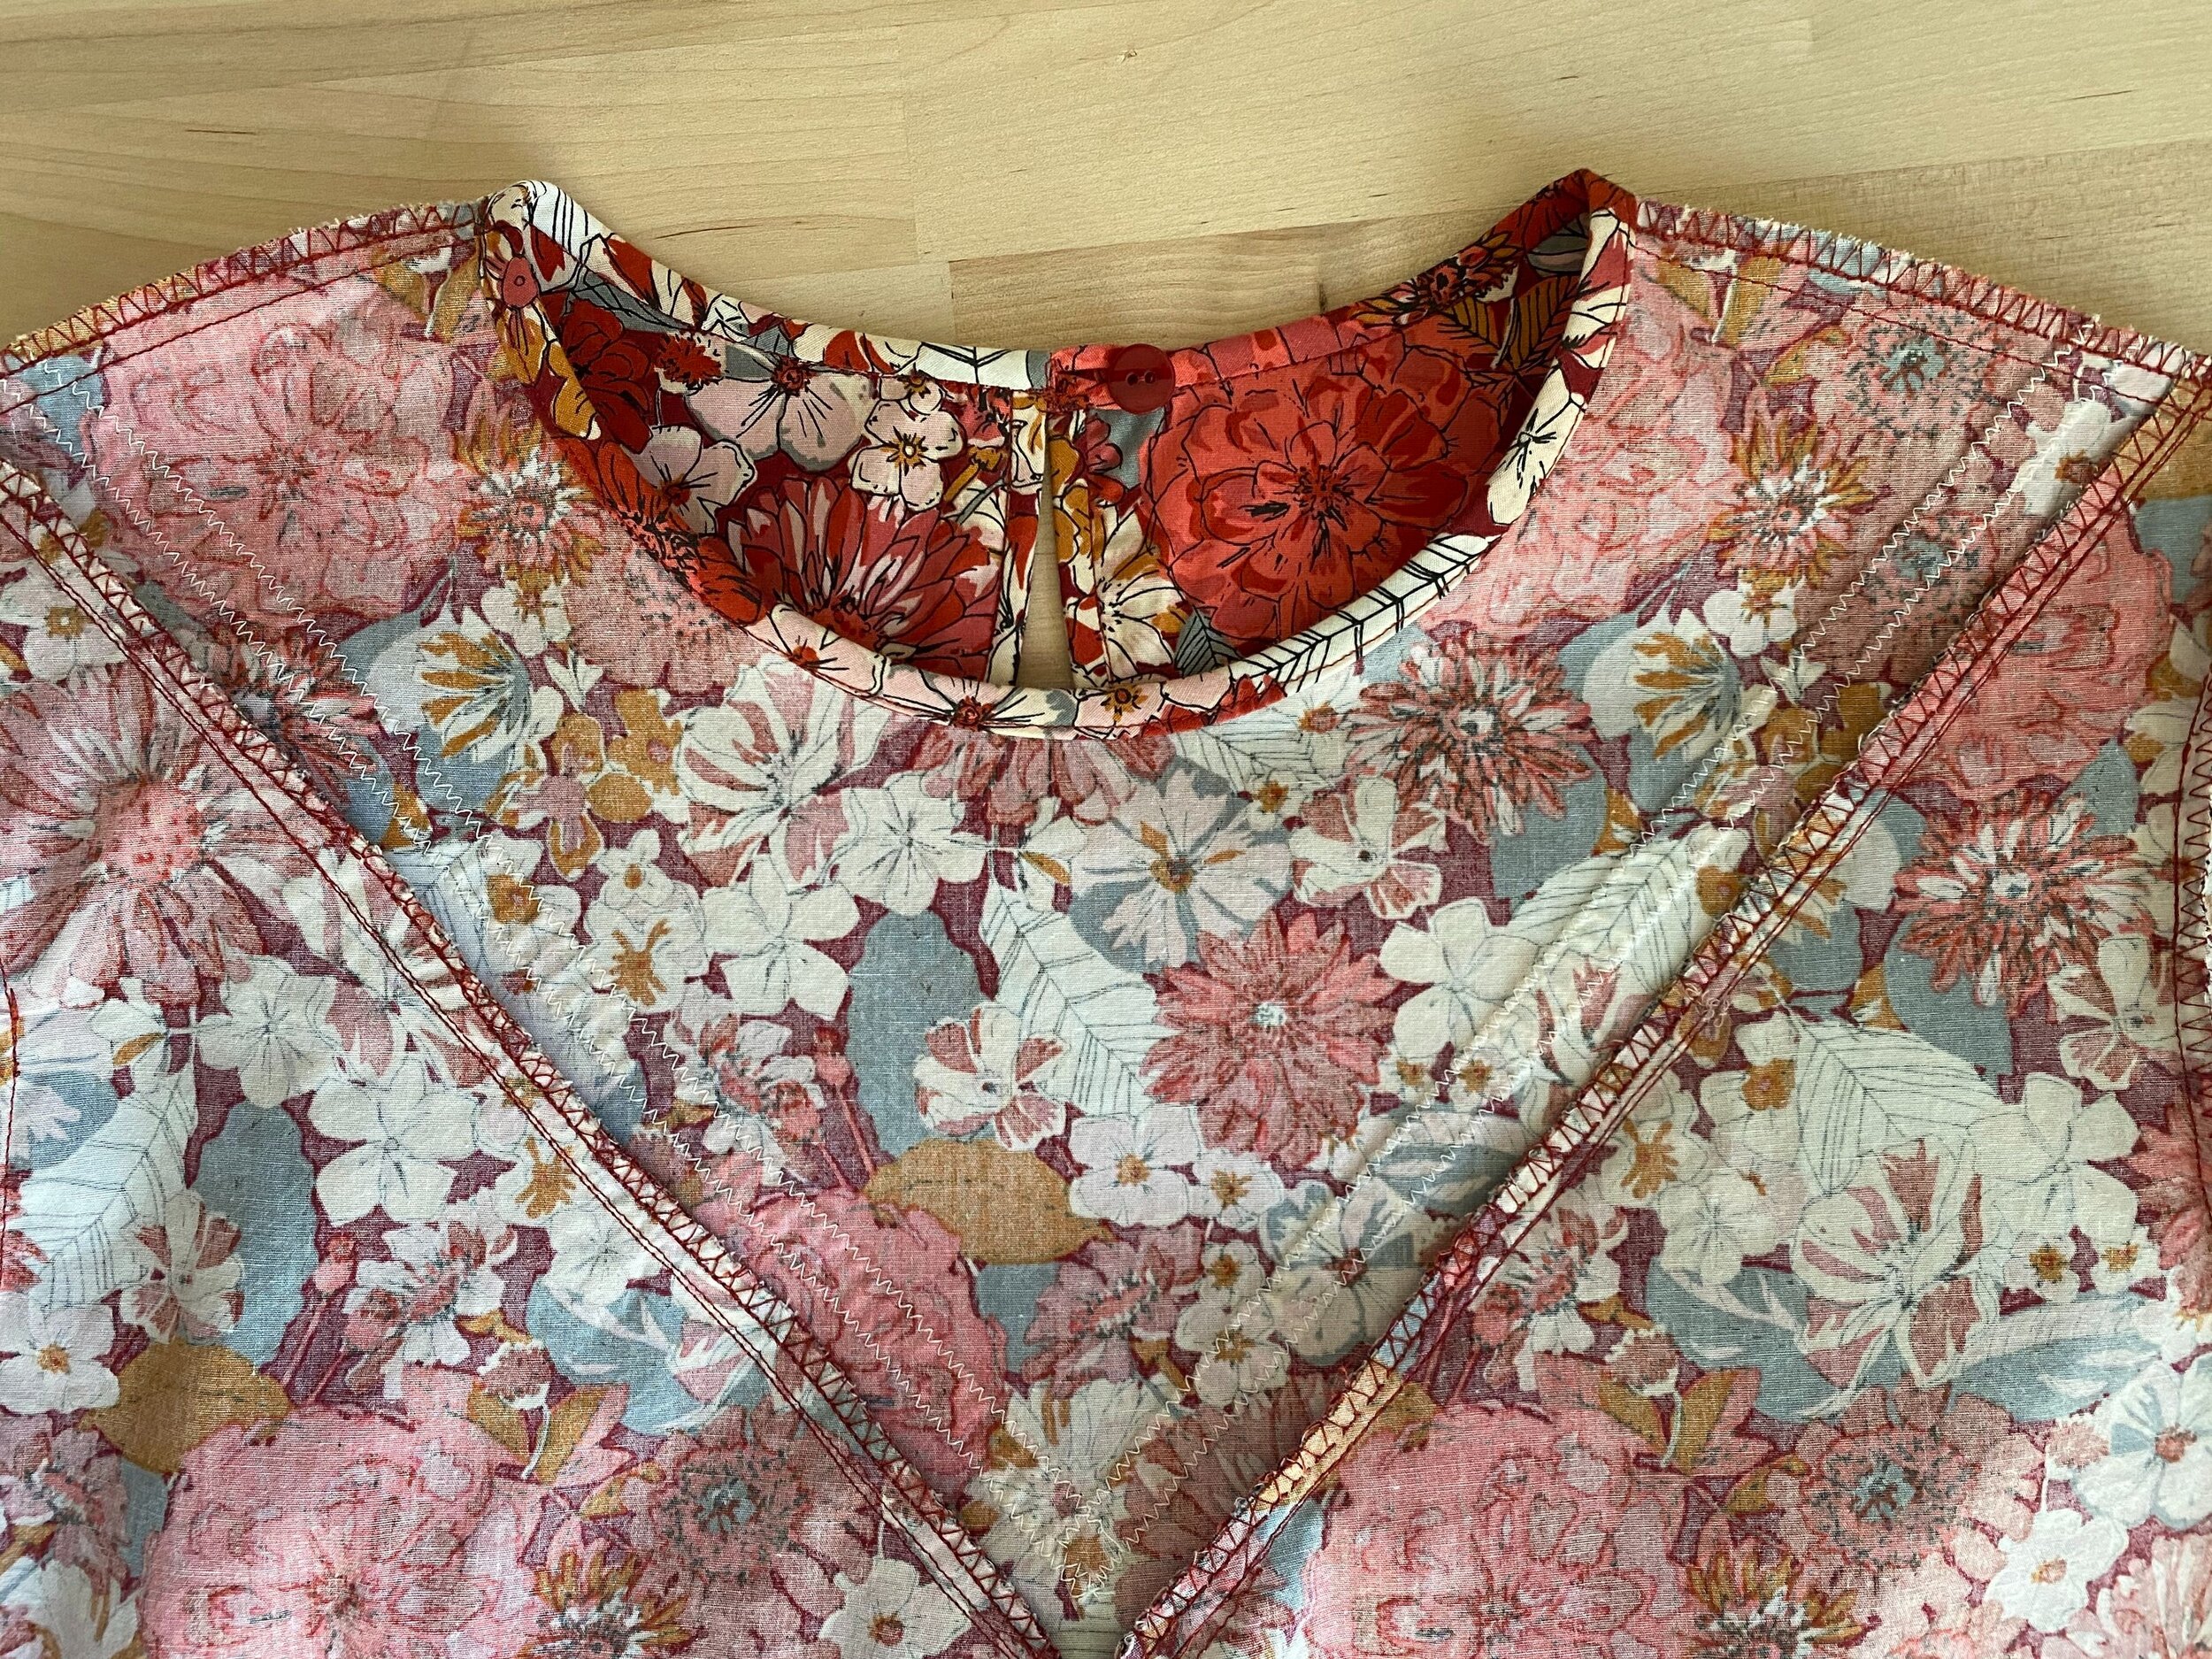
I also wanted to give you a quick look at the interior of this piece. I really like making neat and tidy garments and I did that a couple different ways. On the neckline and keyhole I used double turned bias - one of my favorite finishing techniques. On the armholes, the yoke and side seams I just did an overlock style zig zag with a new foot i just found for my machine.

Inside View M7977
Label in Kismet Blouse.jpg

Lastly, I sewed in a personalized label I designed and had woven by Dutch Label Shop. I’m so proud to put my name on this one. The whole project was a joy to sew and the encouragement I got from you guys during the process was really awesome. 

IMG_7483.jpg

I’ve got plans to do more documentation during my projects and I’d love to hear from you what you enjoy most. No wrong answers! 

Votes for Women! Early Edwardian Suffragist Ensemble

Suffragist Suffragette Outfit Costume
Votes 4.jpg
Votes 7.jpg
Votes 1.jpg
Votes 3.jpg

To celebrate the 100th anniversary of the passage of the 19th Amendment, which gave American women the right to vote*, I met up with some sister suffragettes for a Commemorative Votes for Women March in my hometown of Bloomington, Indiana. The event was put on by the Monroe County Historical Society and it was a nice turnout of mainly women, a few men and one newborn baby (otherwise, I may have been the youngest person in attendance!) in their white, purple and gold. Our mile walk through town yielded lots of thumbs up and photo ops and it was a fun way to spend a Saturday morning.

Here’s what I wore…

My hat and blouse are part of the same costume I posted to my blog earlier this summer. The blouse is from a 1903 reproduction pattern from Truly Victorian and I upcycled a vintage dress I had hanging in my garage, unworn for years. I’m so pleased with the project and how the blouse really looks like it came from the turn of the century. Once I had plans to dress up for the march, I decided I should go for an all white outfit, which many suffragists wore for their marches in the early 1900s. I created the skirt using another Truly Victorian pattern, also from 1903, with two layers of lightweight white cotton (the top being a super sheer muslin from Burnley & Trowbridge). The top is pin tucked to echo the tucks of the blouse.

The star of the show is my reproduction VOTES FOR WOMEN sash, which I made of cotton and used fabric markers for the writing. I used the tutorial from Susanna French (she has an etsy store for premade sashes too!)

I also wore some antique jewelry and a pair of reproduction Edwardian ‘Mae’ heels from American Duchess. I don’t think I’ve ever felt more comfortable or confident wearing a costume in public (outside of Halloween), so maybe I’m getting the hang of this whole costumer thing? I may even wear my sash again on Election Day, this time with a modern outfit. Women before me fought so hard to play a role in our democracy and I do not take it for granted. There’s still work to be done, and by voting for people committed to equality, we can get our country back on track. Please take the time to research your local and state elections (especially your school boards!) to find candidates with views that mirror your own.

*Women of color and indigenous people continued to face voting discrimination for decades afterwards until the Voting Rights Act of 1965 was passed. I really encourage everyone to do their own homework on voting rights (here’s a good article) and not take your current privilege for granted. You can check your voting status or register to vote at Vote.org.

Votes 2.jpg
Votes 6.jpg

Jessica Sews | Folkwear 229 Sailor Pants + Self Drafted Upcycled Tee

Sailor Pants 1.jpg
Sailor Pant Front.jpg

I’m so excited to share two new makes I’ve stitched up this week. Firstly, a super simple tee shirt - made from a thrifted dress I picked up for $7. I made this top from a self drafted tee shirt pattern I worked on earlier this year and gave it a scooped neck. It took me under two hours from cut to try on and now I want to make allll. the. knit. shiiiiirrrtts.

More excitingly (and far more time intensive) - my newest pair of pants. These are the 229 Sailor Pants from Folkwear patterns, which I cut in a size 30 (the smallest available) and slightly modified to fit. Firstly, I added a few inches to the leg length when I cut, resulting in a 35.25” inseam. Yes, I’m tall. Secondly, I took out a little fullness in the crotch simply by grading in from the inseam about 1.5”. The only other change I made from the pattern instructions was to do metal grommets at the back gusset versus hand sewn, although I tried (and after all those buttons and pulling all of the threads to the back), but decided I was sick of it and went with copper grommets I had.

These are sewn in a medium weight denim with a slight stretch. I wish I had used rigid but I still like these pants a lot! They’re very comfortable and I foresee myself getting a lot of use out of them in the future! I used thrifted buttons from my stash but miscounted and was one short - so I used a matching colored button at the waist and think it looks just fine!

Sailor Back.jpg
Sailor Pants 2.jpg

Quilted Tamarack Jacket

Quilted Jacket 12.jpg
Quilted Jacket 11.jpg
Quilted Jacket 8.jpg
Quilted Jacket 6.jpg
Quilted Jacket 5.jpg
Quilted Jacket 7.jpg

For a while now I’ve been thinking of starting the epic journey of making a king sized quilt for my bed. Before I jump into a project of such a huge scale, it occurred to me that it might be a good idea to see if I still liked quilting and to play around with ideas on what kind of large quilt I wanted to make. I knew I wanted to use the Tamarack Jacket pattern from Grainline Studios and I had an idea of a palette. I used pretty humble fabrics - basic muslin, chambray (some new yardage, some upcycled from a second hand dress) and some gold quilting cotton. From there, I just let my imagination fly and designed the piecing as I went!

I created each section (two fronts, two sleeves, one back) one at a time and then attempted to mirror or compliment the design with each subsequent piece. Next I hand quilted using a cotton/wool blend batting and cotton backing, before tracing the pattern lines onto the finished block, basting those edge lines and then cutting it out.

I ended up sizing down from a 12 by taking rather large seam allowances on the shoulders and under the arms - my guess is that it’s a probably an 8, but I’m not positive. I always wanted this jacket to have a little extra room for comfort and I like the finished feel!

On the inside I hand finished every seam by either appliquéing a strip of fabric over the pressed open seam, or making something sort of like a flat felled seam so that there are no raw edges.

I cannot wait to wear this quilted jacket all fall and winter long. I’m usually quite cold at home so I set out to make a wearable quilt and I think this does the trick! And the 120+ hours it took to make it hasn’t swayed me from making my own large bed quilt either! I’ll keep you posted on the progress!

Quilted Jacket 4.jpg