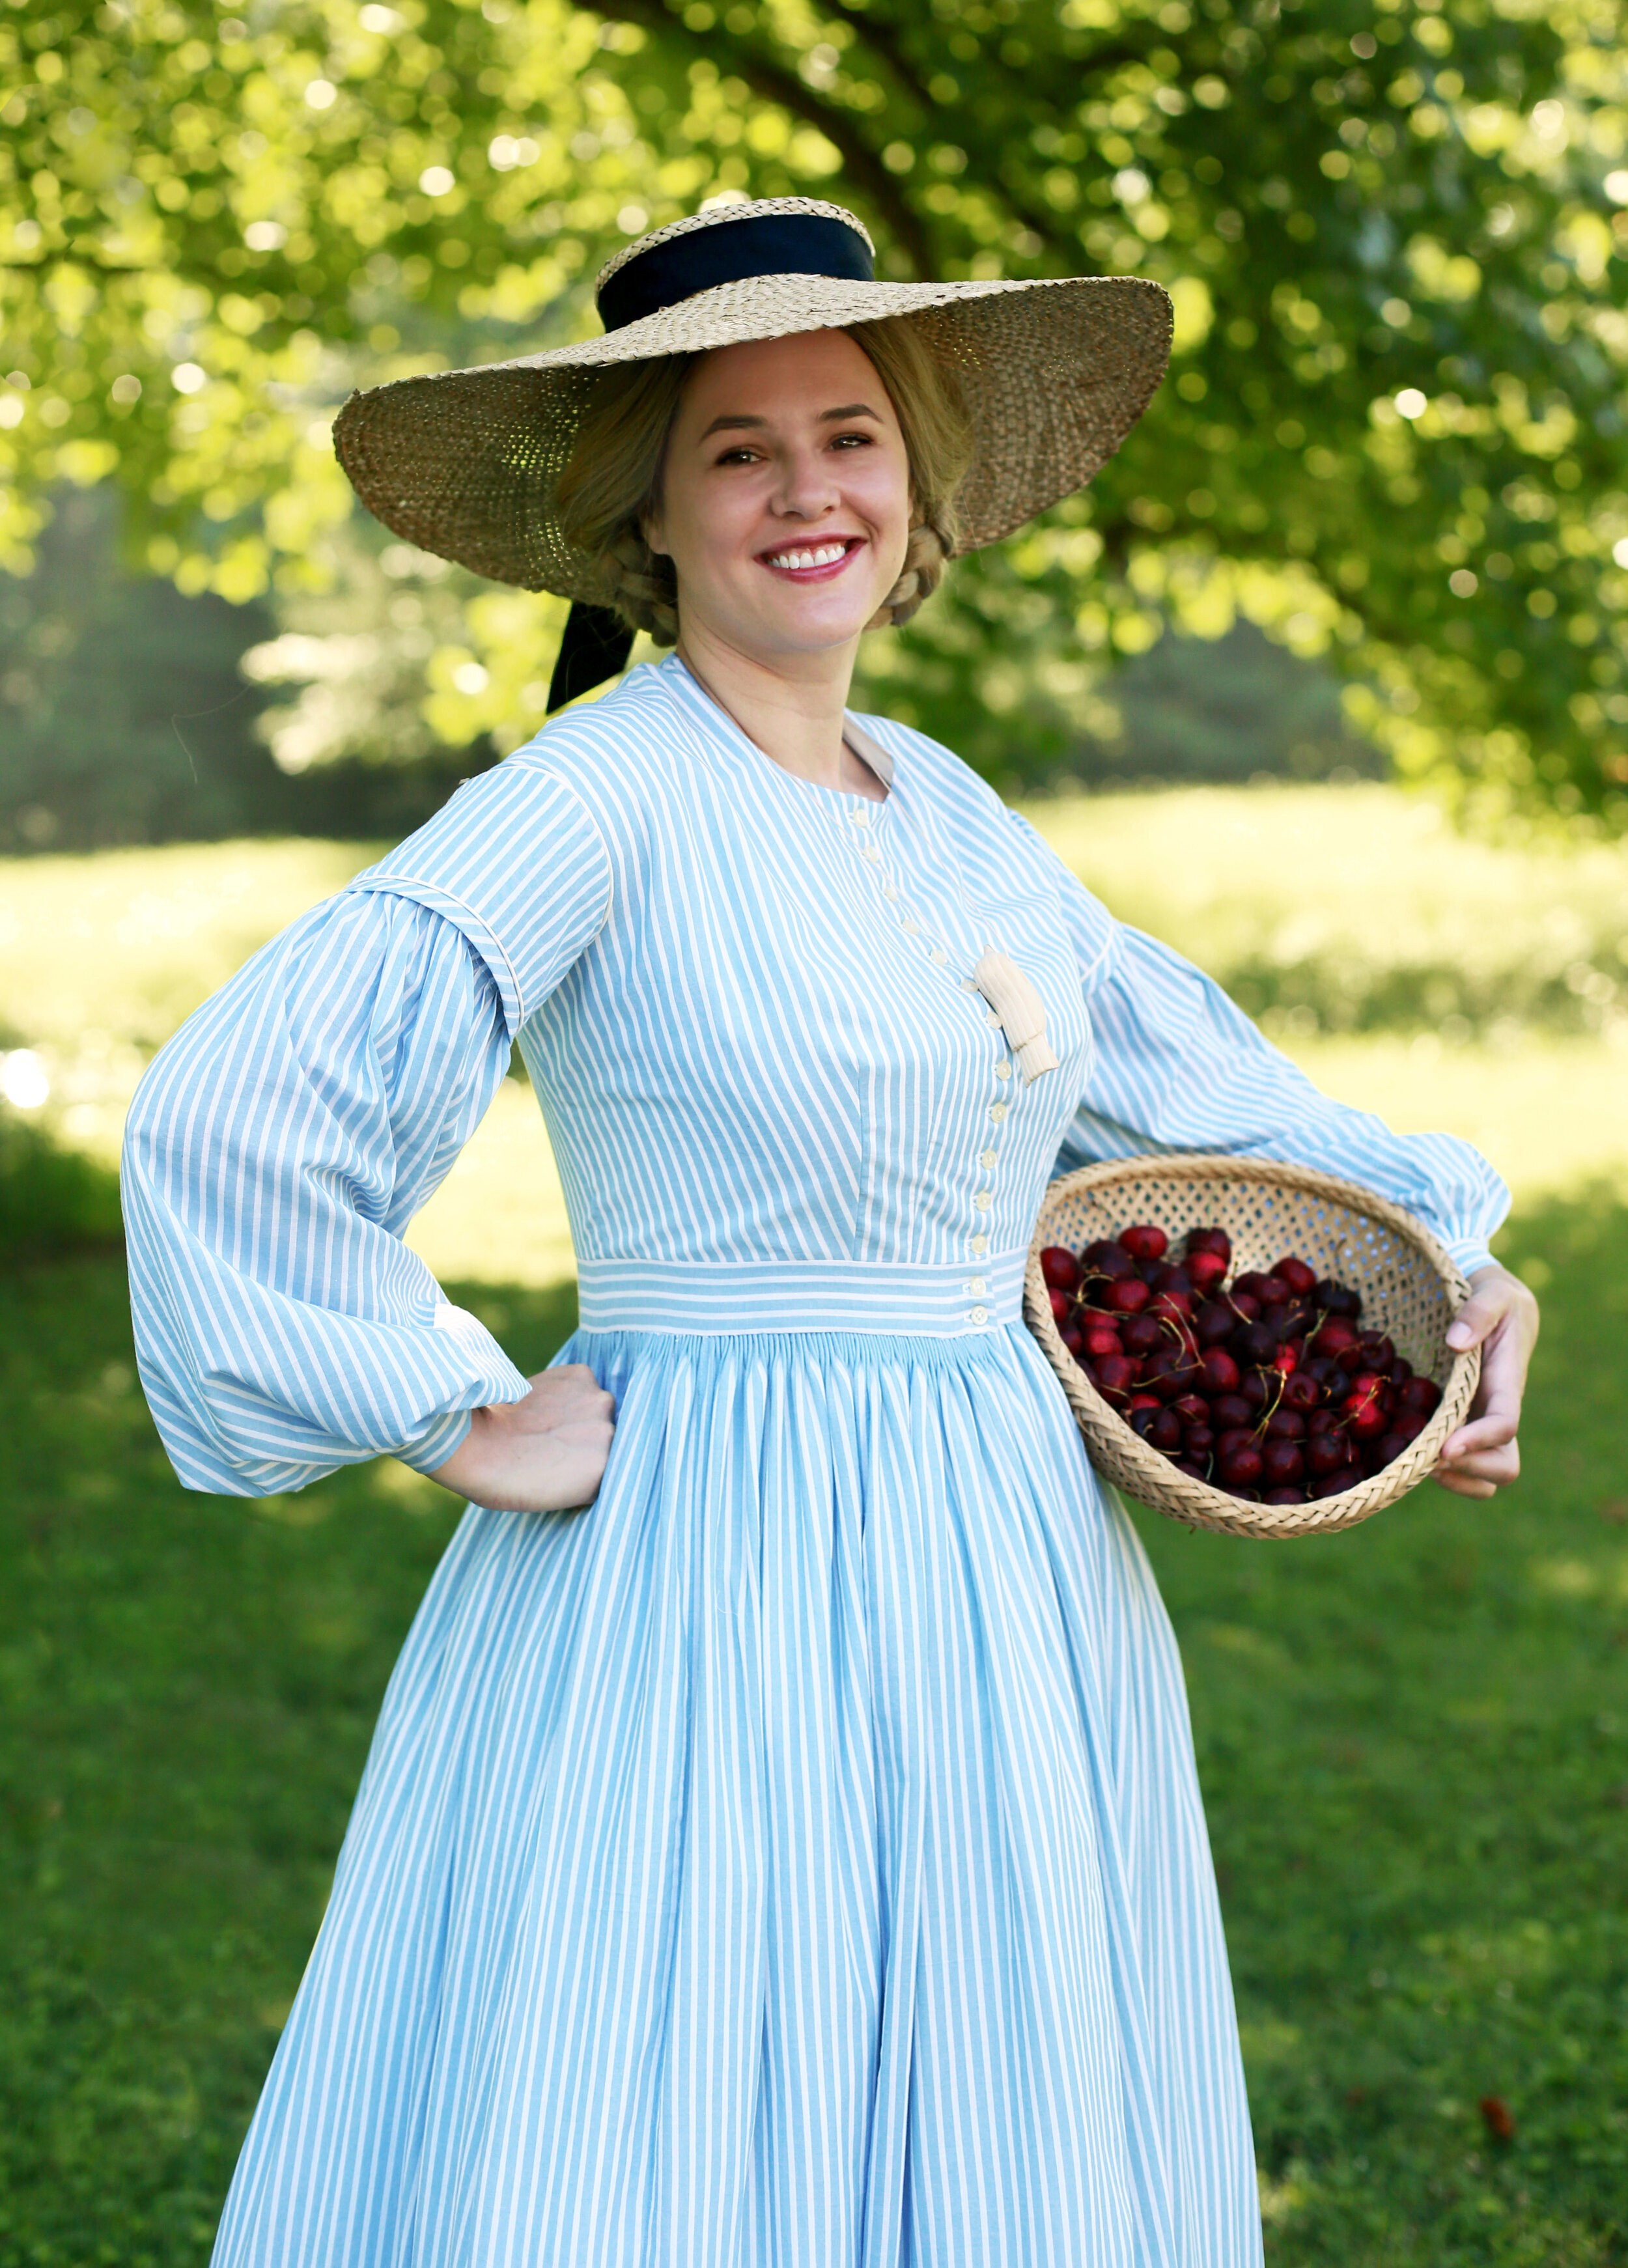
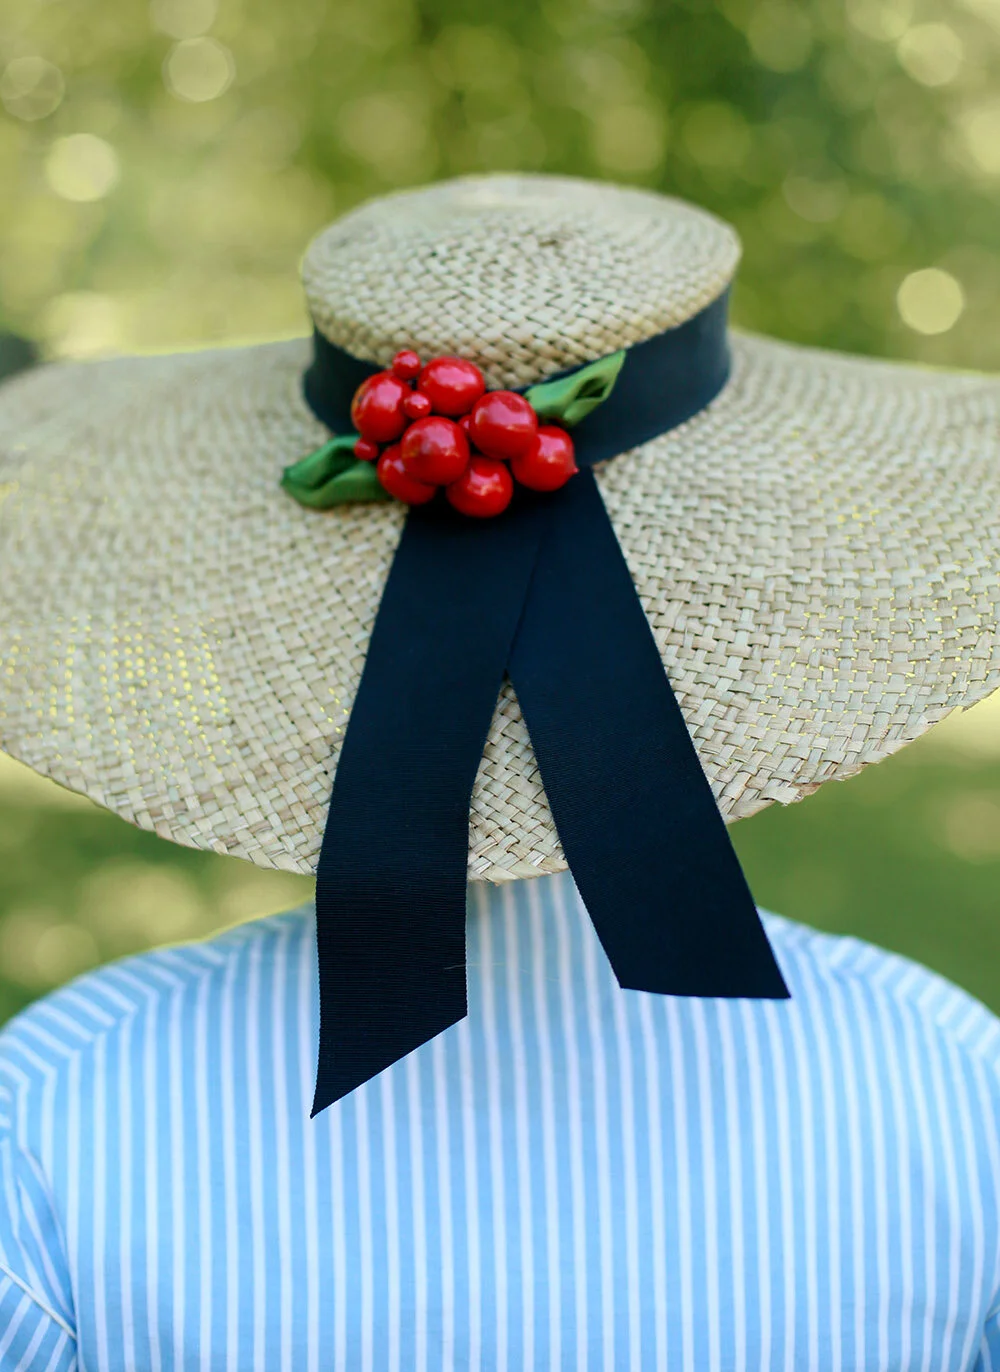
Jessica Sews | Folkwear 229 Sailor Pants + Self Drafted Upcycled Tee

Sailor Pants 1.jpg
Sailor Pant Front.jpg

I’m so excited to share two new makes I’ve stitched up this week. Firstly, a super simple tee shirt - made from a thrifted dress I picked up for $7. I made this top from a self drafted tee shirt pattern I worked on earlier this year and gave it a scooped neck. It took me under two hours from cut to try on and now I want to make allll. the. knit. shiiiiirrrtts.

More excitingly (and far more time intensive) - my newest pair of pants. These are the 229 Sailor Pants from Folkwear patterns, which I cut in a size 30 (the smallest available) and slightly modified to fit. Firstly, I added a few inches to the leg length when I cut, resulting in a 35.25” inseam. Yes, I’m tall. Secondly, I took out a little fullness in the crotch simply by grading in from the inseam about 1.5”. The only other change I made from the pattern instructions was to do metal grommets at the back gusset versus hand sewn, although I tried (and after all those buttons and pulling all of the threads to the back), but decided I was sick of it and went with copper grommets I had.

These are sewn in a medium weight denim with a slight stretch. I wish I had used rigid but I still like these pants a lot! They’re very comfortable and I foresee myself getting a lot of use out of them in the future! I used thrifted buttons from my stash but miscounted and was one short - so I used a matching colored button at the waist and think it looks just fine!

Sailor Back.jpg
Sailor Pants 2.jpg

Quilted Tamarack Jacket

Quilted Jacket 12.jpg
Quilted Jacket 11.jpg
Quilted Jacket 8.jpg
Quilted Jacket 6.jpg
Quilted Jacket 5.jpg
Quilted Jacket 7.jpg

For a while now I’ve been thinking of starting the epic journey of making a king sized quilt for my bed. Before I jump into a project of such a huge scale, it occurred to me that it might be a good idea to see if I still liked quilting and to play around with ideas on what kind of large quilt I wanted to make. I knew I wanted to use the Tamarack Jacket pattern from Grainline Studios and I had an idea of a palette. I used pretty humble fabrics - basic muslin, chambray (some new yardage, some upcycled from a second hand dress) and some gold quilting cotton. From there, I just let my imagination fly and designed the piecing as I went!

I created each section (two fronts, two sleeves, one back) one at a time and then attempted to mirror or compliment the design with each subsequent piece. Next I hand quilted using a cotton/wool blend batting and cotton backing, before tracing the pattern lines onto the finished block, basting those edge lines and then cutting it out.

I ended up sizing down from a 12 by taking rather large seam allowances on the shoulders and under the arms - my guess is that it’s a probably an 8, but I’m not positive. I always wanted this jacket to have a little extra room for comfort and I like the finished feel!

On the inside I hand finished every seam by either appliquéing a strip of fabric over the pressed open seam, or making something sort of like a flat felled seam so that there are no raw edges.

I cannot wait to wear this quilted jacket all fall and winter long. I’m usually quite cold at home so I set out to make a wearable quilt and I think this does the trick! And the 120+ hours it took to make it hasn’t swayed me from making my own large bed quilt either! I’ll keep you posted on the progress!

Quilted Jacket 4.jpg

The Kirsten Project | Kirsten Saves the Day

Kirsten Saves the Day Costume - The Kirsten Project
Kirsten Saves D.jpg
Kirsten Saves the Day Costume
Red Lace Up Boots
Kirsten Saves the Day full costume

Grab your foraged berries, sit down and join me for the latest installment of The Kirsten Project. For this edition, we’re going into the woods to recreate Kirsten’s summertime ensemble based on her story Kirsten Saves the Day.

For much of this book, Kirsten spends her time in the woods near her family farm, collecting berries, fishing in the creek and getting into trouble with her younger brother. For my costume, I’ve chosen to take most of my design decisions from the American Girl catalog and the styling of the doll in her straw hat, blue and white striped dress, bird whistle and red boots - all with an eye to period correct silhouettes. Let’s break down each piece with more detail on my artistic choices with the historical references I used to create my look.

Floral+Motif+spacer.jpg

Wide Brim Straw Hat

42132345-DFF8-46F3-8CB4-6CC511AC4599.JPG

Like Kirsten, I’m wearing a wide brim straw hat, trimmed with traditional petersham ribbon and adorned with a bunch of bright red faux cherries. I chose to use the same style of straw hood (a milliner’s term for a dome shape hat base) as my doll’s hat. After wetting the straw, I blocked it on a wooden crown and brim mold, pinned and tied it into place and then allowed it to dry. Afterwards I simply tacked the ribbon and berries into place and added a few green leaves made from raw silk ribbon.

Alternatively (and more historically accurate), a straw hat could be made by braiding the straw into long ribbon like pieces, sewing them around and around onto themselves to form the shape of the crown and then outward to the brim. This is definitely a technique I want to try one day! Here’s a great clip from Edwardian Farm where Ruth Goodman doing just this!

Kirsten Saves the Day cosplay
KSTD 5.jpg
Straw Wide Brimmed Hat with Cherries
Kirsten Saves the Day Silhouette
Floral+Motif+spacer.jpg

Summer Work Dress

For summer, Kirsten wears a lightweight cotton work dress. Creating this piece was a fun way to combine the character’s dress (which I believe was inspired by this painting) with a historically accurate adult silhouette. As I breakdown each portion of the dress, I’ll assign it to one of three categories - matches doll AND historically accurate, matches doll but without historical research and upgraded for historical accuracy.

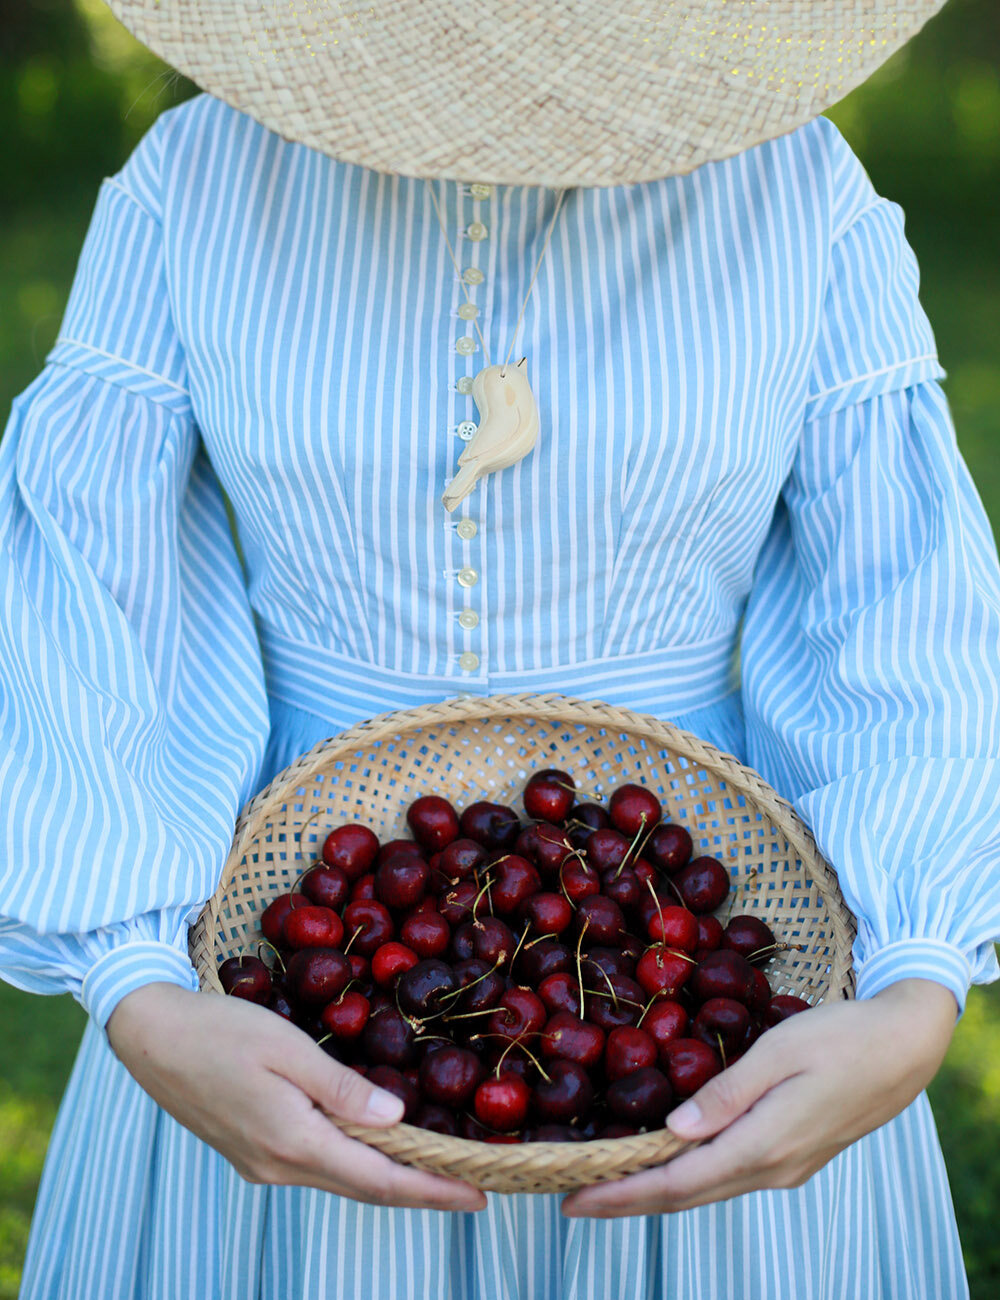
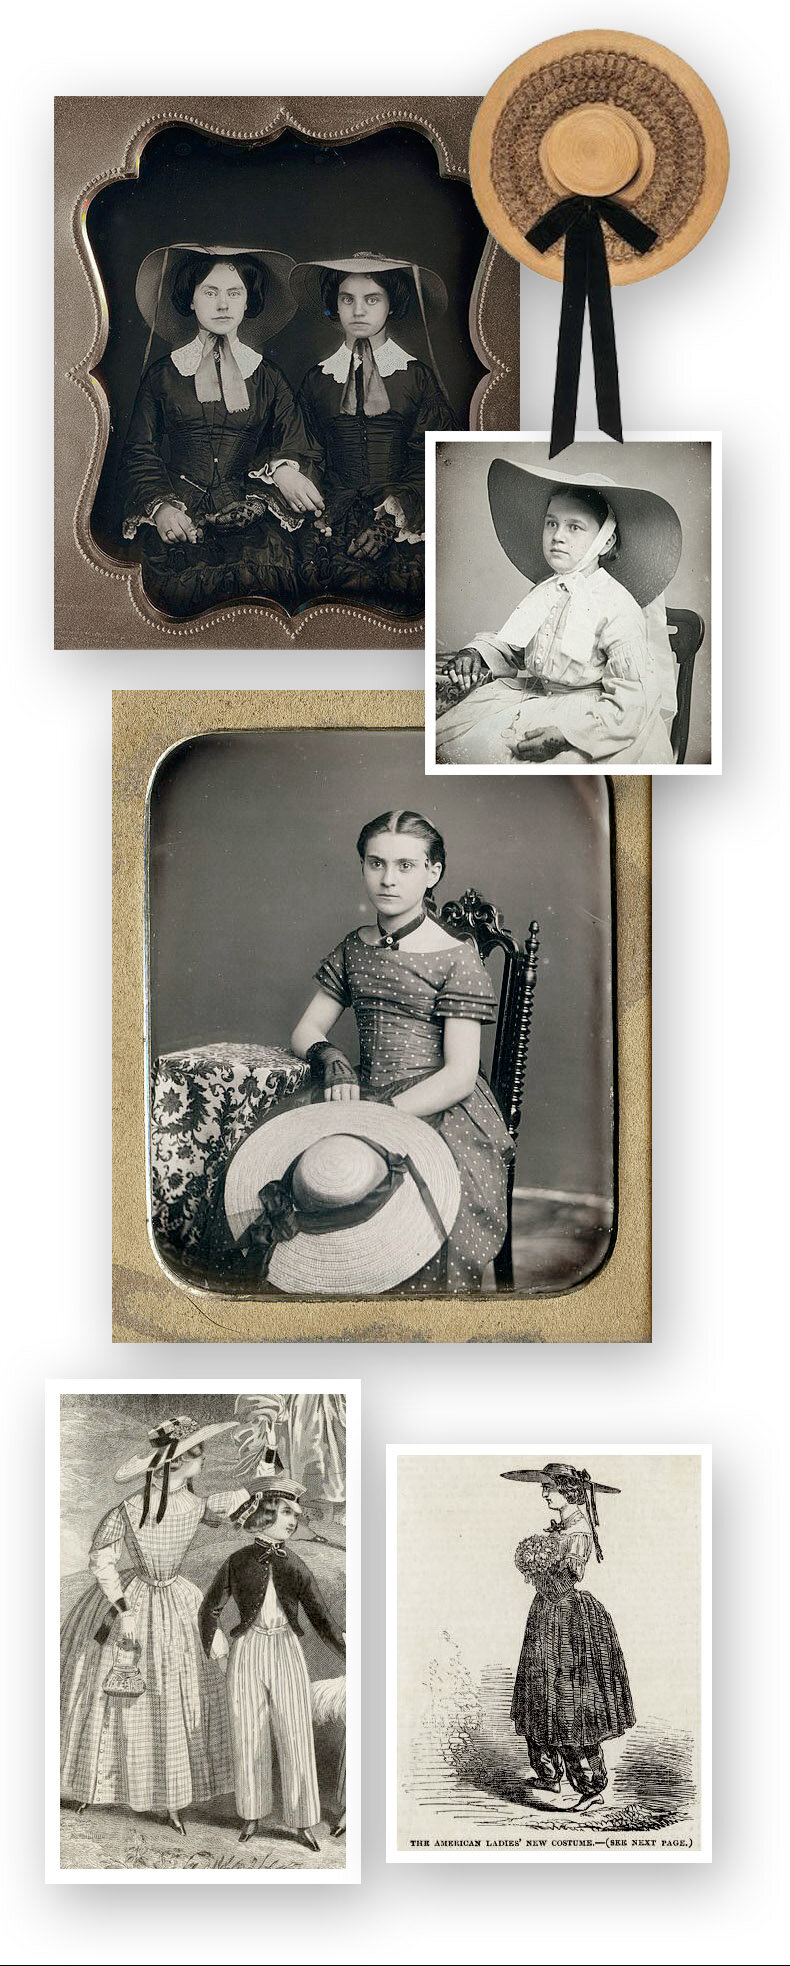
Let’s start with the bodice of the dress. Kirsten has a squared neckline but I chose to do a more rounded shape, which I believe to be a historical upgrade. Sure, there are examples of square necklines in the 19th century, but they are often deeper (like the 1870s) or constructed by way of shoulder straps as was done in the 18th century and early 19th. Neither of those examples result in the high neckline that was used in work dresses of the 1850s - thus I opted for a round neck.

To fit the bust line of a woman’s dress (my chest is rather large and a ten year old girl wouldn’t have developed in that area yet) I used a pair of darts on each side. This is a historical upgrade based on countless examples from the era.

To capture the look of the shorter sleeve doll’s dress, I created a two piece sleeve to mirror examples I found in my research. This style of sleeve, composed of a short upper sleeve and a fuller under sleeve, was common during the 1840s-1850s. Like the doll dress, I added piping details to the upper sleeve along with a bias detail which was purely my own design decision. Adult women would have always worn long sleeves for daytime in the 19th century. For a laboring woman, sleeves provided a layer of protection - from the sun or other elements. A woman in higher society would have also shielded herself from the sun, AND from the eyes of others outside her social class. In private evening functions, it would have been acceptable to reveal the arms, shoulders and décoletté, but never in the daytime hours.

Other bodice elements like the dropped shoulders, center front buttons and cross grain waistband are both historically accurate and used in the doll’s dress.

To achieve the fullness I wanted for my skirt, I created cartridge pleats, which I hand sewed to my waistband. The doll’s dress doesn’t have the same fullness to fit into the waistband, so hers is simply gathered.

Finally, I opted to incorporate Kirsten’s growth stripes at the hem of the skirt - something absolutely used for younger girls in the 1850s, but not something you see as often on women’s skirts. I’m ok with veering from accuracy here because I feel this helps my costume capture the essence of Kirsten’s summer look.

Blue and White Striped Fabric

The blue and white stripe of the fabric is something I believe was popular in the 1980s when the Kirsten doll was designed and found it’s way into her summer look. Historically I’ve found more examples of similar stripes in late 19th/early 20th than the 1850s (again, I think this is the influence of Carl Larsson), although that doesn’t mean they didn’t exist then too, I just couldn’t find concrete examples like I have in my previous editions of The Kirsten Project. Thus, this is a portion of my costume where I’ve opted to copy the doll without extant dresses or historical images to work from.

Cotton yarn dyed fabric such as this was sold in general stores across the country (I’ve found dozens of newspaper advertisements from this time period, like the one here from March of 1854 in Plymouth, Indiana) and likely made in the US. If it came from a Southern mill, it came from cotton that was grown, harvested and woven by enslaved labor. Many mills (in both the North and South), used child labor for their small size and tiny hands. If that sounds awful (it is!), please consider that textile and garment production in 2020 still happens elsewhere in the world under conditions most of us would never willingly endure. Just because it’s cheap doesn’t mean there’s not a human cost. If that feels icky to you, consider shopping second hand, sewing your own clothing, upcycling or repurposing what you already have or seeking out fair trade clothing made under ethical conditions.

Kirsten Saves the Day Full Costume
Two Piece 1850s sleeve - Kirsten Saves the Day
Floral+Motif+spacer.jpg

Bird Necklace and Boots

Wooden Bird Necklace

To round out my Kirsten Saves the Day costume, I’m wearing a wooden bird necklace and pair of red leather lace up boots. In Kirsten’s summer book she has a bird whistle, which is something I believe was designed for parity alongside the other original dolls (Samantha and Molly) who also have whistles in their summer stories. I have found bird whistles which weren’t necklaces or wooden whistles that weren’t in the shape of birds. I settled for shape of a bird that didn’t have a whistle function and found a small wooden bird via a cute etsy store. I drilled a small hole in the eye area and threaded some waxed cotton string through, tied in a simple knot a trimmed. My kids are already fighting on who gets to wear the necklace each day.

My boots (pictured above) were a secondhand find on eBay, but were originally a taupe color. I dyed them myself into a rich vivid red and the process was pretty easy (if you’re a neat and tidy kind of DIY person). You can see me wearing them with Kirsten’s birthday dress here.

Floral+Motif+spacer.jpg

That’s a wrap for my summer edition of The Kirsten Project - I hope you’ve enjoyed! You can see my previous costumes by clicking the links for Meet Kirsten, Kirsten’s Surprise, Happy Birthday Kirsten and Changes for Kirsten.

Kirsten Saves the Day Adult costume
Kirsten Saves the Day Costume

The Kirsten Project | Wide Brim Straw Hats

Wide Brim Straw Hat 19th Century.jpg

When I think of the 1850s and headwear, my first thoughts lean towards bonnets of all kinds - soft corded bonnets like I wore for my Meet Kirsten costume, or the straw or silk varieties seen in countless daguerrotypes or museums. Yet, when I looked hard enough I found plenty of examples of wide brim straw hats, like the one Kirsten receives at the end of Kirsten Saves the Day.

Above: Various Daguerrotypes, mid 19th century, Straw Hat with Black Ribbon, 1863, Les Arts Décoratifs, Sketch, Bloomer Costume July 1851, Sketch, Godey’s Lady’s Book, March 1853

I’ve taken a bit of a break from social media and blogging, but I hope I can conjure up the energy to put the finishing touches on this costume and to photograph it before the summer ends! I hope you’re all well and taking care of yourselves and each other.